|
Oleg Perelet
Join Date: Jul 2010
Location: Escondido, CA
Posts: 173
|
Last edited by perelet; 06-07-2015 at 07:23 PM.. |
||
 06-07-2015, 05:30 PM
|

|
Oleg Perelet
Join Date: Jul 2010
Location: Escondido, CA
Posts: 173
|
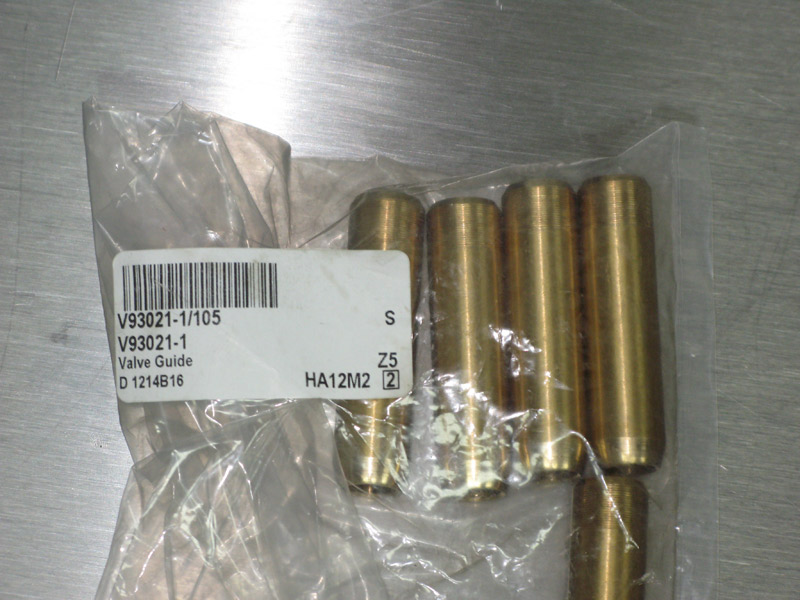
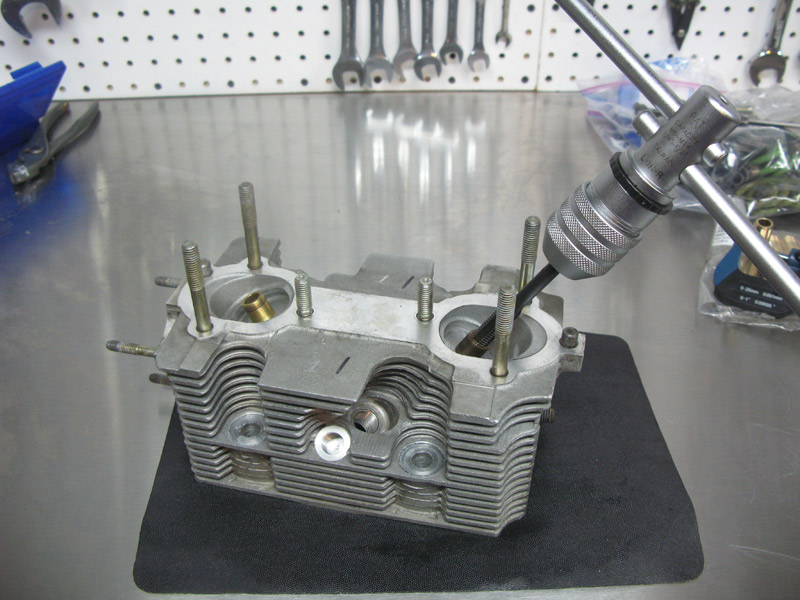
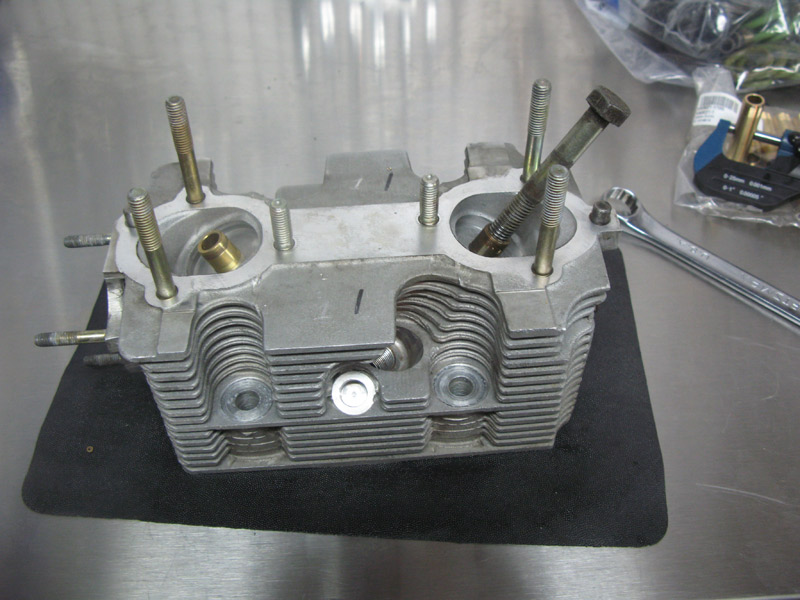
Head dis assembly continuedPressing new guides in (heat head in oven, cool guide in fridge): 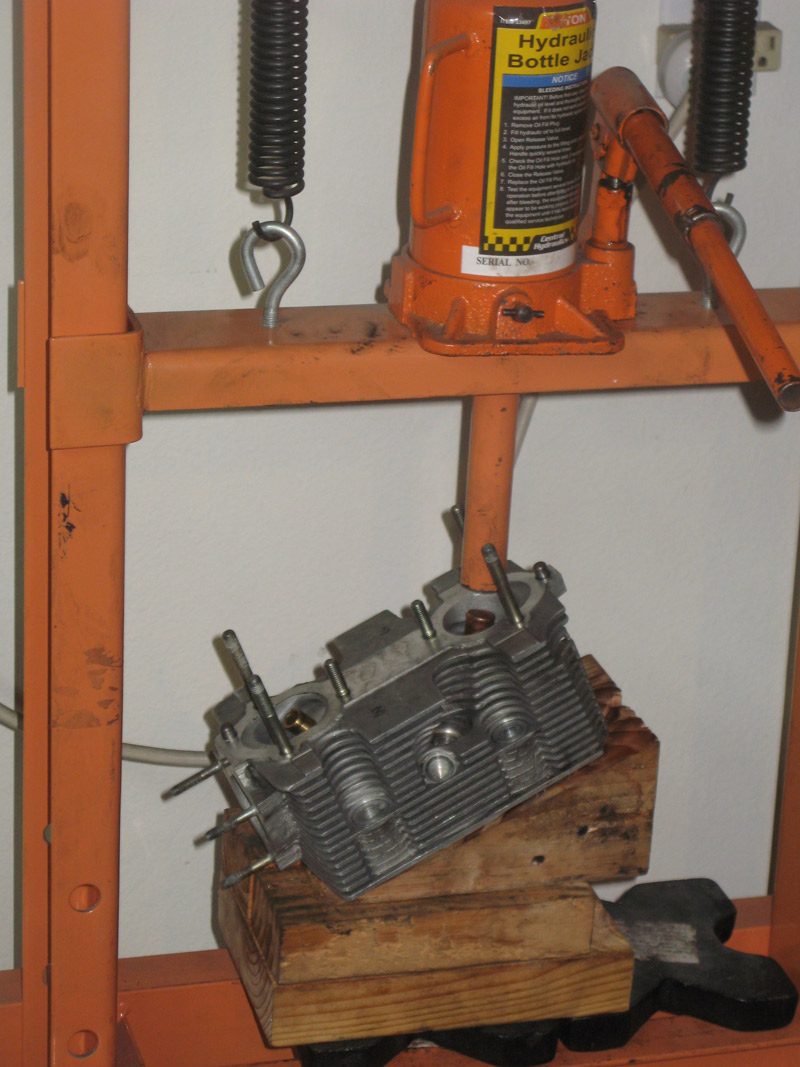 Honing valve guides: 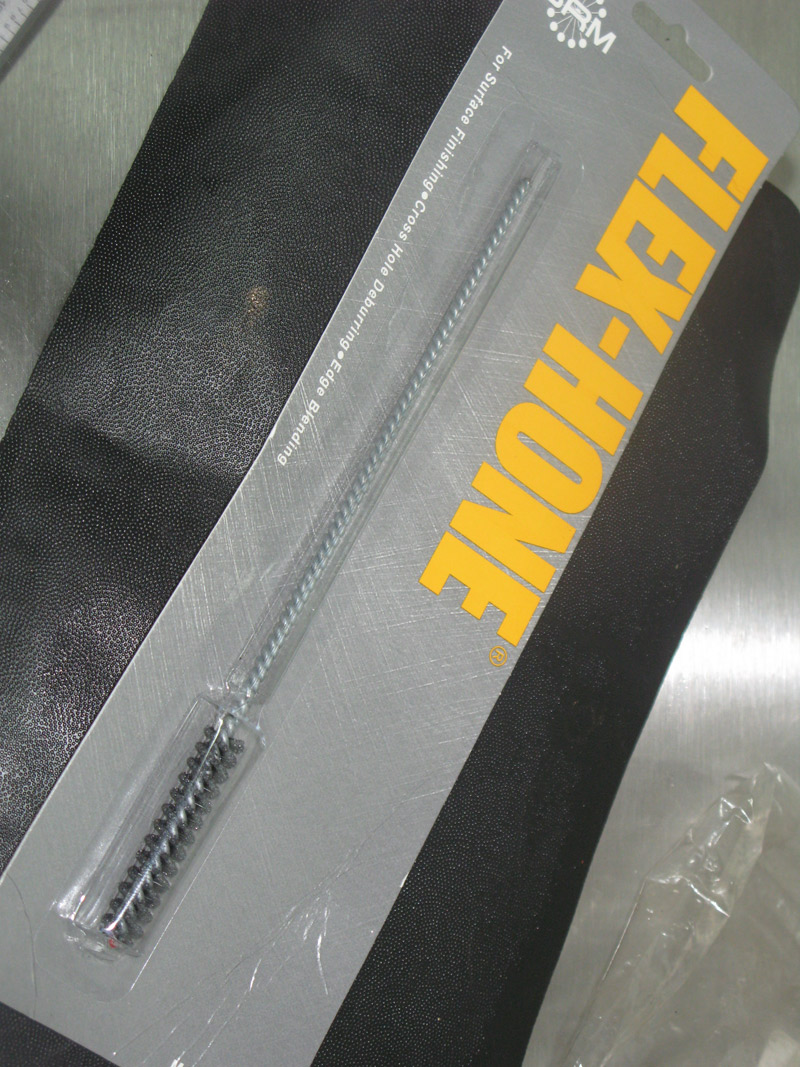 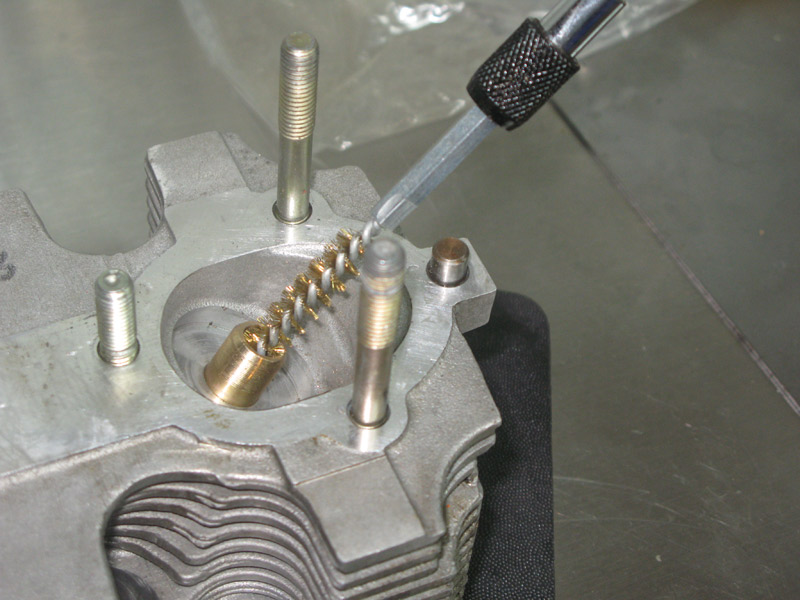 Lapping valves: 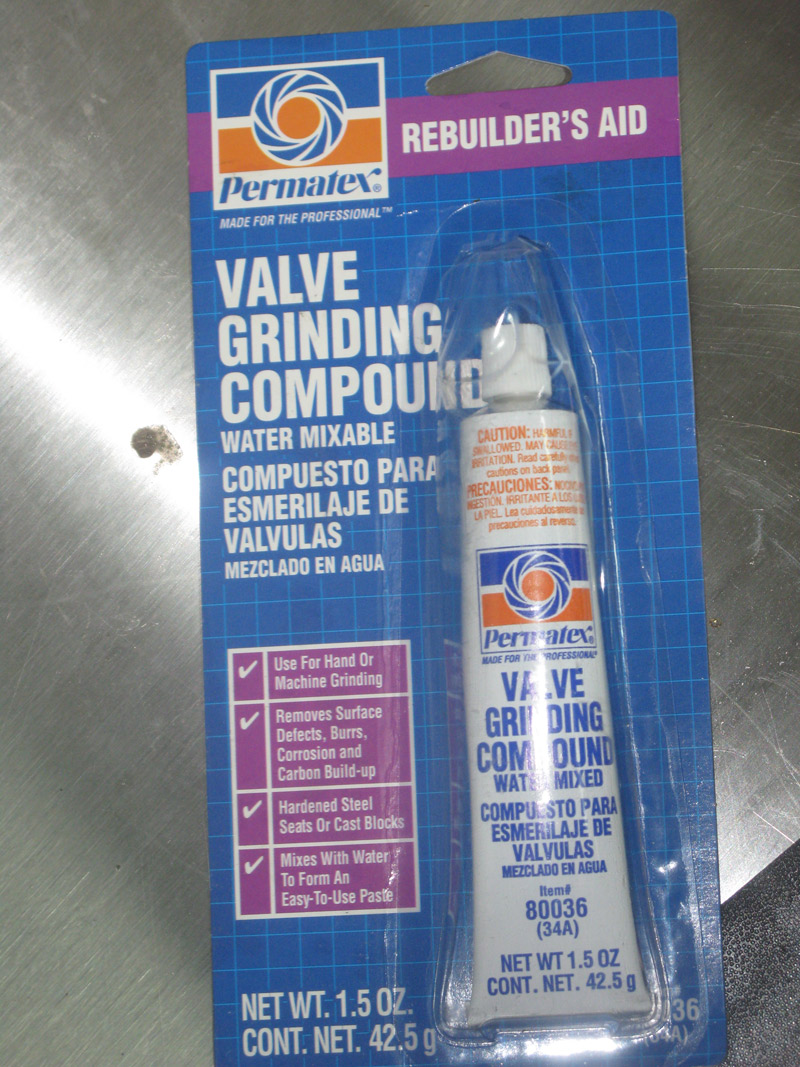 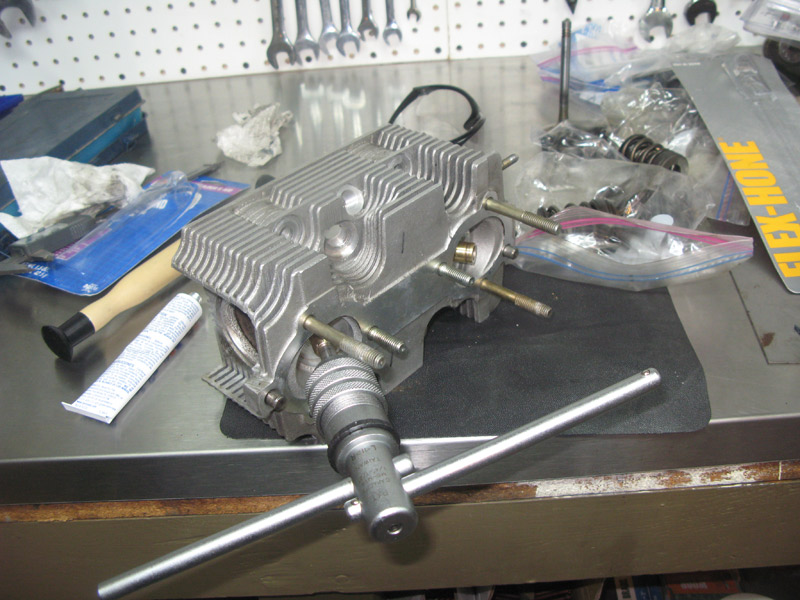 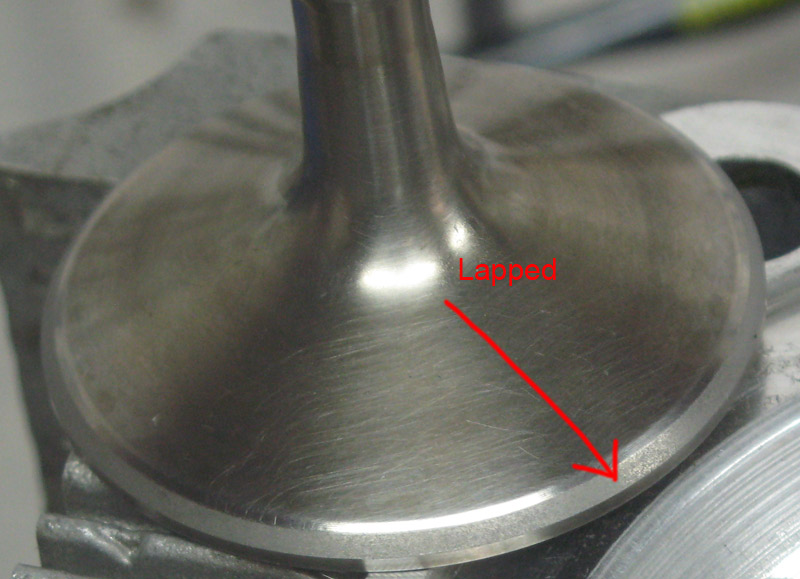 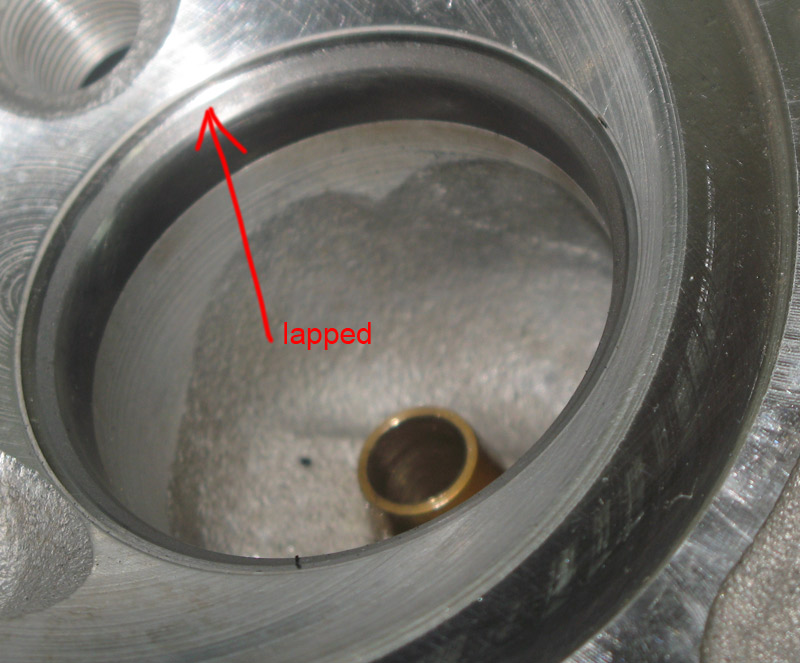 Removing exhaust studs: 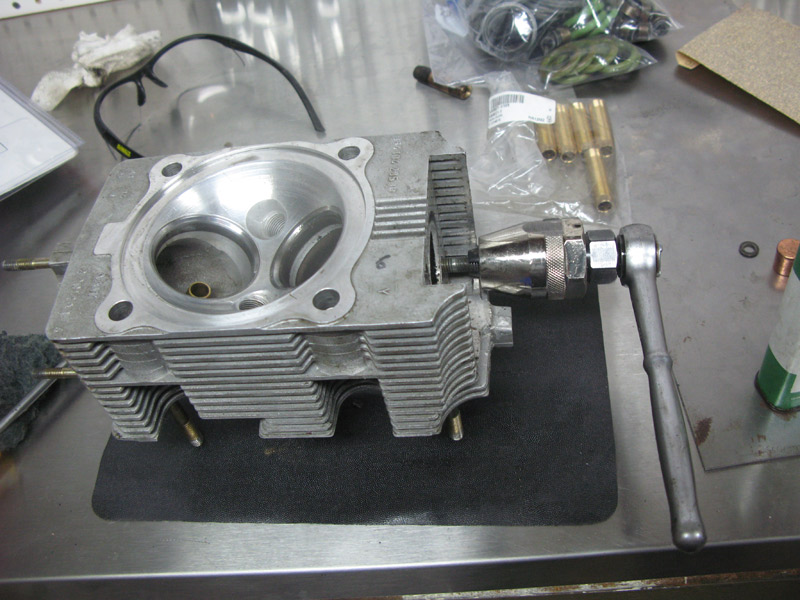 Use socket to put new valve seals: 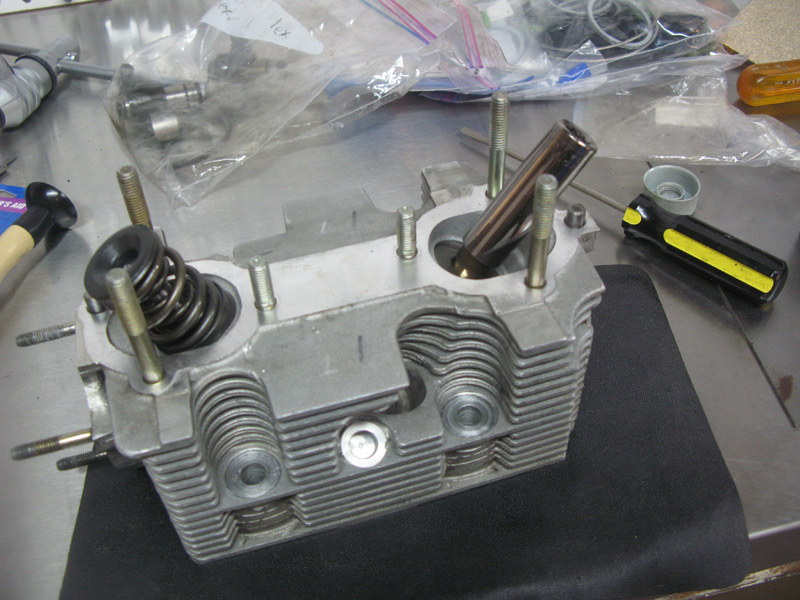 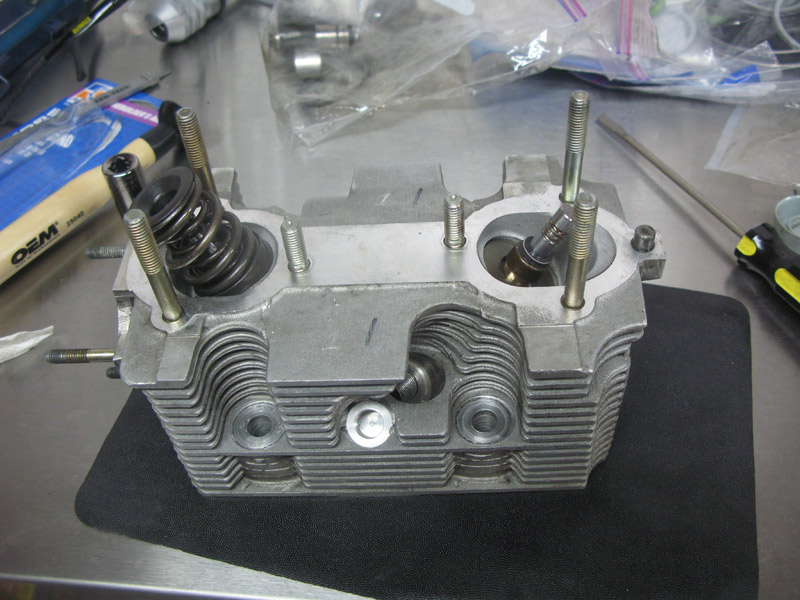 rest is pretty much assembly and spacing springs by adding/removing washers. I also soda blasted all parts and pressure cleaned them. I contracted CNC head surfacing to machine shop - $120. That was only piece of work I contracted. Last edited by perelet; 06-07-2015 at 06:27 PM.. |
|
06-07-2015, 06:20 PM
|
|
Oleg Perelet
Join Date: Jul 2010
Location: Escondido, CA
Posts: 173
|
Pistons & cylinders Lifting cylinders: 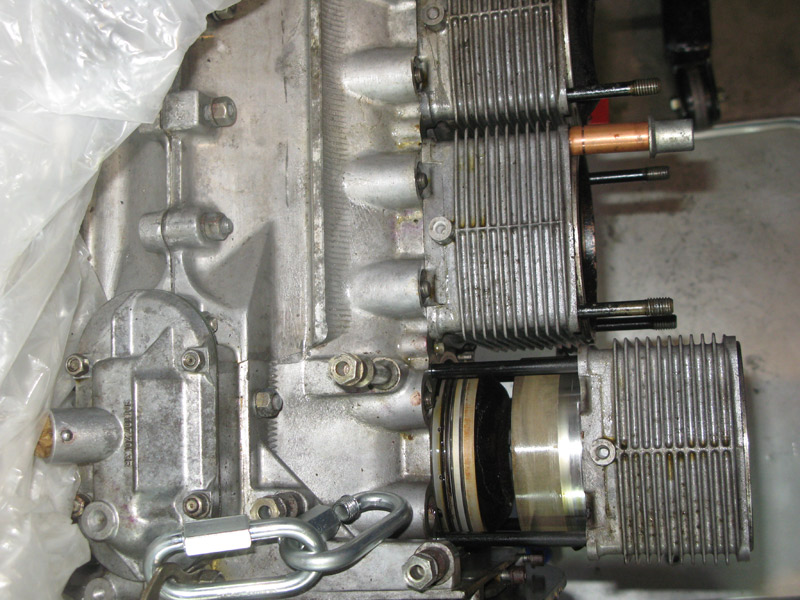 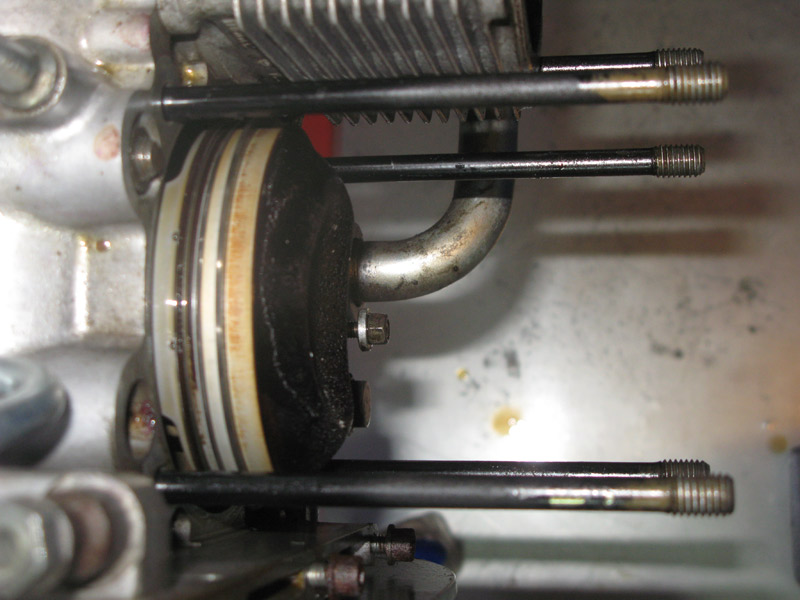 One had broken ring:  Removing pin clips is pain on all engines: 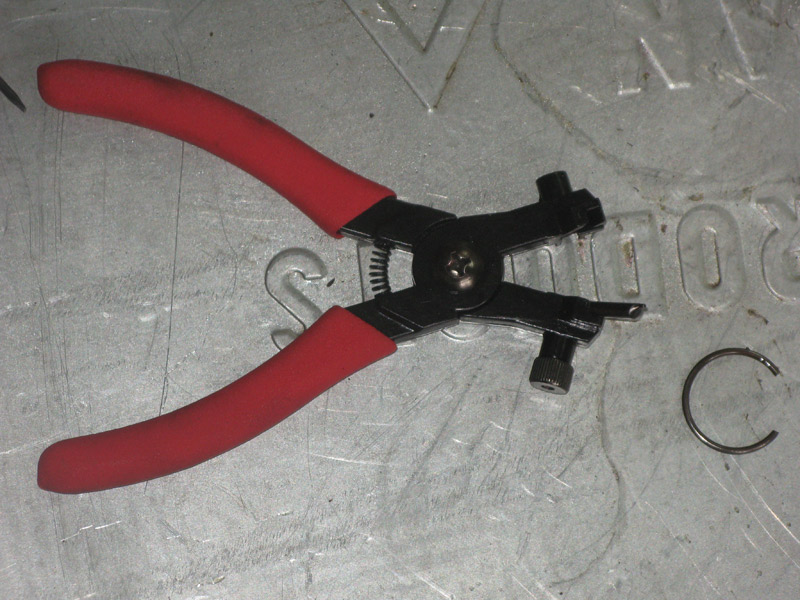 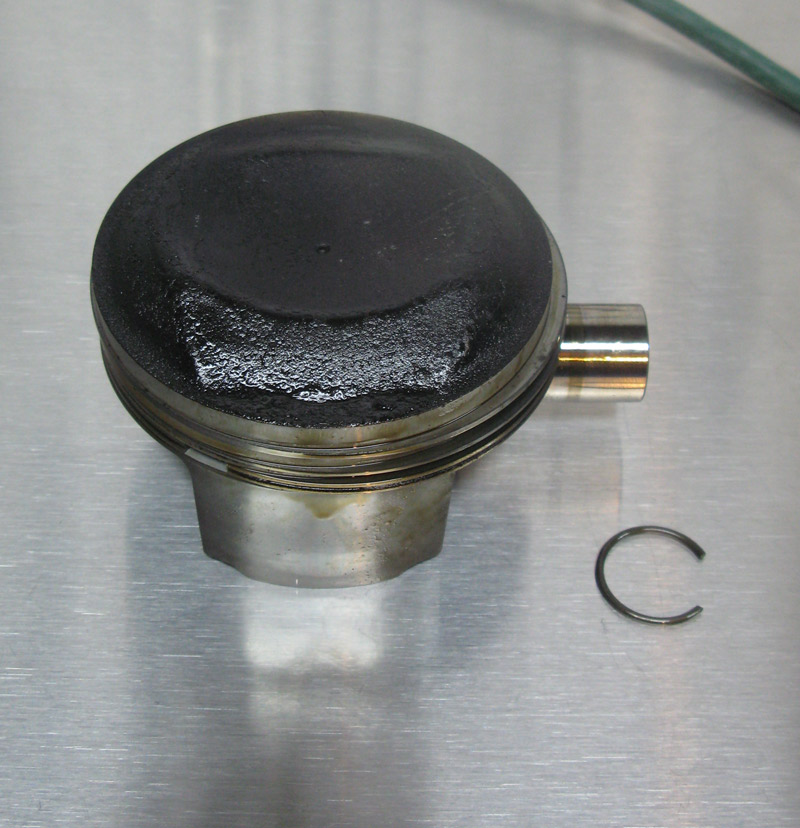 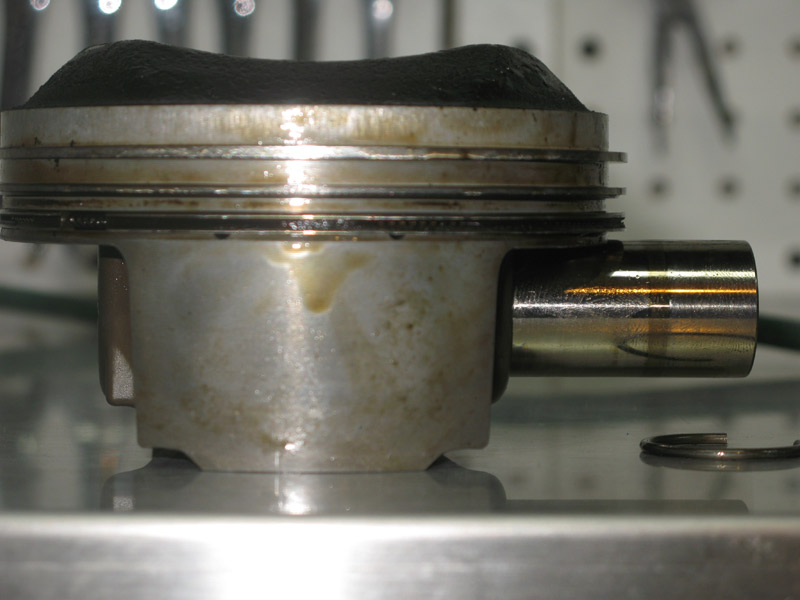 Piston apart: 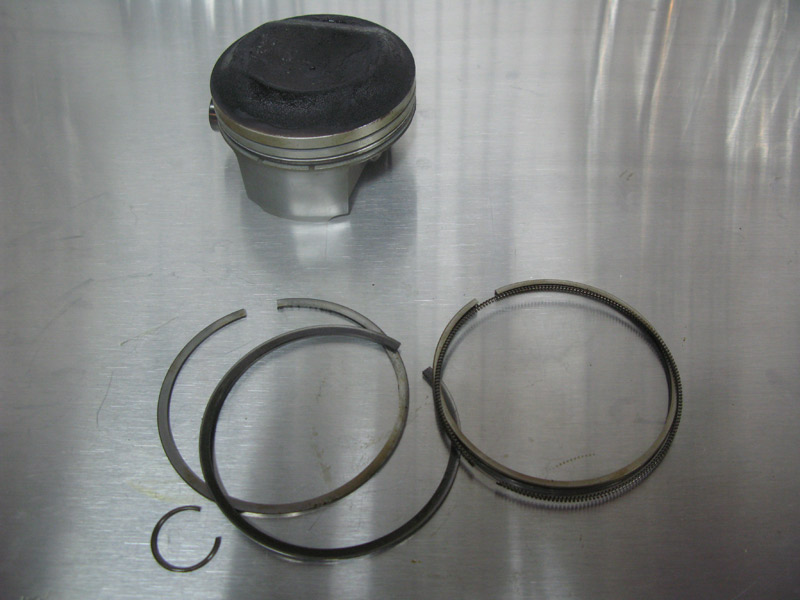 Soda blasted: 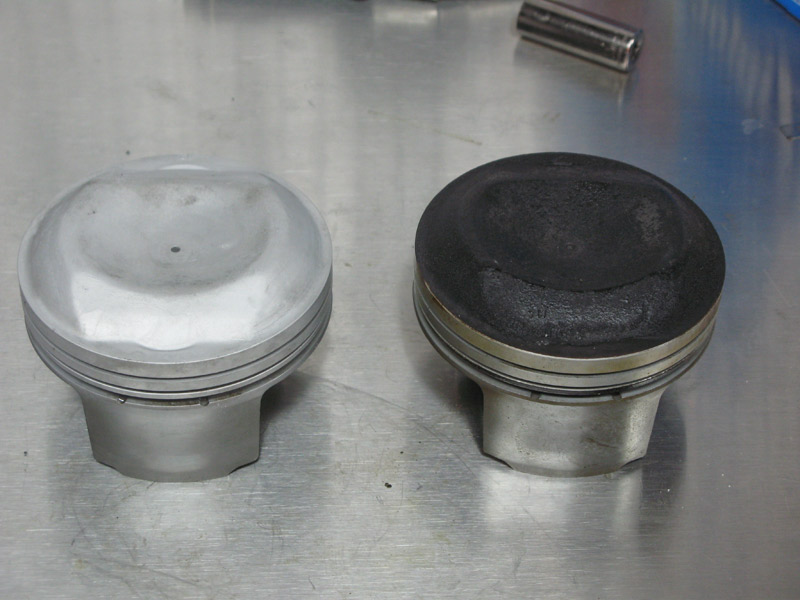 All cleaned up and dry: 
|
|
06-07-2015, 06:41 PM
|
|
Oleg Perelet
Join Date: Jul 2010
Location: Escondido, CA
Posts: 173
|
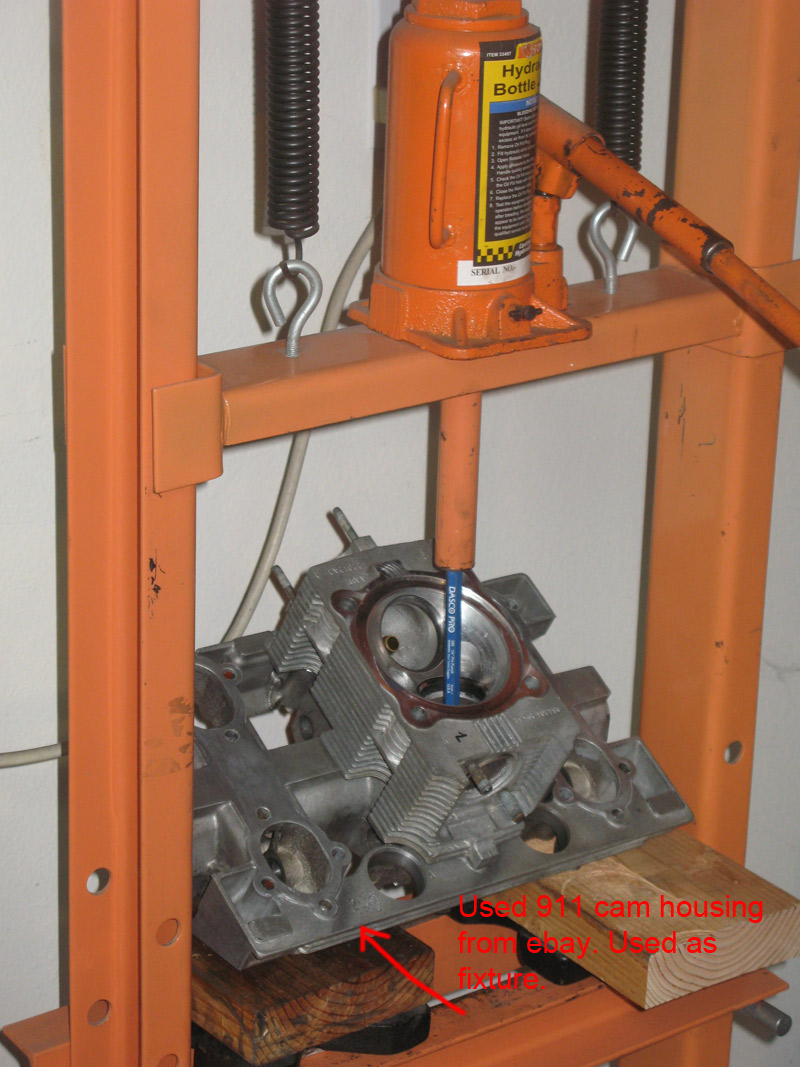
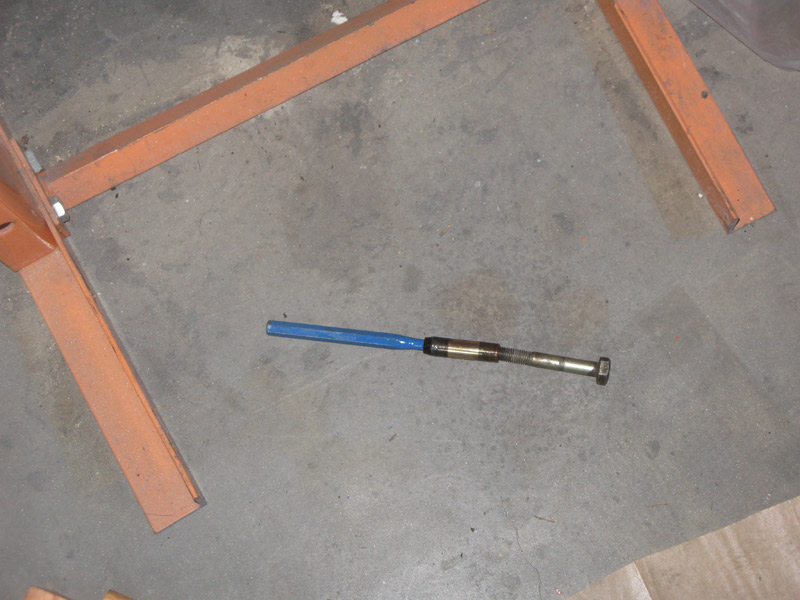
Removing dilivars Dilivars are sitting hard and won't go out without pain. You got to have right tool here - impact extractor. There are 2 kinds - nondestructive collar extractor, it costs about $150. Other kind is what I used - it will destroy threads on studs. Not that I care! I'm not going to use them anymore: 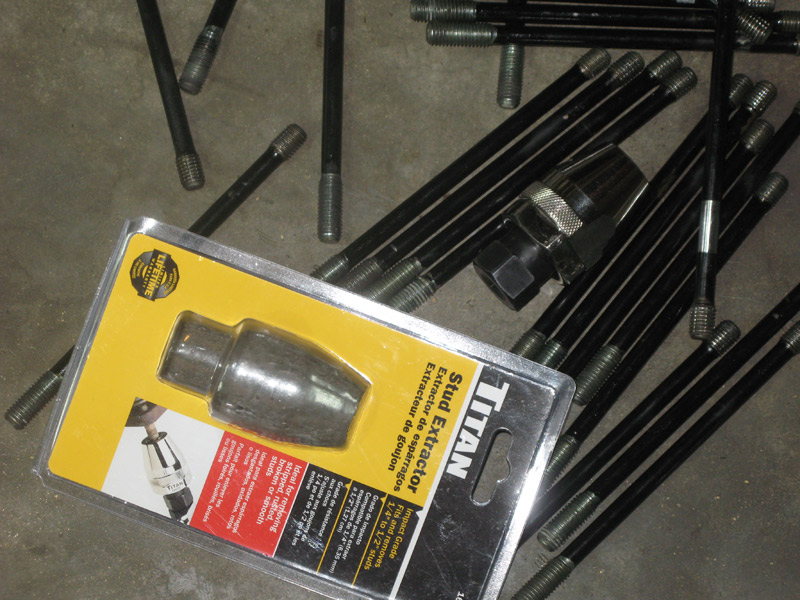 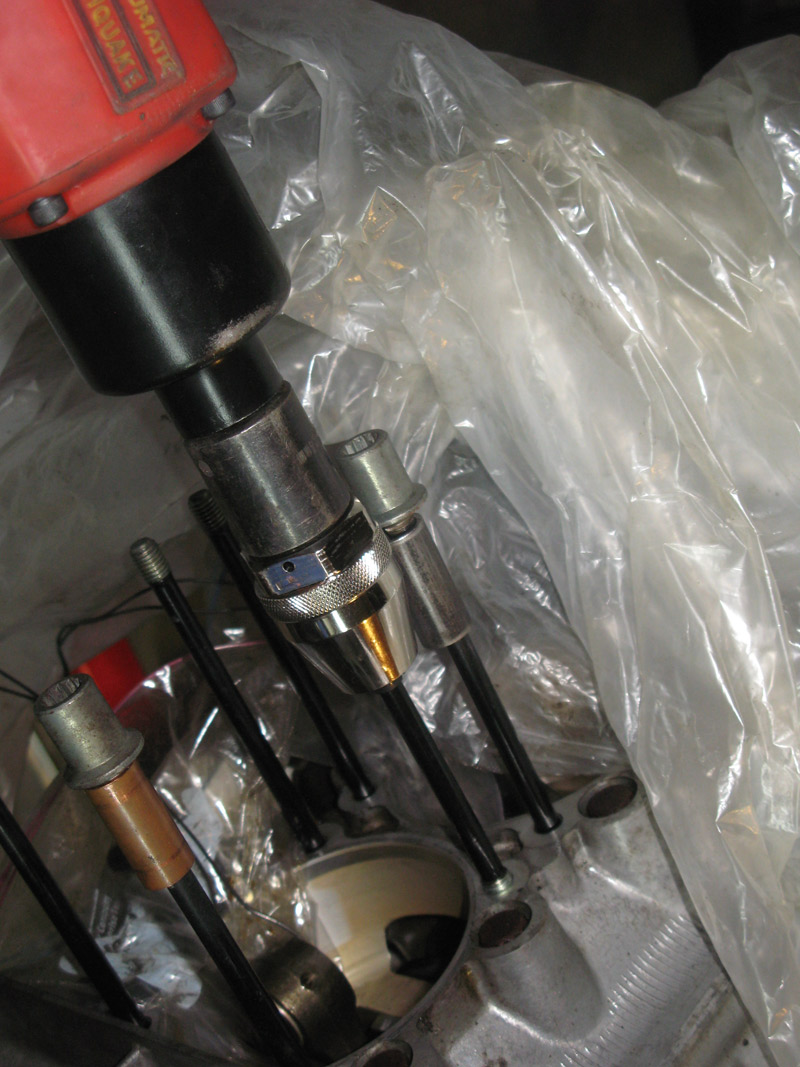 What's left: 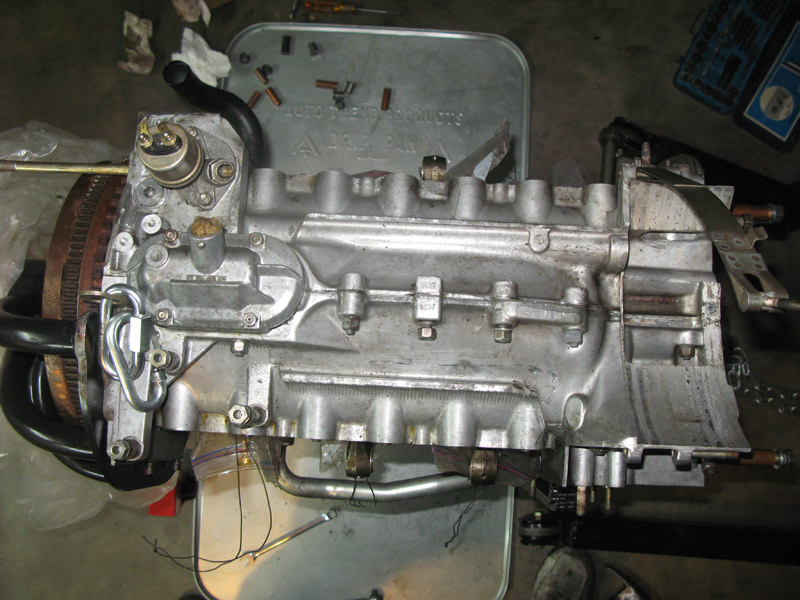 There's a lot of snake oil spilled about studs. You can find threads and wars about that subject. I went with 993 parts: 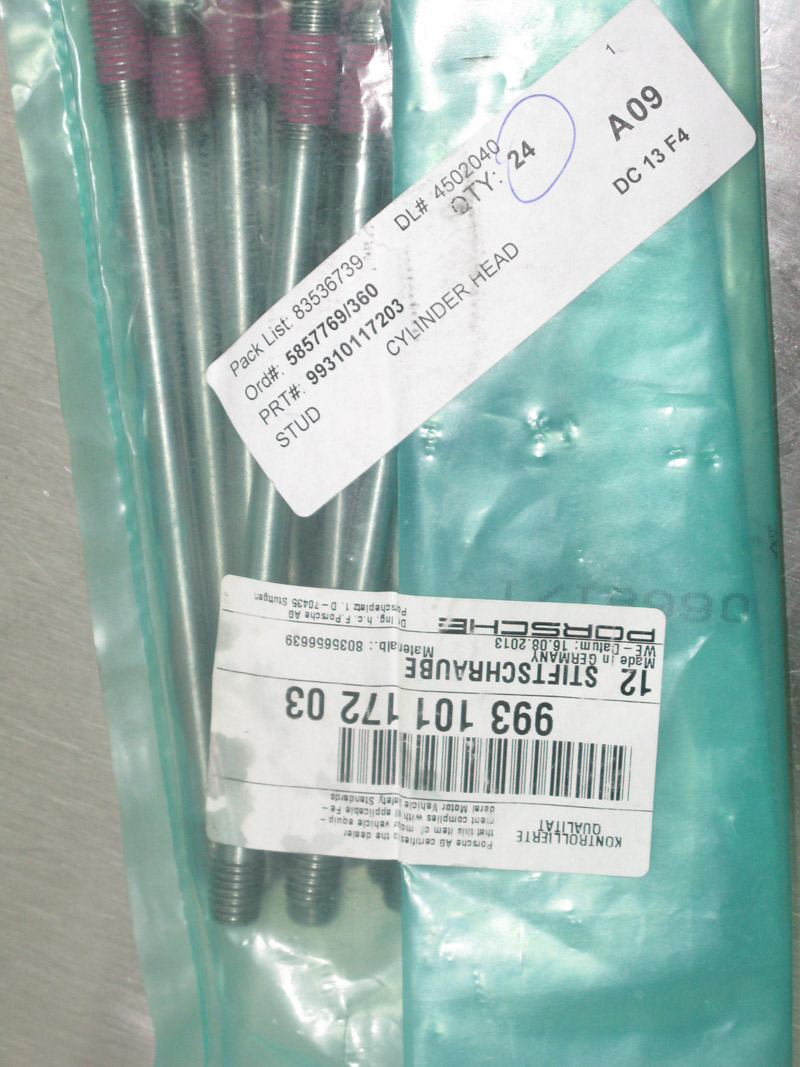 I made sizing guide from cooper plumbing pipe and cap: 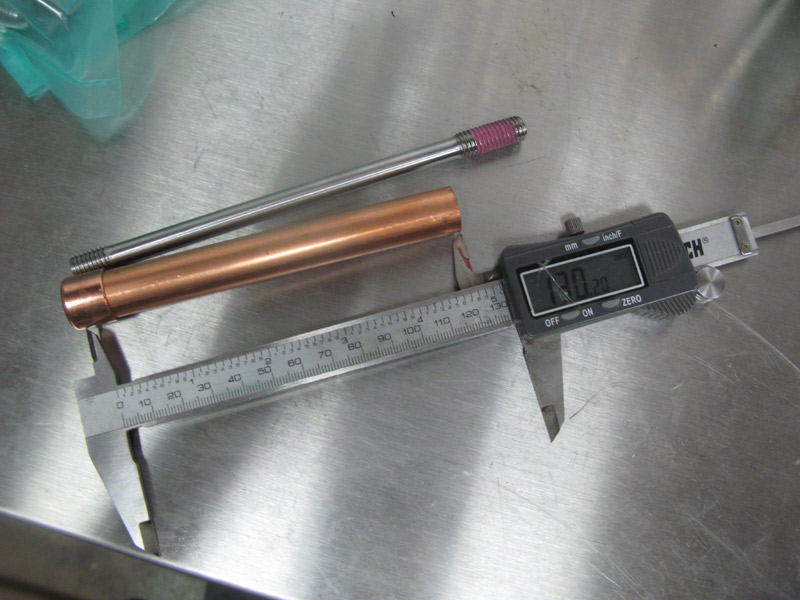 (I have a lot of plumbing spares - had to redo bathrooms in our house). |
|
06-07-2015, 07:03 PM
|
|
Oleg Perelet
Join Date: Jul 2010
Location: Escondido, CA
Posts: 173
|
Through bolts You have to strip engine completely to replace through bolts seals. Good time  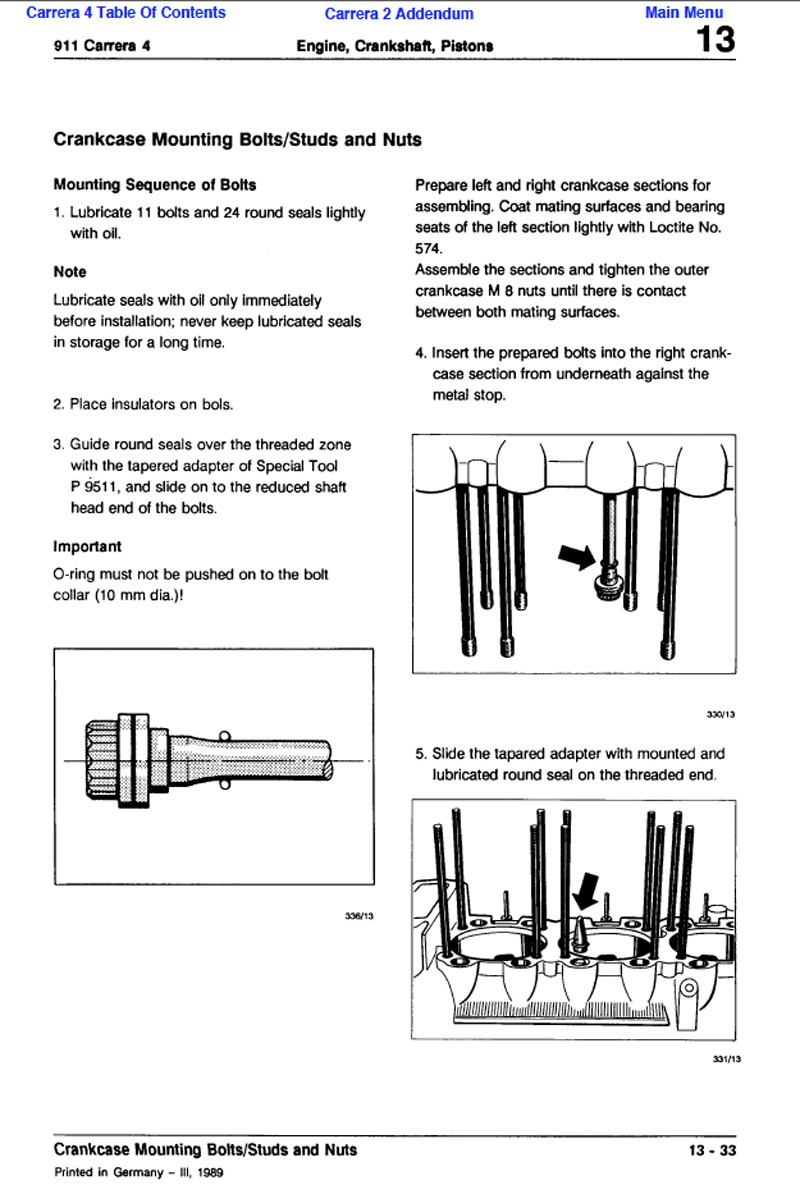 that's how it looks: 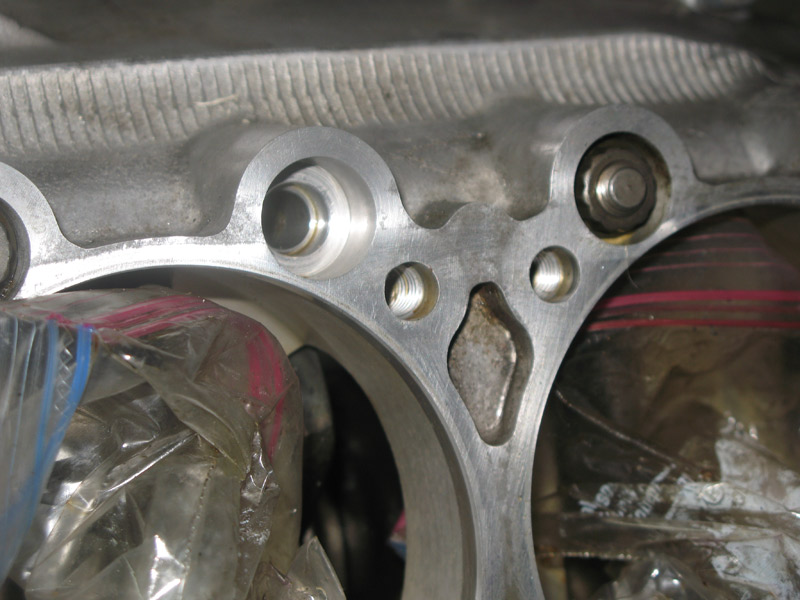 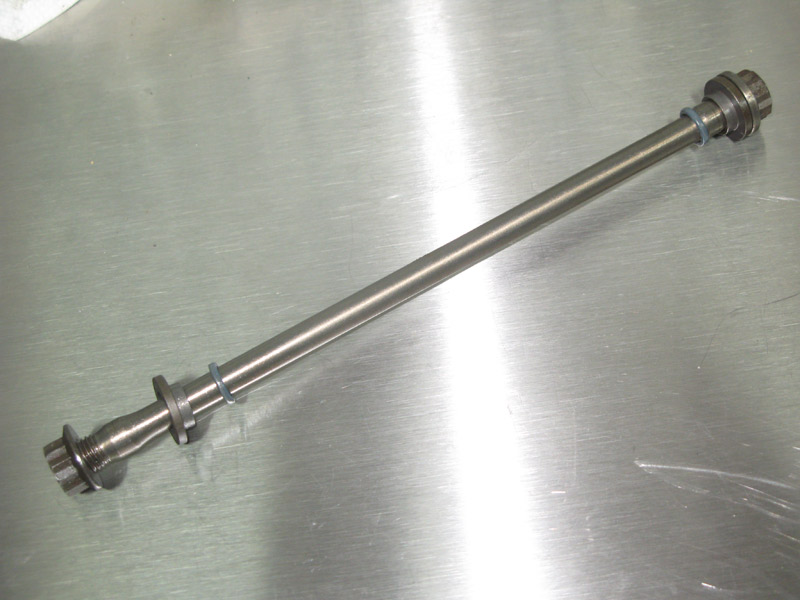 Use pen cup to get new seals on: 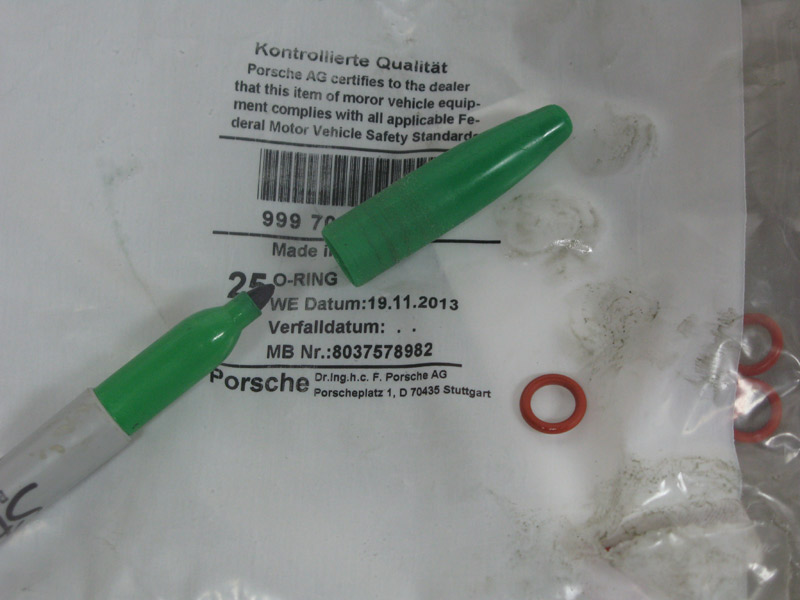
Last edited by perelet; 06-08-2015 at 07:07 PM.. |
|
06-07-2015, 07:09 PM
|
|
Oleg Perelet
Join Date: Jul 2010
Location: Escondido, CA
Posts: 173
|
more to come, taking break now...
|
|
|
06-07-2015, 07:13 PM
|
|
|
Ari
Join Date: Jul 2010
Location: ND
Posts: 683
|
Very inspiring. Not many people would do as much of the rebuild work at home. I think my 964 rebuild budget (before I sold the car, knowing a rebuild was not necessary but tempting to do) came to 1/3 tools, 1/3 parts, and 1/3 outsourced machine shop work. You probably had all the tools already, from the looks of it, so you probably did this for 1/3 what the rest of us would anticipate spending.
|
|
|
06-08-2015, 07:06 AM
|
|
|
Open to suggestions
Join Date: Aug 2008
Location: slc, utah
Posts: 1,296
|
HOLY SMOKES. Yes, it's been discussed many times but this has already answered some of the nagging questions I have never seen addressed. Very helpful!
__________________
PCA member since 1993 1972 911 1991 964 C2 1977 s |
|
|
06-08-2015, 11:37 AM
|
|
|
Oleg Perelet
Join Date: Jul 2010
Location: Escondido, CA
Posts: 173
|
I did brought heads to machine shop that deals with 911's to take 0.02mm to surface. That needs to be done.
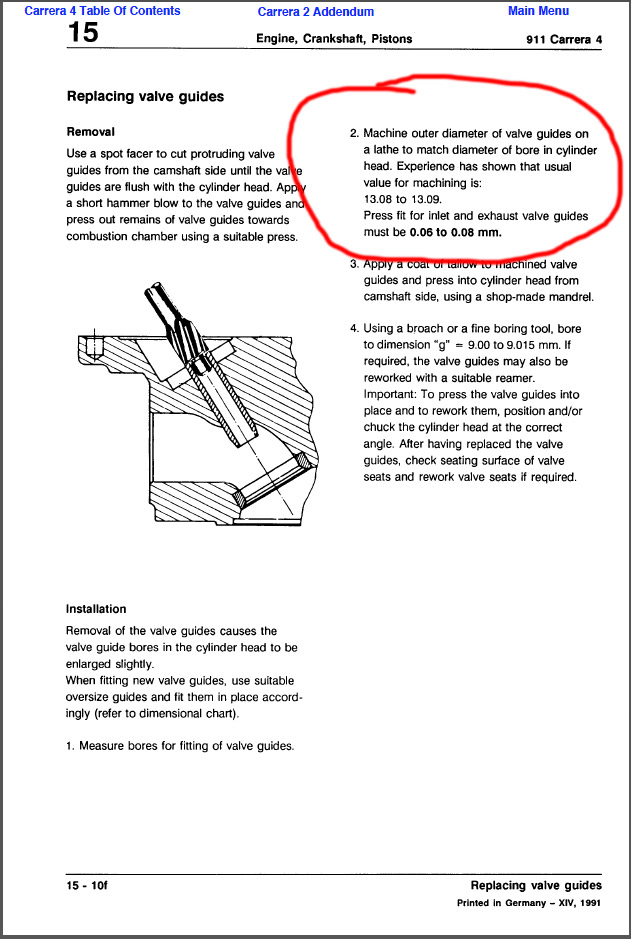
My #3 and #6 cyl started to show leak. Not a lot, but leaked: 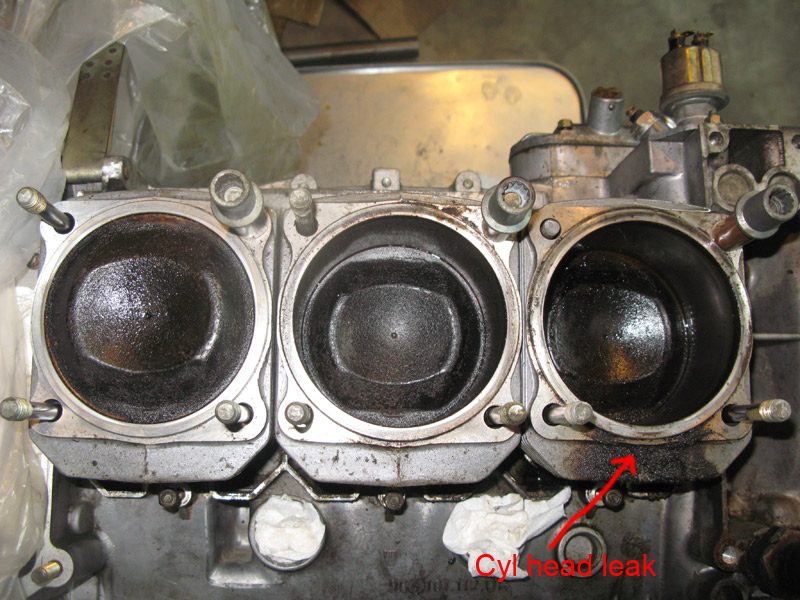 There's urban myth that if they haven't leaked for 20 years they won't start leaking now. Well, mines started. Any other pic of #3 & #6 from other 964 rebuild threads also show same symptoms. Here's factory spec on surfacing: 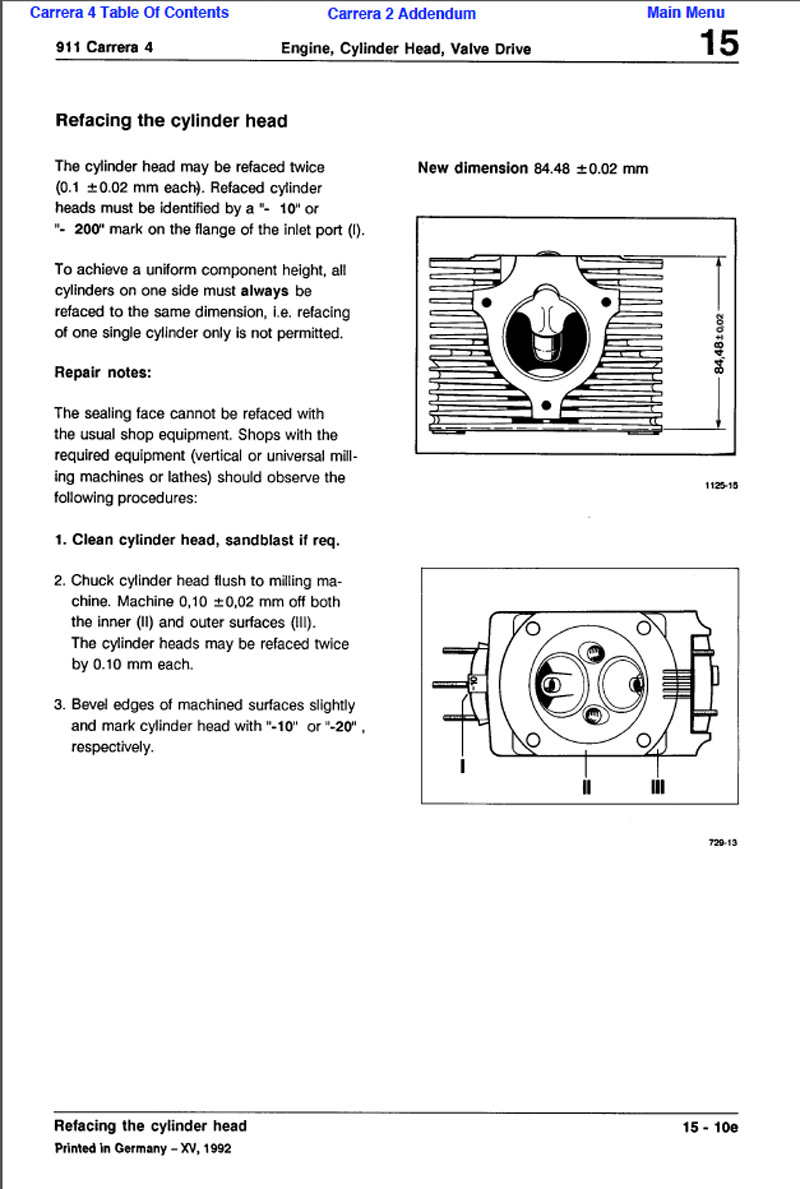 Now and then I hear about shop installing 993 rings in to 964 heads. IMHO that's not good idea: 1. Rings will barely fit. There's no space on outer side, ring will be jammed in cyl head - pics below. 2. That's very costly procedure. Your heads will not be reusable with new style 964 cylinders/pistons. New style cylinders have groove for sealing ring. So next time you'll need to update your cyls&pistons - add 6x per replacement head ") here are pics of 993 sealing ring and 964 head: 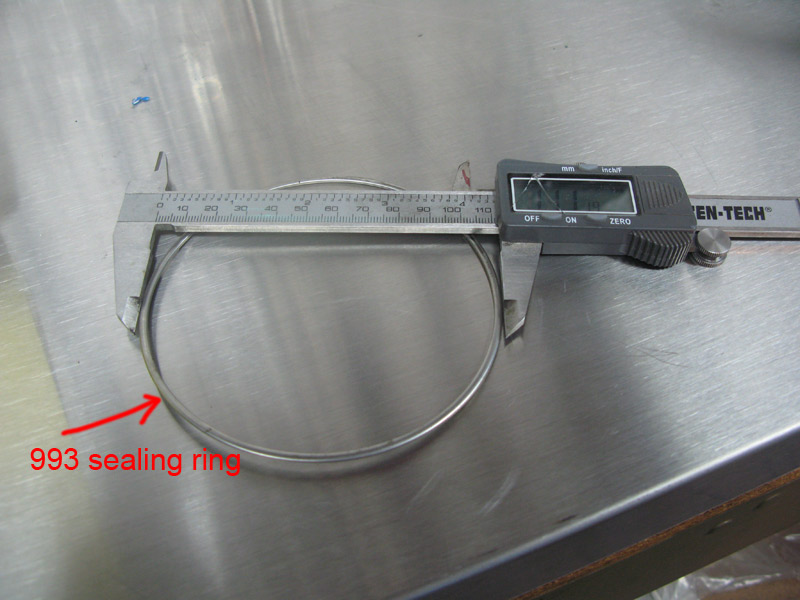 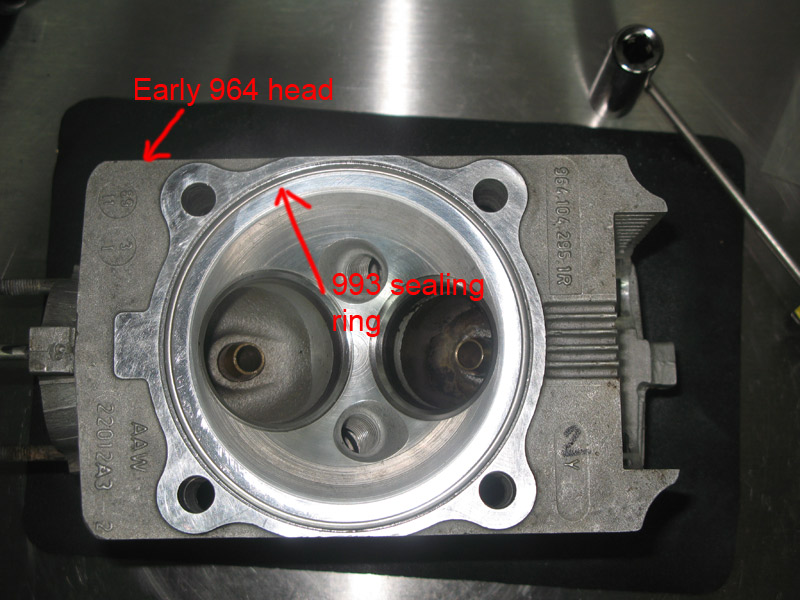
|
|
06-08-2015, 06:34 PM
|
|
Oleg Perelet
Join Date: Jul 2010
Location: Escondido, CA
Posts: 173
|
Fitting rings/pistons Factory rings came in nicely labeled packaging: 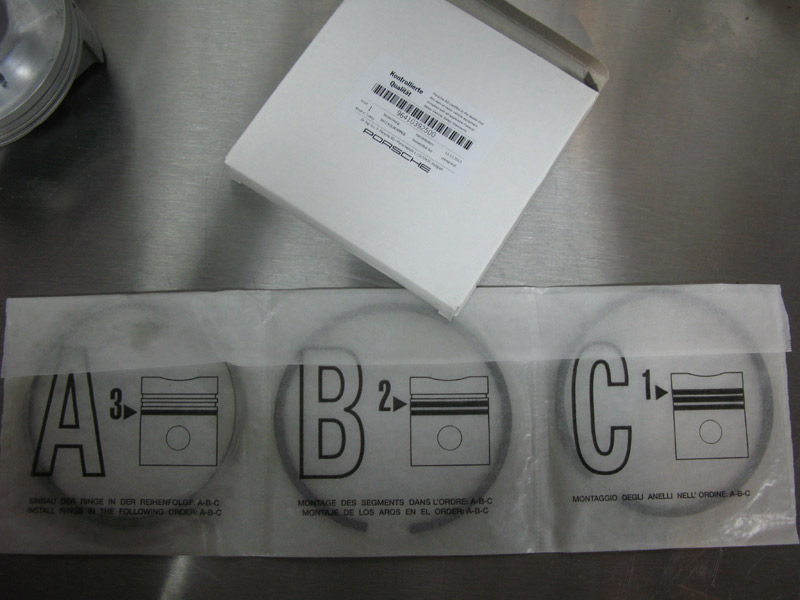 Rings easily fit by hand, less chance of breaking and scratching piston: 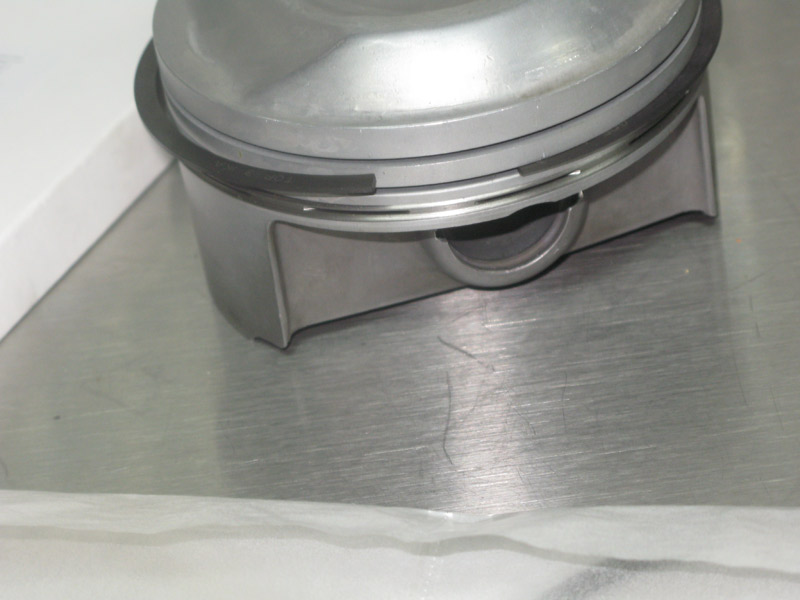 Gaps at 9, 12 and 3oclock. Bottom part of the rings should have full seal - no gap at 6oclock. Factory manual has notes on that. Pistons/rings can be fitted by hand, if you're doing this on table. On engine ring compressor may be more convenient: 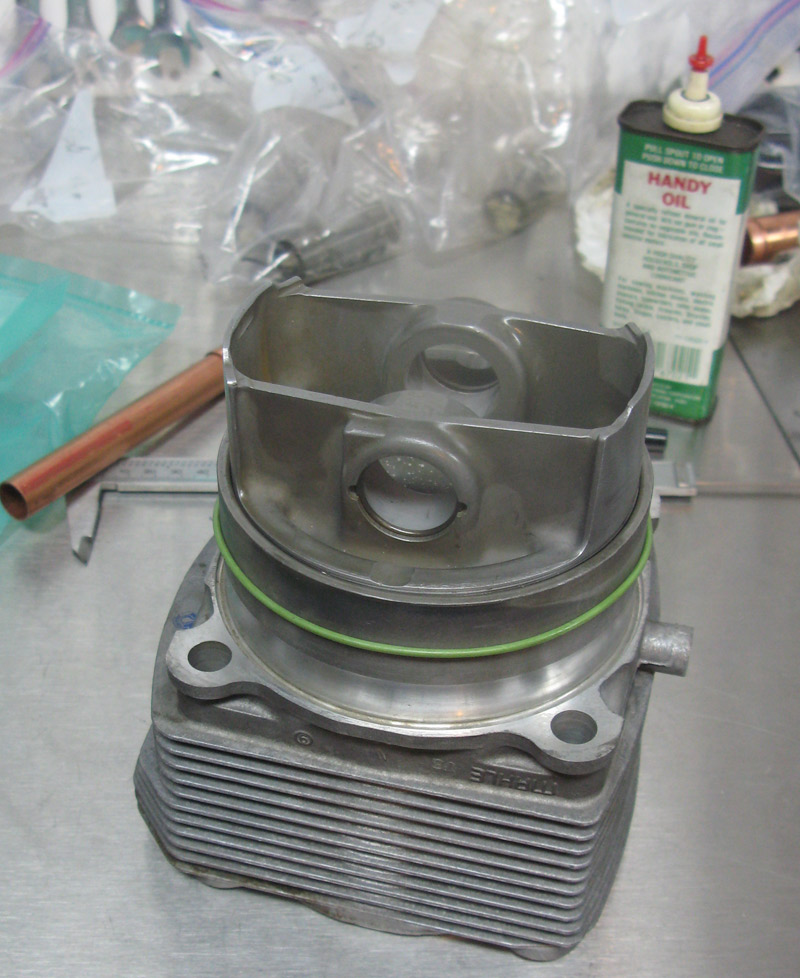 964 Wrist pin holes match perfectly with US sized plumbing pipes, here's my tool:    Push it with matching socket. You'll feel/hear click when clip settles  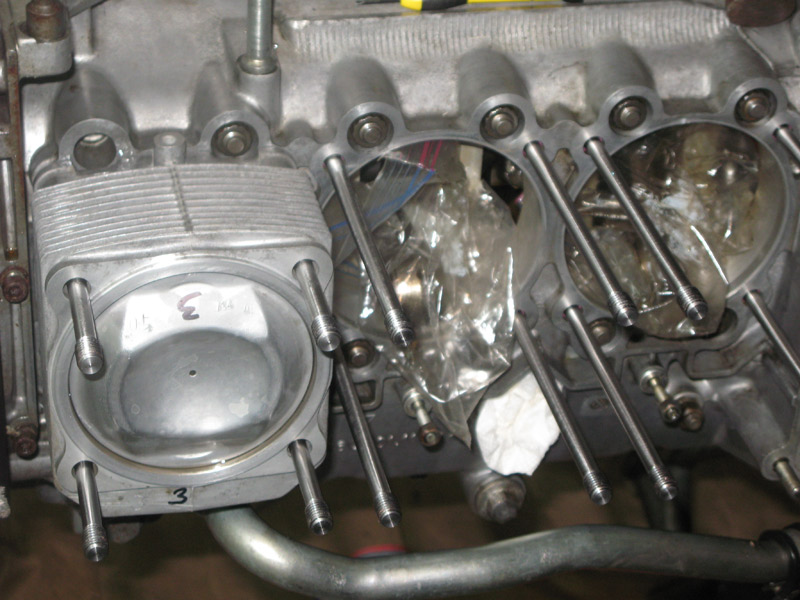 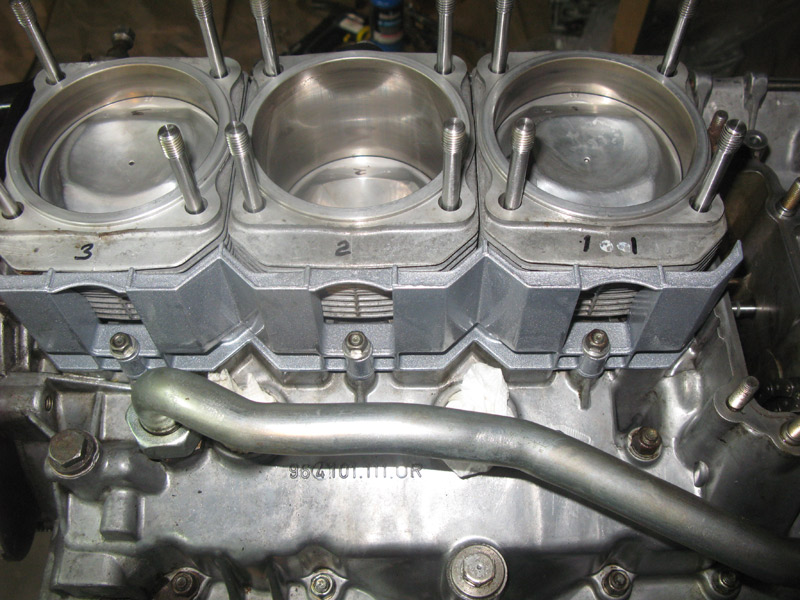
|
|
06-08-2015, 07:25 PM
|
|
Registered User
Join Date: Jan 2009
Location: DC
Posts: 936
|
Great work.... thx for all the pics
__________________
1986 944 turbo -first car 1997 993 Cab 6 speed-sold 1992 964 C2 turbo SOLD, 911GT ,CIS, 428 fwhp 450 trq, Carrillo rods, 964 cams, TT retainers,7.5 comp 1.1 bar boost 320 ml black fuel head 009 injectors, 044 pumps, 60-1 T4/T3 dual scroll turbo |
|
06-08-2015, 07:38 PM
|
 Blackbird
|
Oleg Perelet
Join Date: Jul 2010
Location: Escondido, CA
Posts: 173
|
rest of assembly Pretty much as described in factory manualputting heads on: 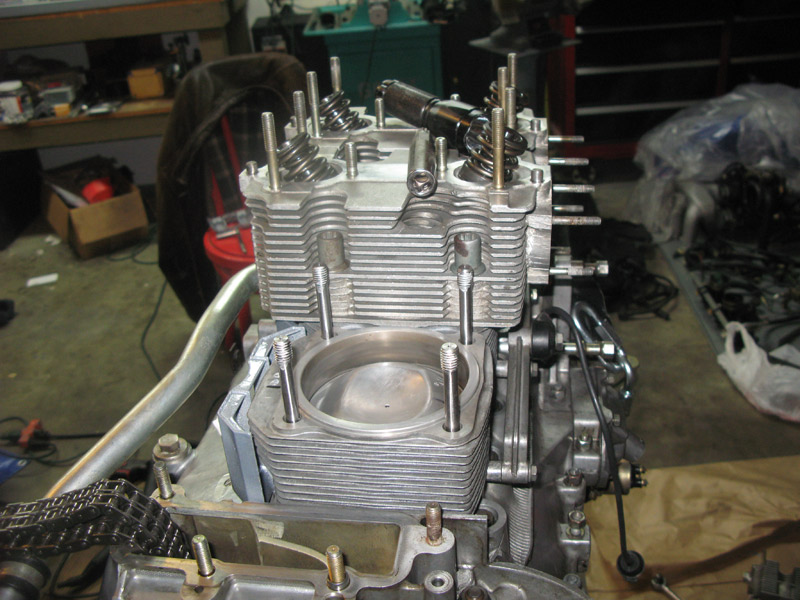 here's what digital torque reads after final 90deg final tightening of head studs: 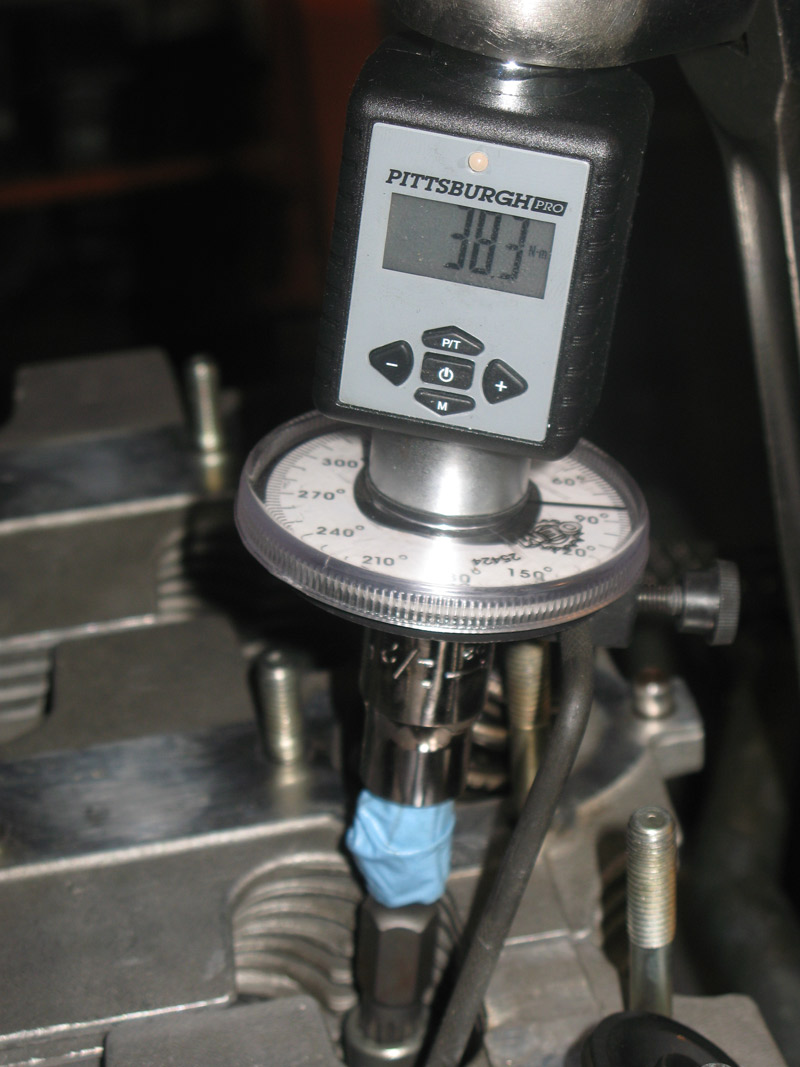 factory recommended Loctite: 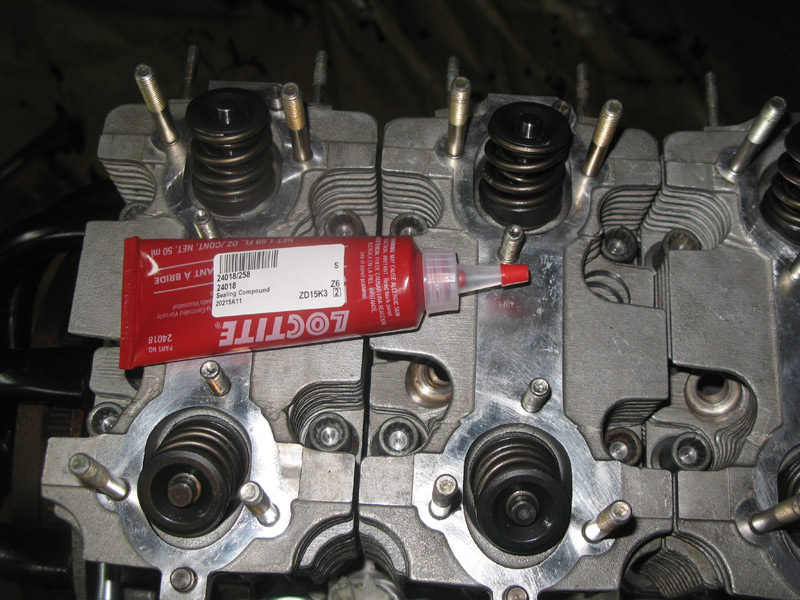 Cam housing covered with sealer: 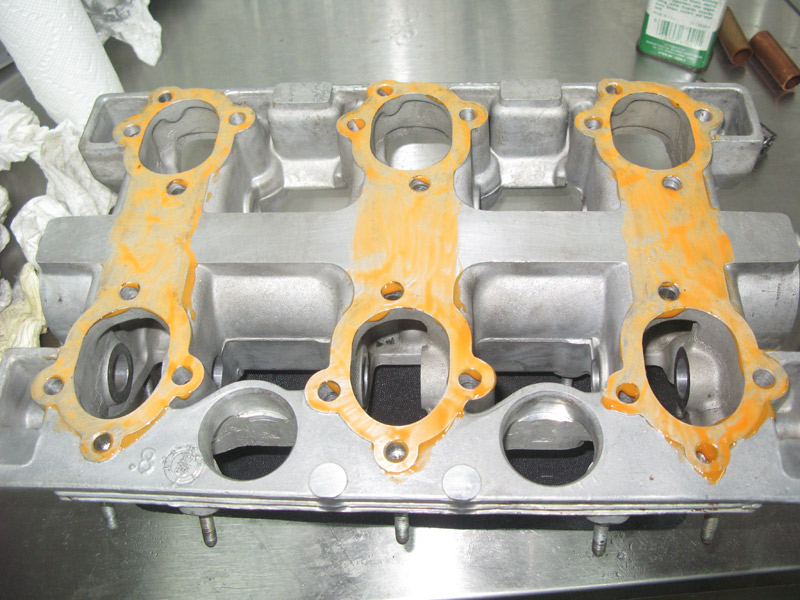 return tubes: factory recommended stuff: 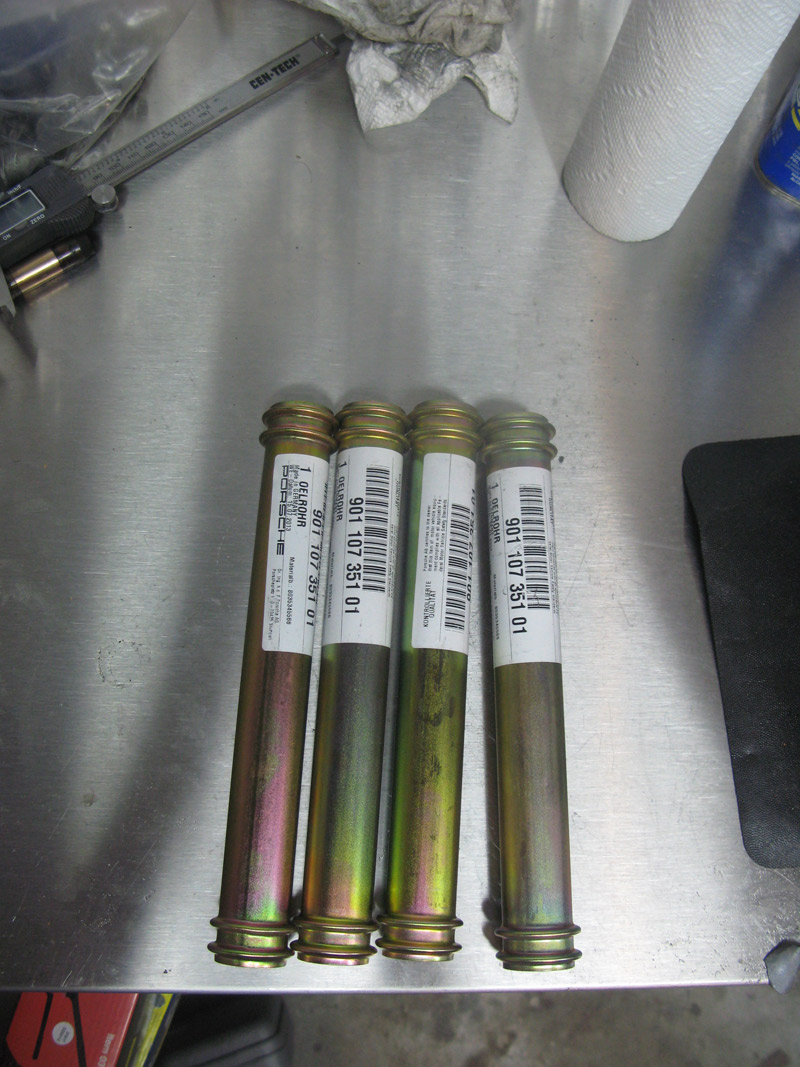  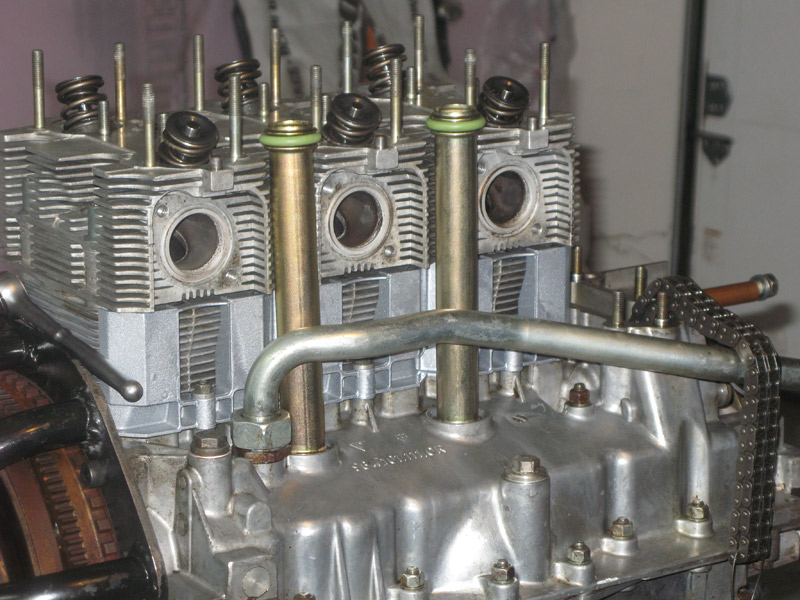 all there: 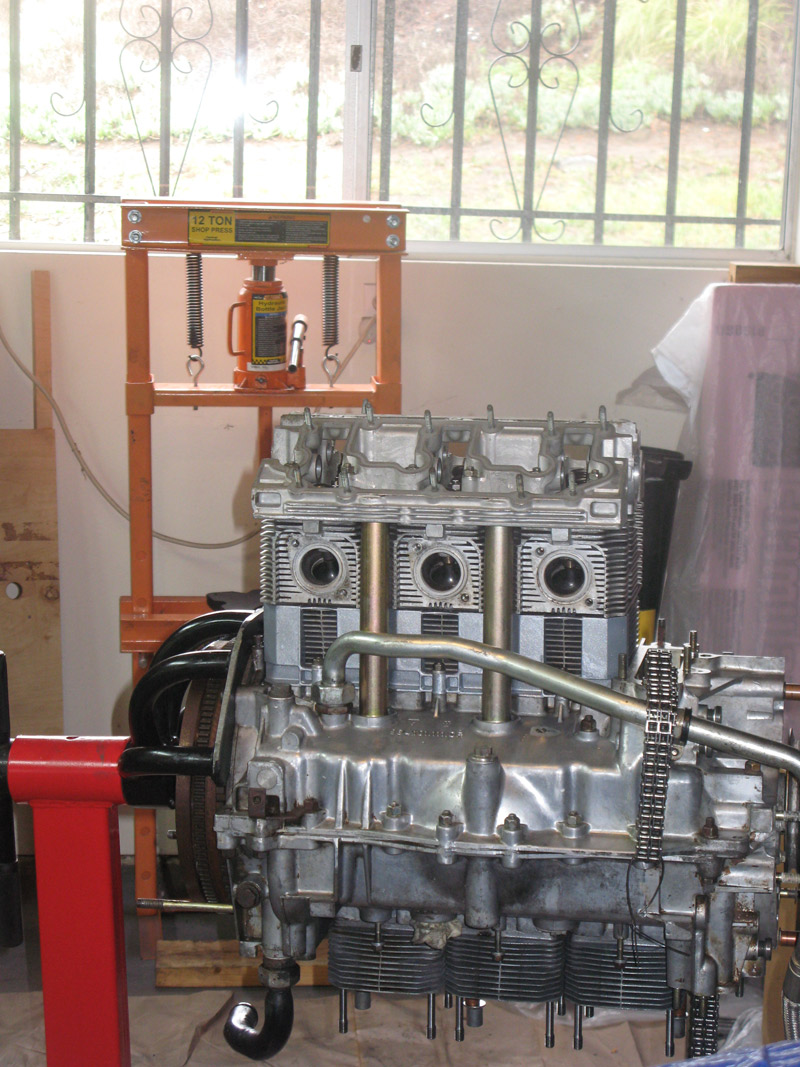 new exhaust studs: 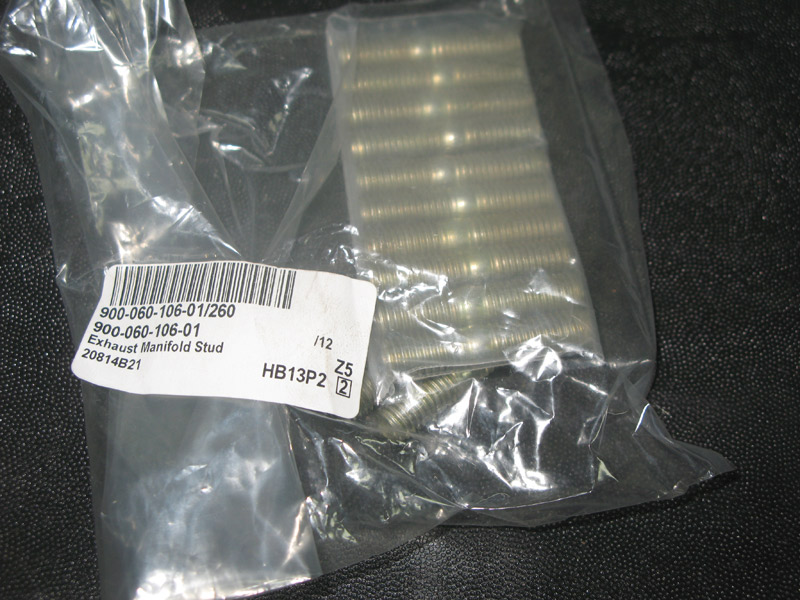
|
|
06-08-2015, 07:44 PM
|
|
Oleg Perelet
Join Date: Jul 2010
Location: Escondido, CA
Posts: 173
|
Cam trouble Here's how my 4-6 cam looked like when I removed it: 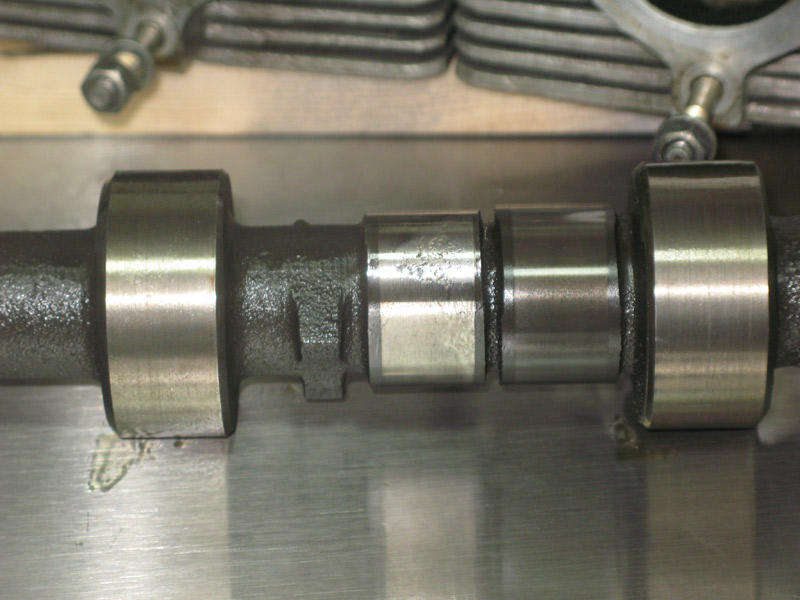 My understanding is that around year 2000 somebody realized that zink in oil destroys catalytic convertors. So they mandated to oil companies to remove zink from oils. Well after that date oils started to destroy cams on engines with rocker followers  I think outcome - use oil additive. There's local Schrick cam place that had pair of 964 cams. Not anymore  my valet also got very lightweight after that. |
|
06-08-2015, 08:06 PM
|
|
Oleg Perelet
Join Date: Jul 2010
Location: Escondido, CA
Posts: 173
|
Leak down test About only test that you can while engine is on the stand - leak down. Next is to fill it up with oil and let sit for couple of nights. 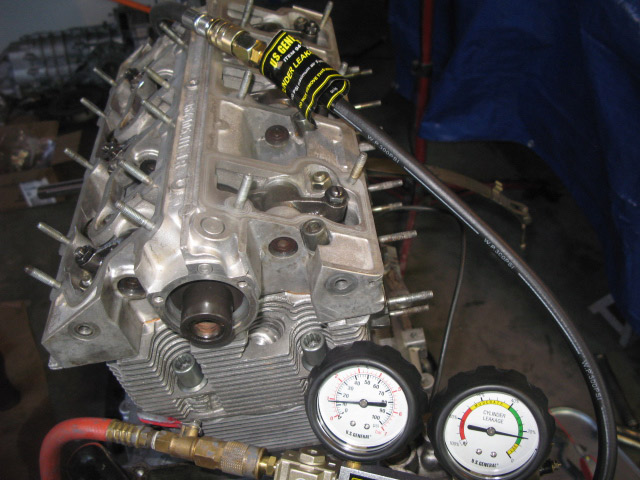
|
|
06-08-2015, 08:12 PM
|
|
Oleg Perelet
Join Date: Jul 2010
Location: Escondido, CA
Posts: 173
|
Light weight flywheel Not exactly about leaks, but I do have pics.... and installation steps Removing double weight assembly: 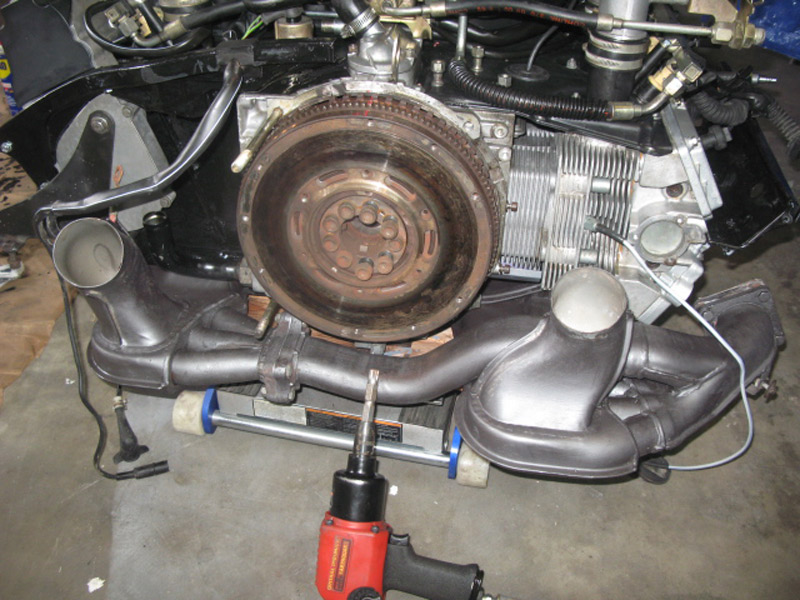 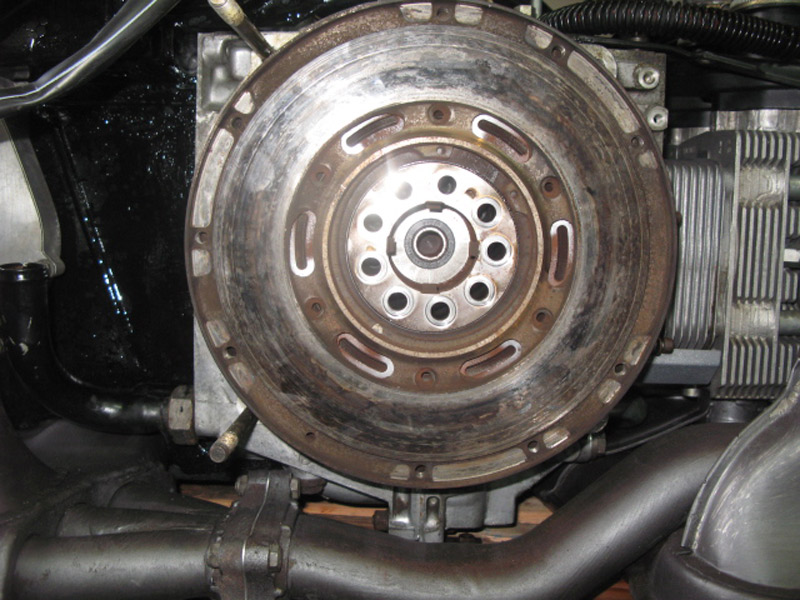 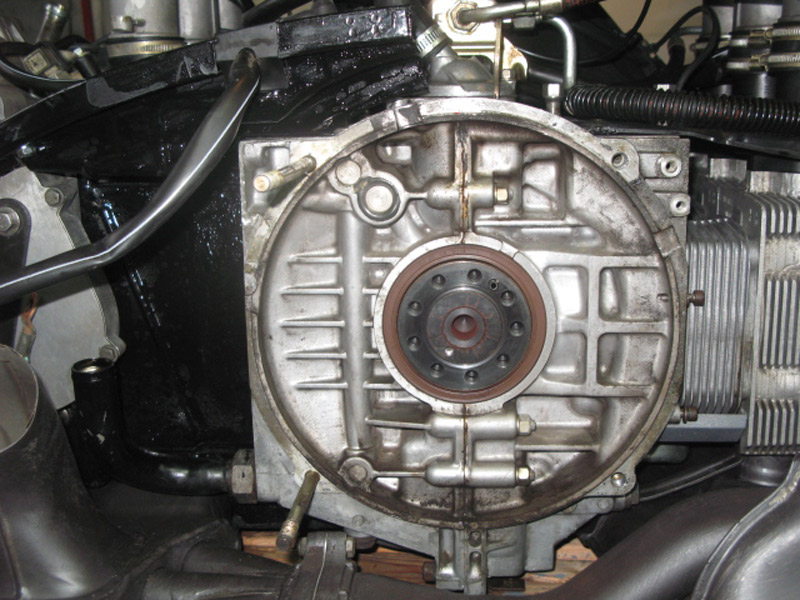 Goodies:  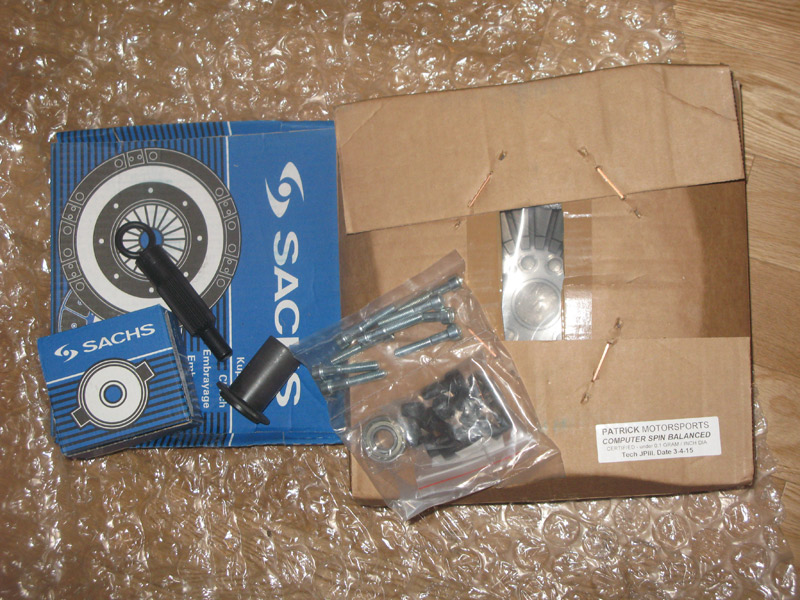 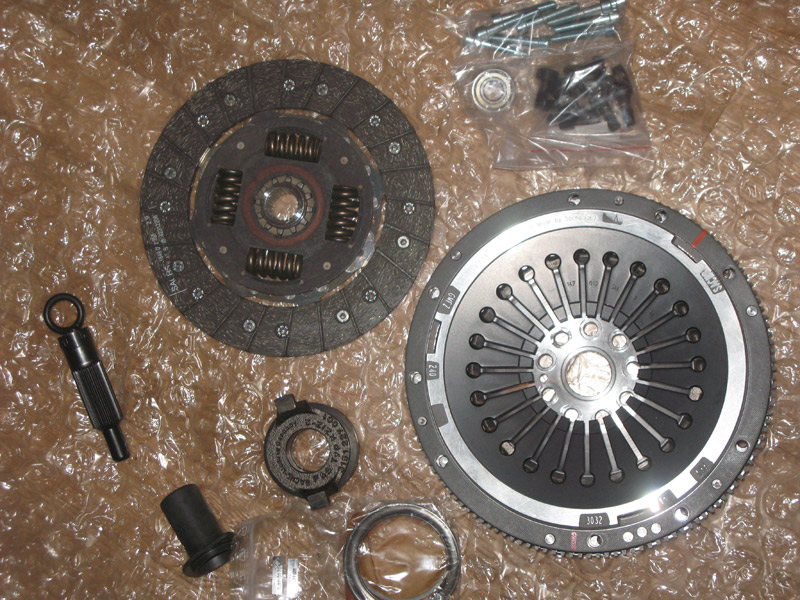 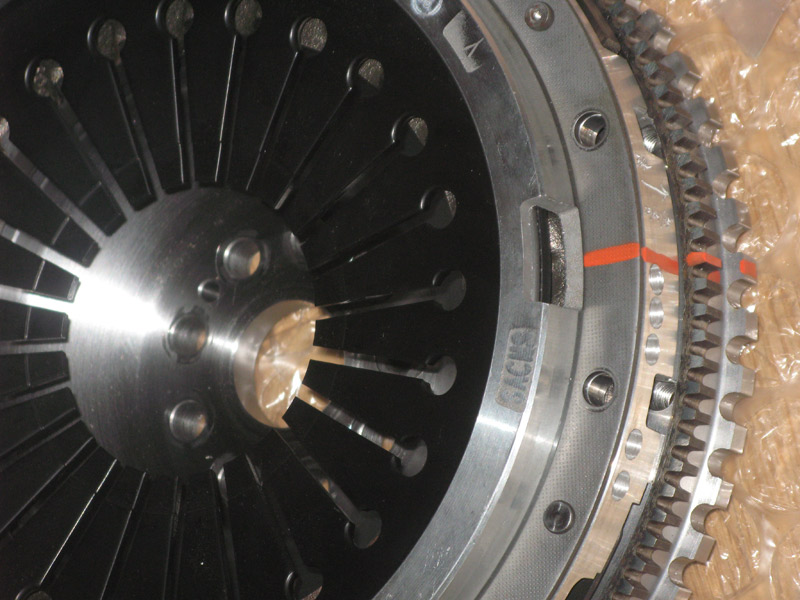 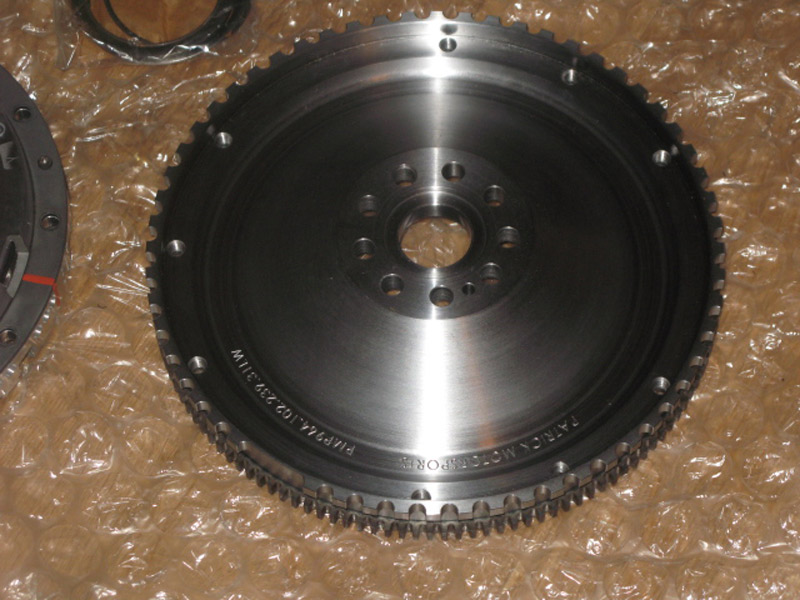
|
|
06-08-2015, 08:43 PM
|
|
Oleg Perelet
Join Date: Jul 2010
Location: Escondido, CA
Posts: 173
|
Light weight flywheel continuedNow, important thing to understand - total weight is not that much different Total weights: 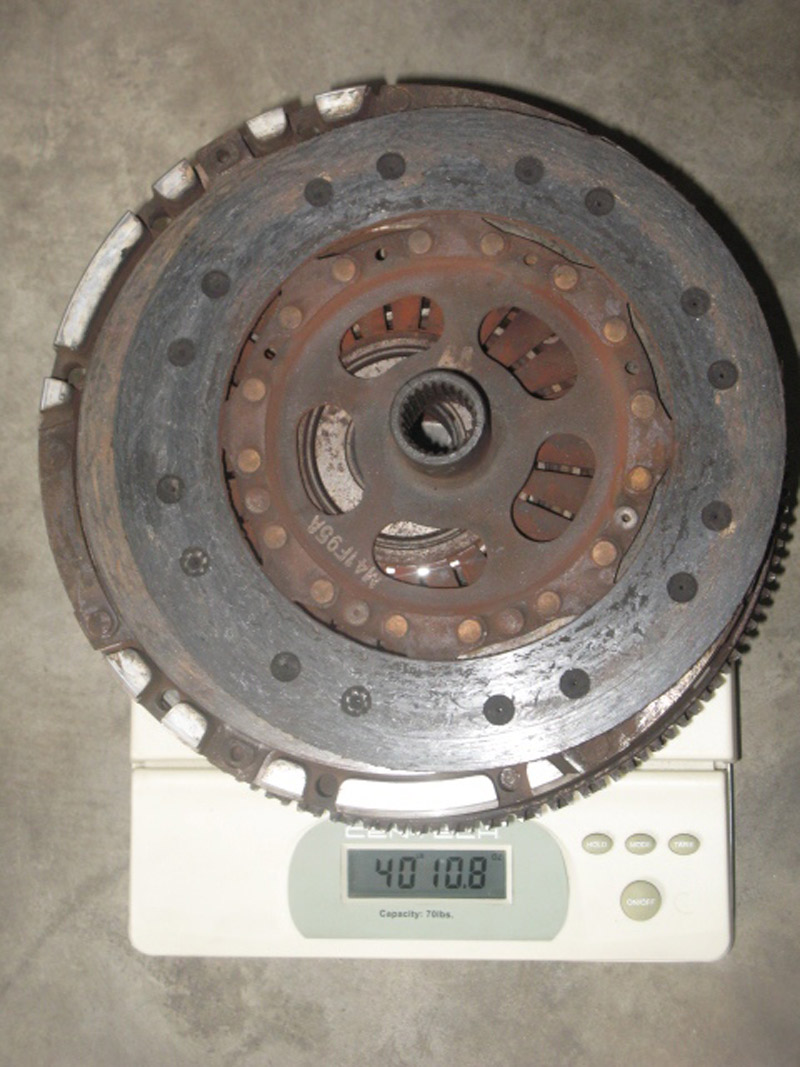 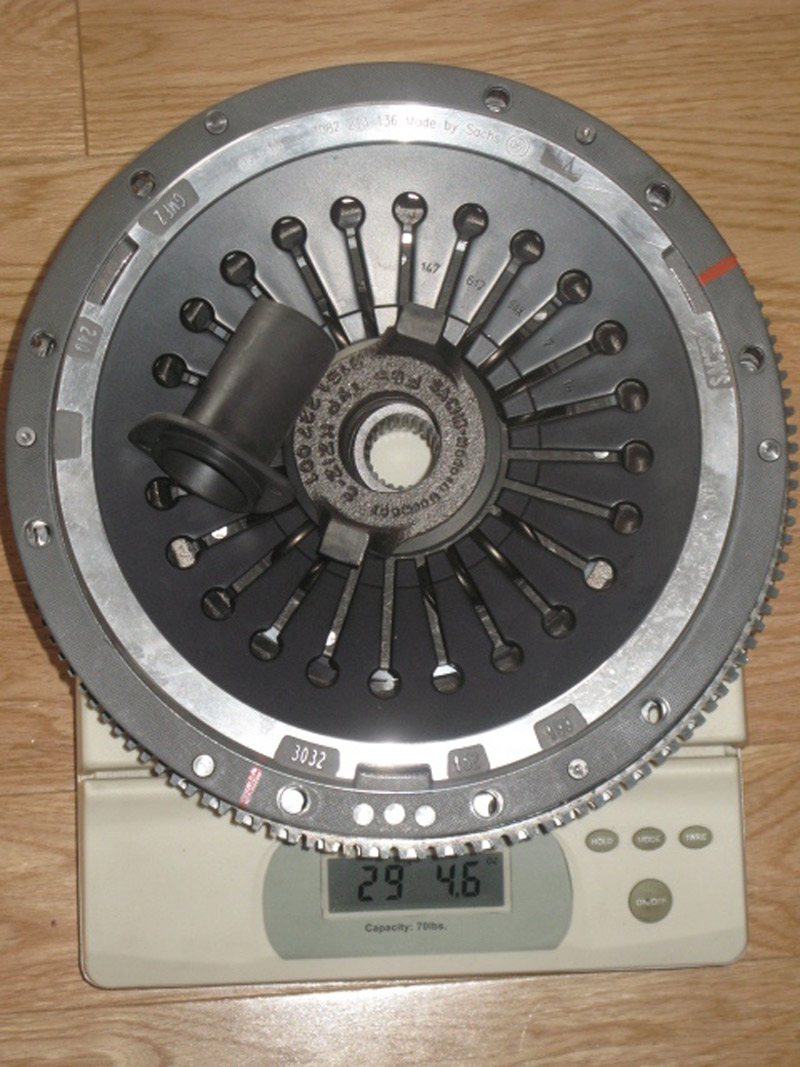 Flywheels compared: 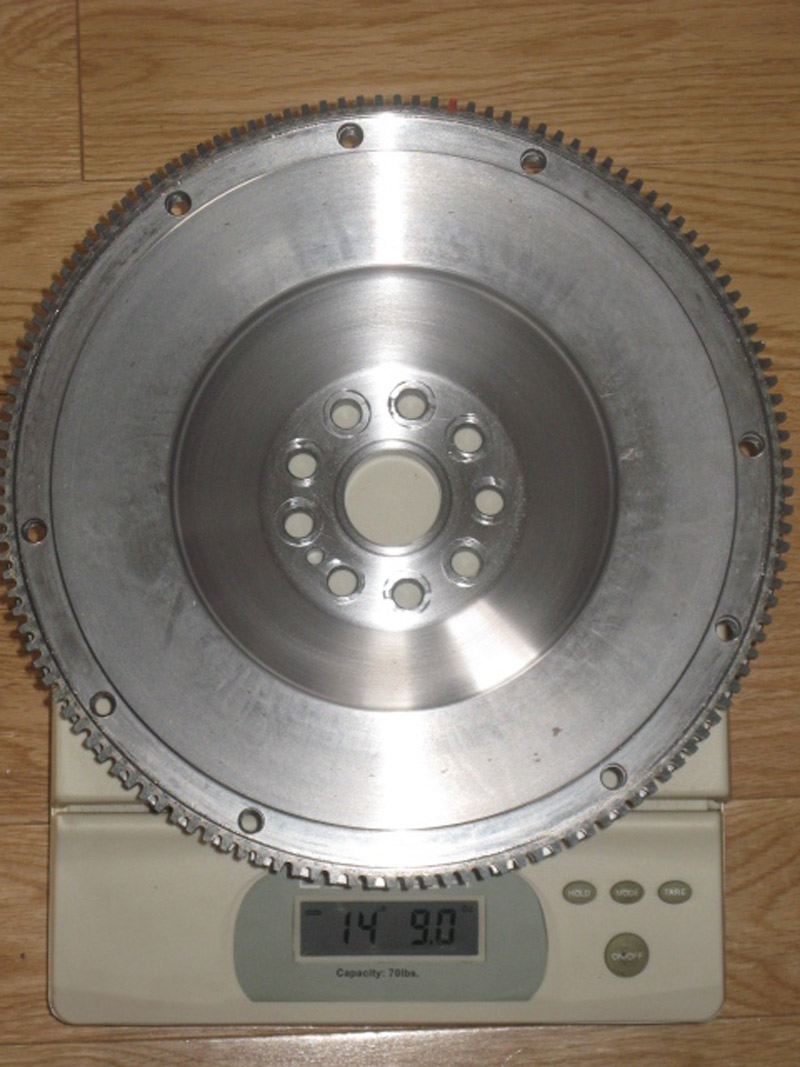 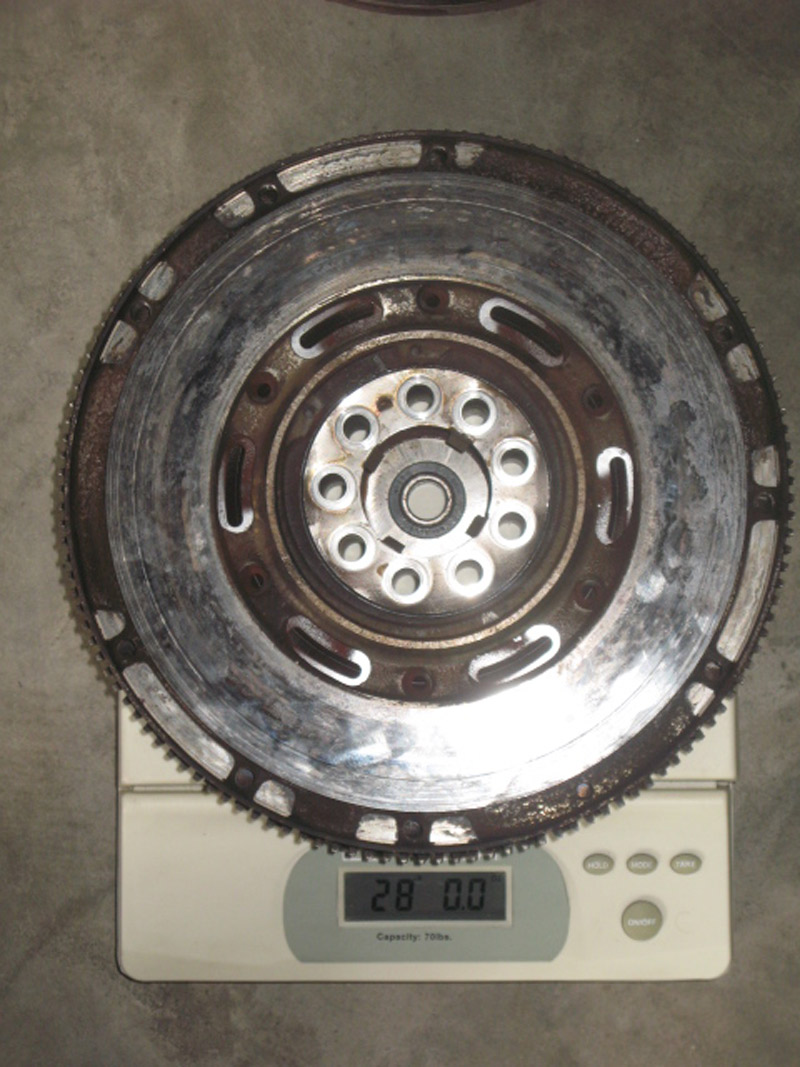 Looking at advertizing - they usually mention weight of LWFW alone compared to DWFW assembly Pressing in center bearing: 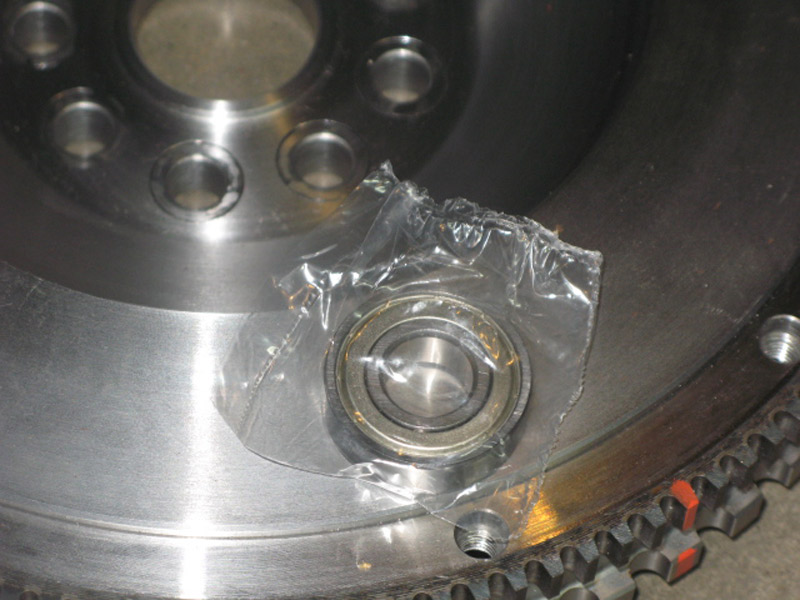 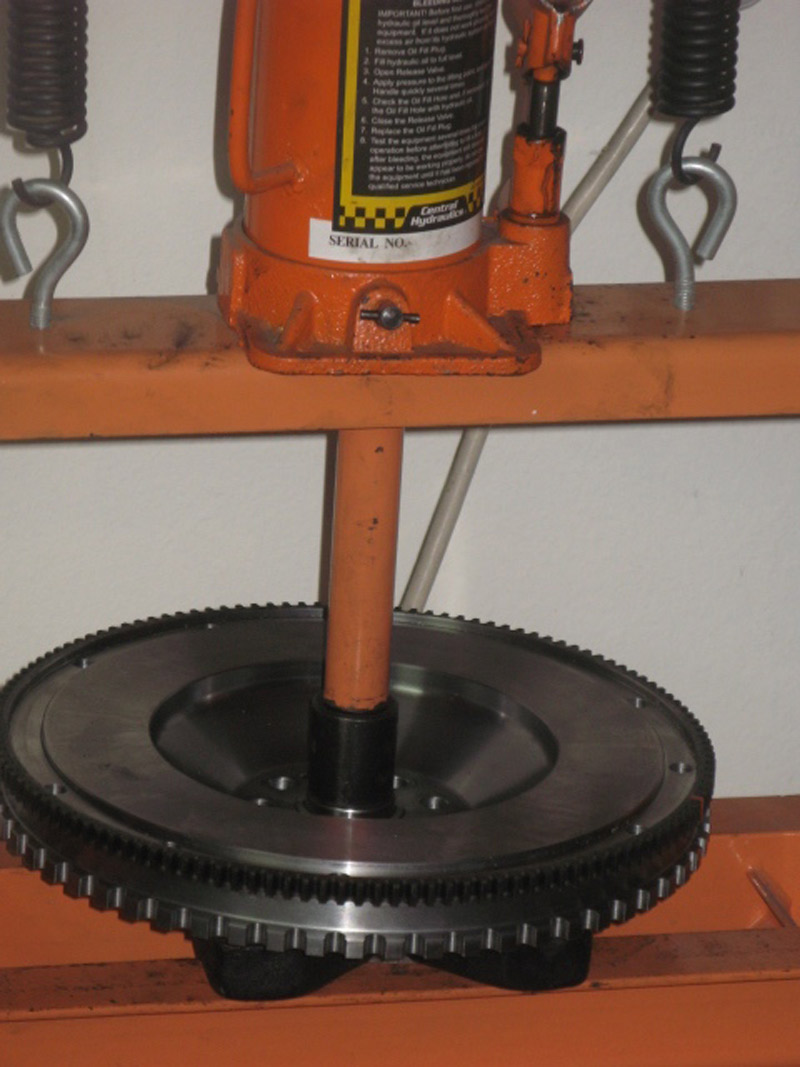 Things to note different bolt sizes: 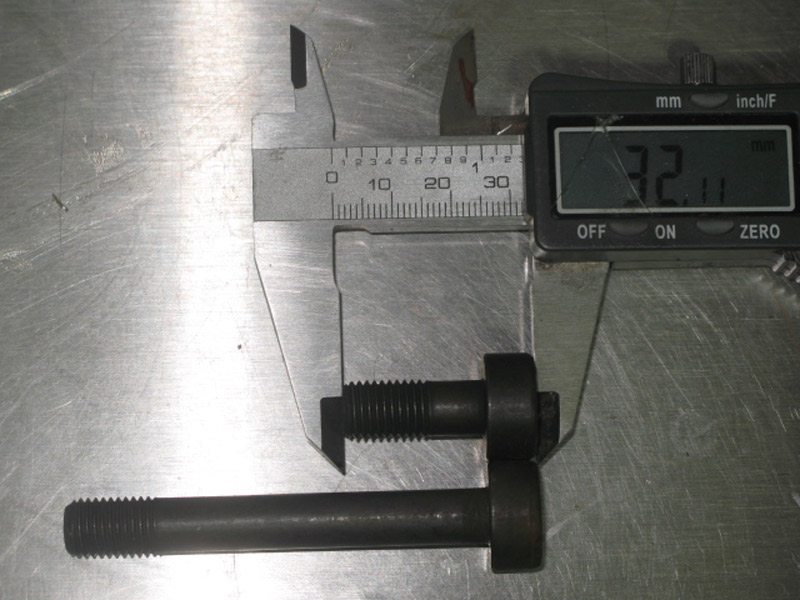 Flywheel on: 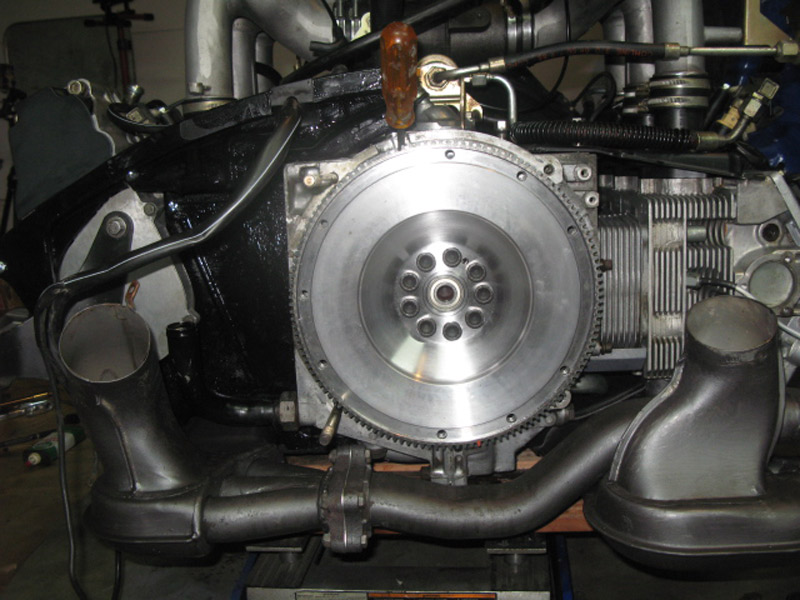
|
|
06-08-2015, 08:58 PM
|
|
Oleg Perelet
Join Date: Jul 2010
Location: Escondido, CA
Posts: 173
|
Light weight flywheel continuedclutch thickness for reference: Full thickness: 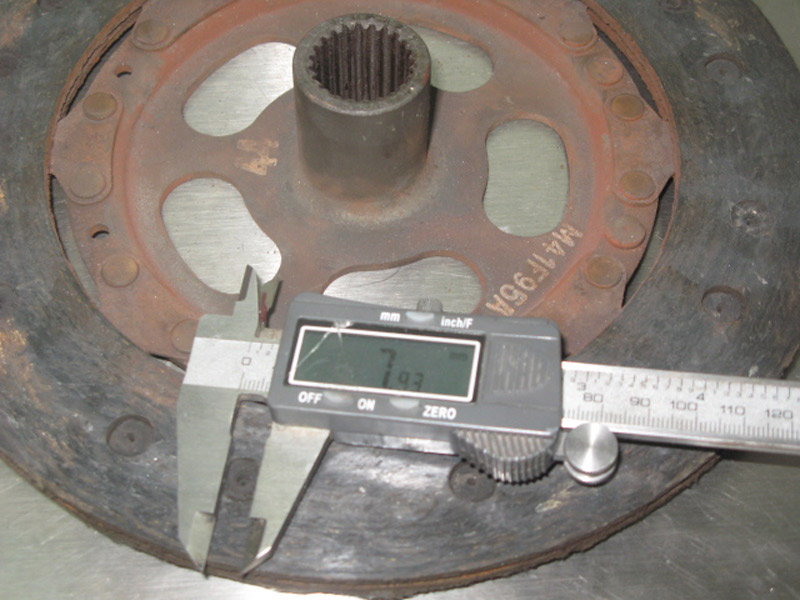 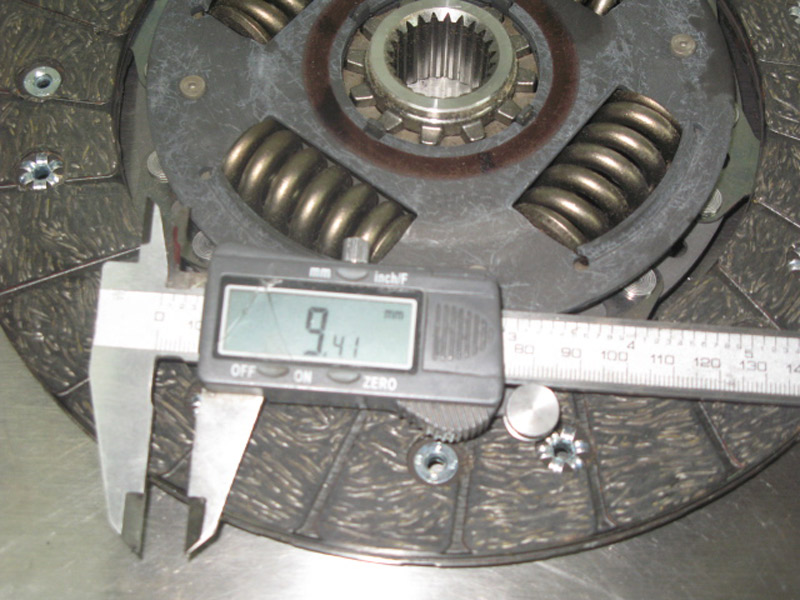 to the rivet: 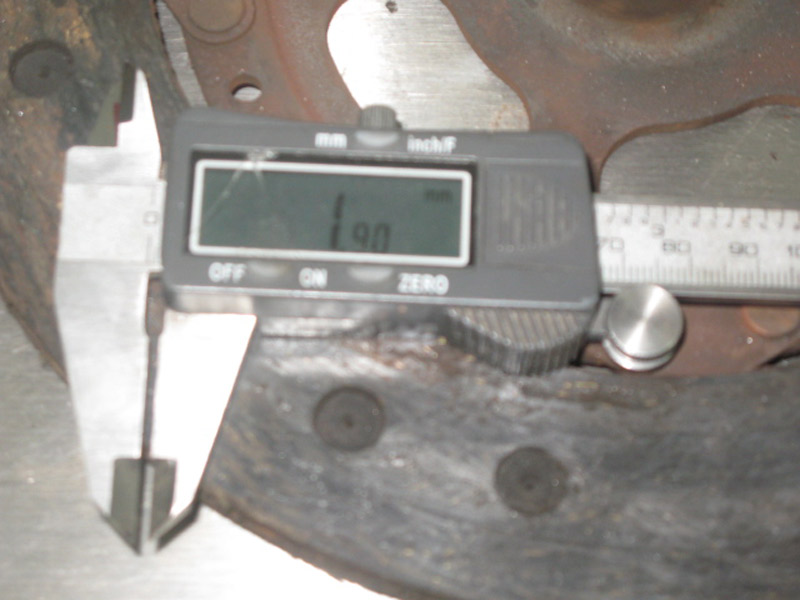 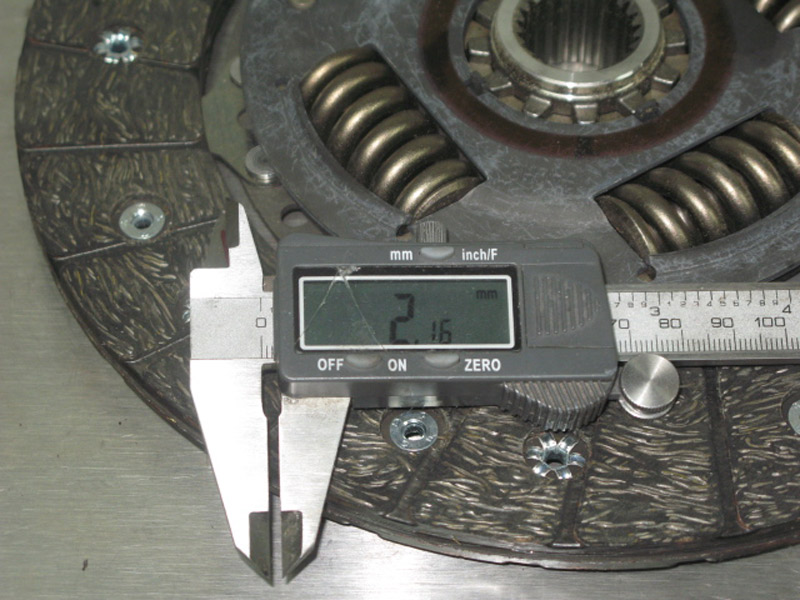 Factory diagram for release bearing fitting: 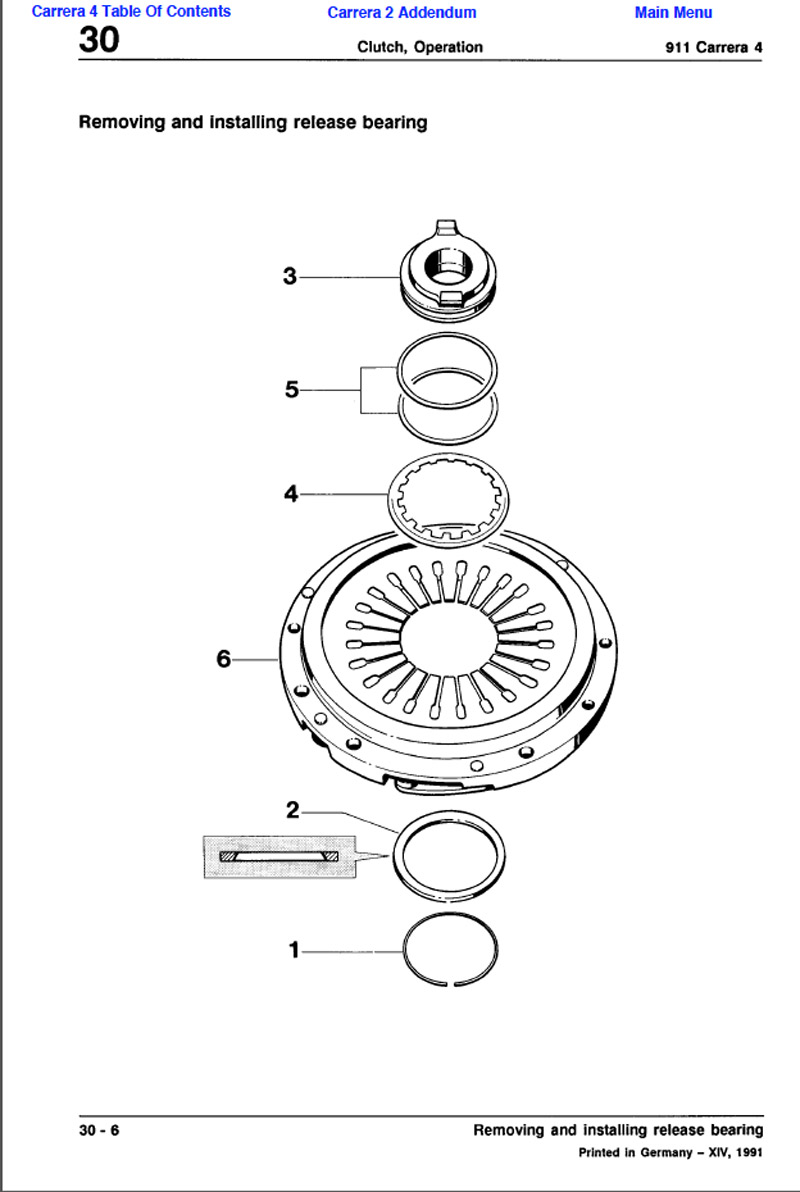 and real stuff: 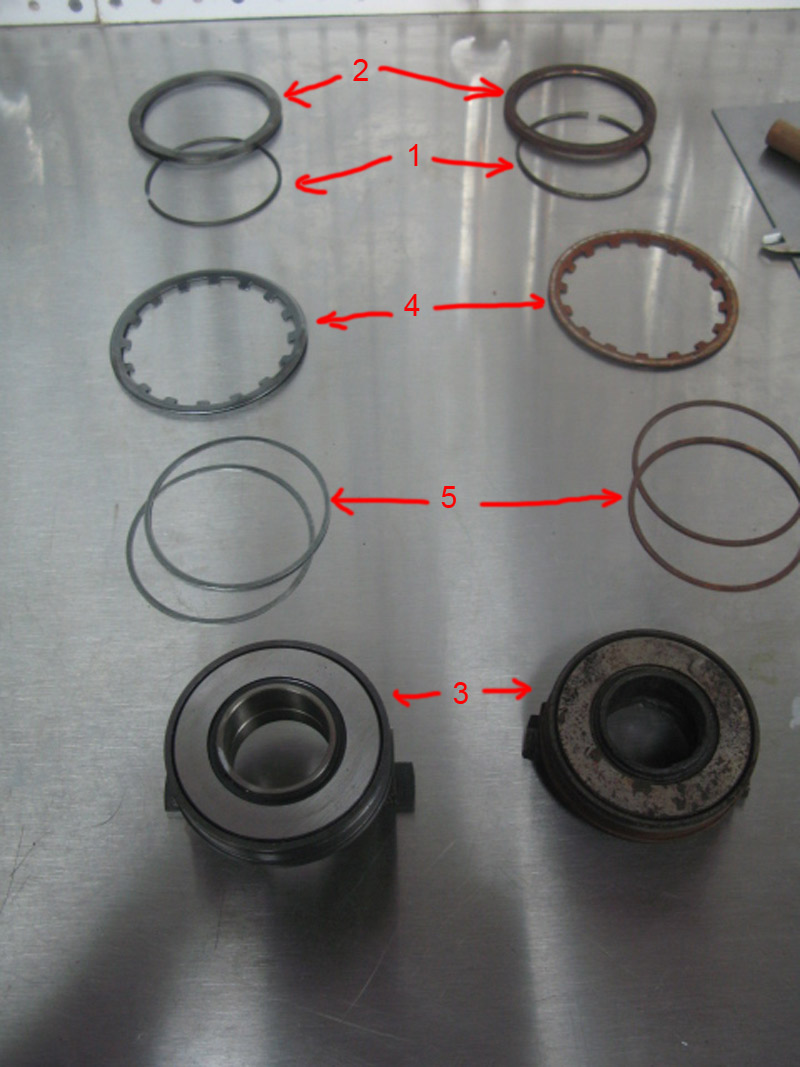 Pressing in release bearing: 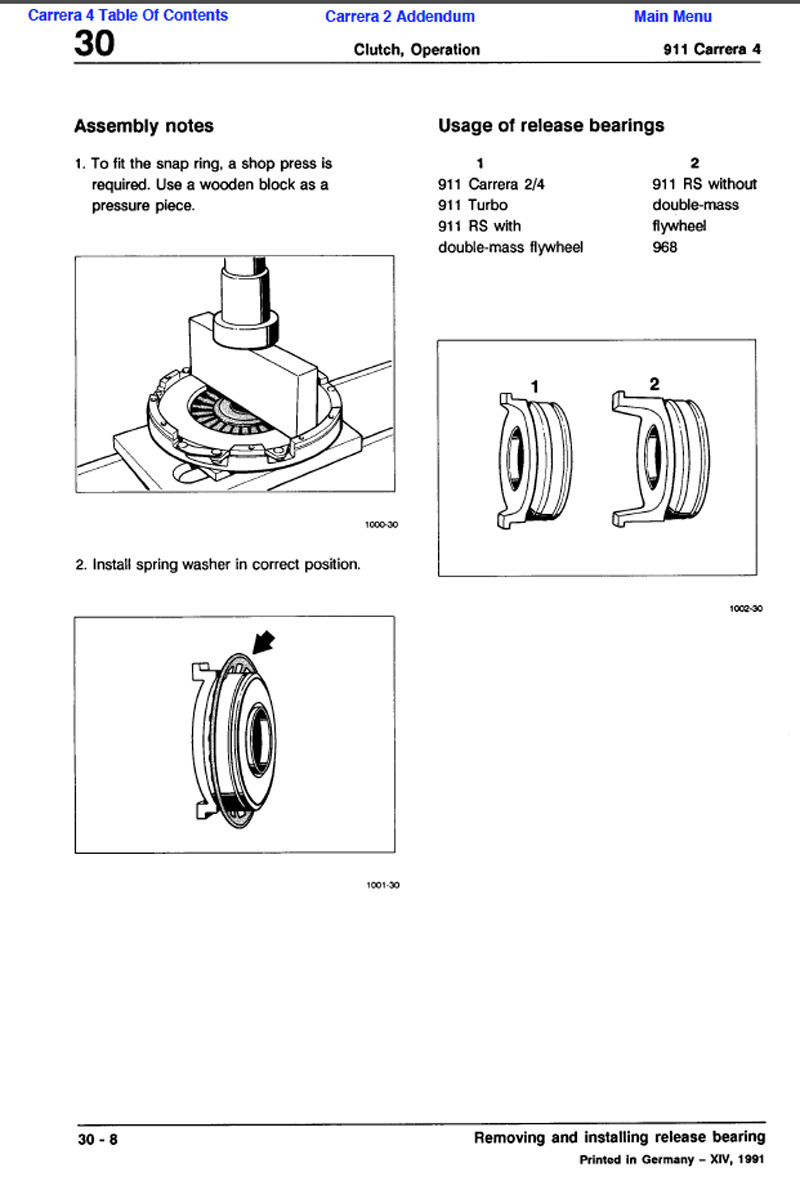 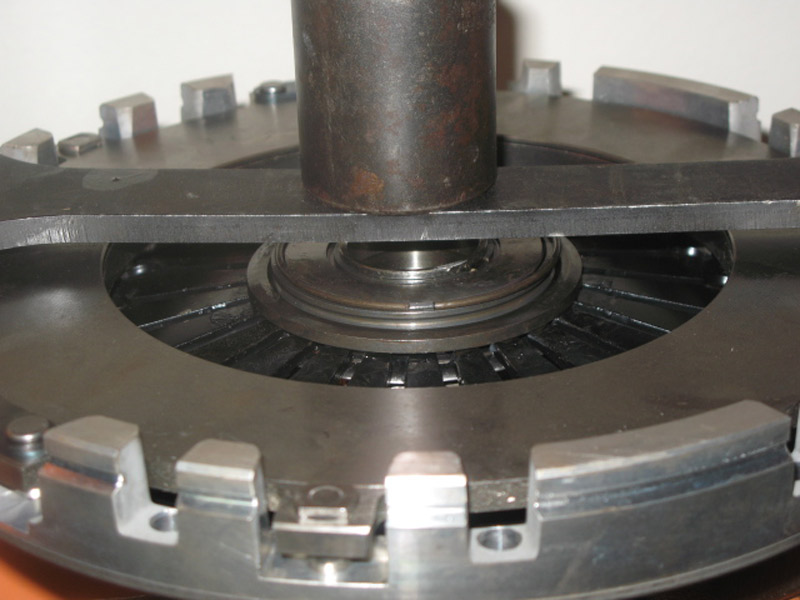 Lining up clutch and pressure plate: 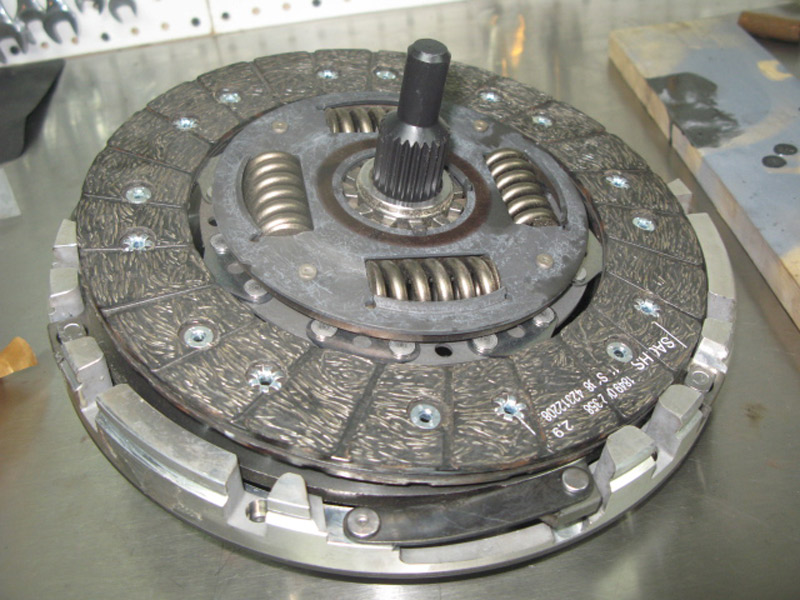 bolted together: 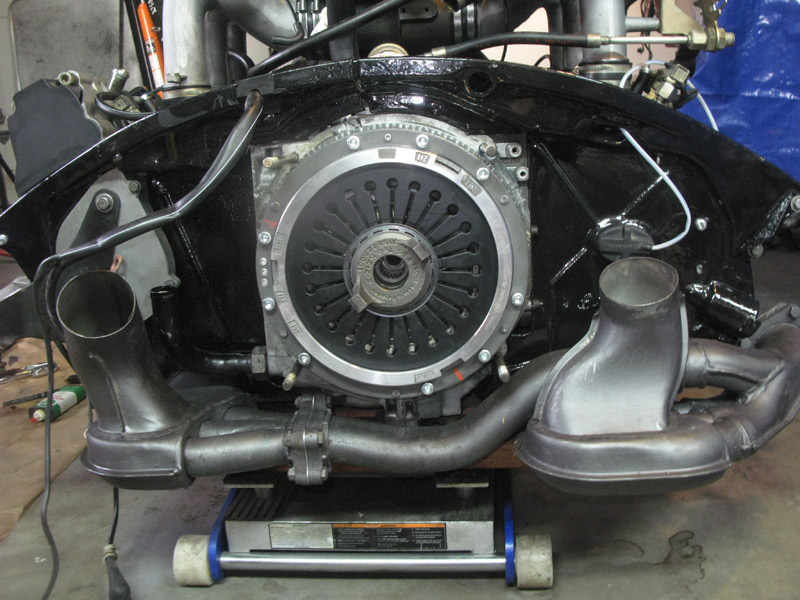
Last edited by perelet; 06-09-2015 at 06:42 PM.. |
|
06-08-2015, 09:13 PM
|
|
Oleg Perelet
Join Date: Jul 2010
Location: Escondido, CA
Posts: 173
|
Light weight flywheel continuedguide difference: 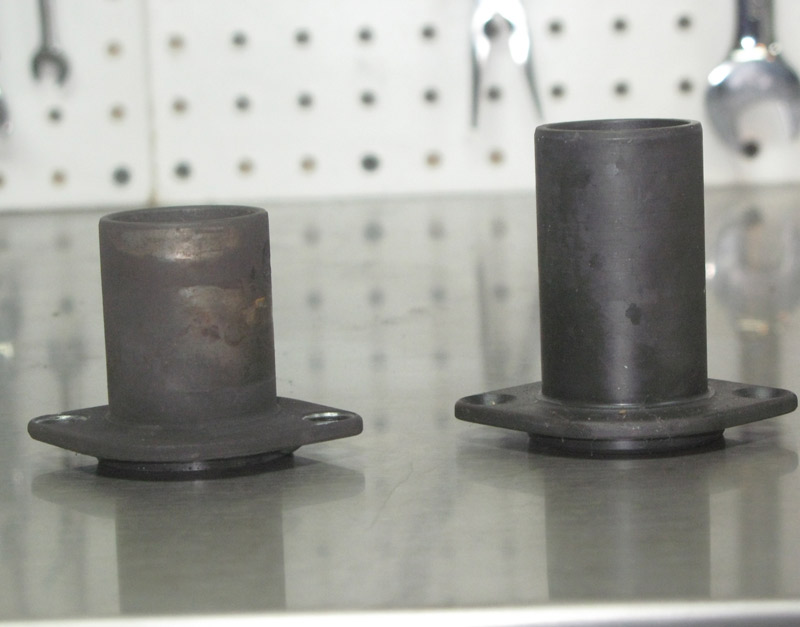 Lining up transmission: 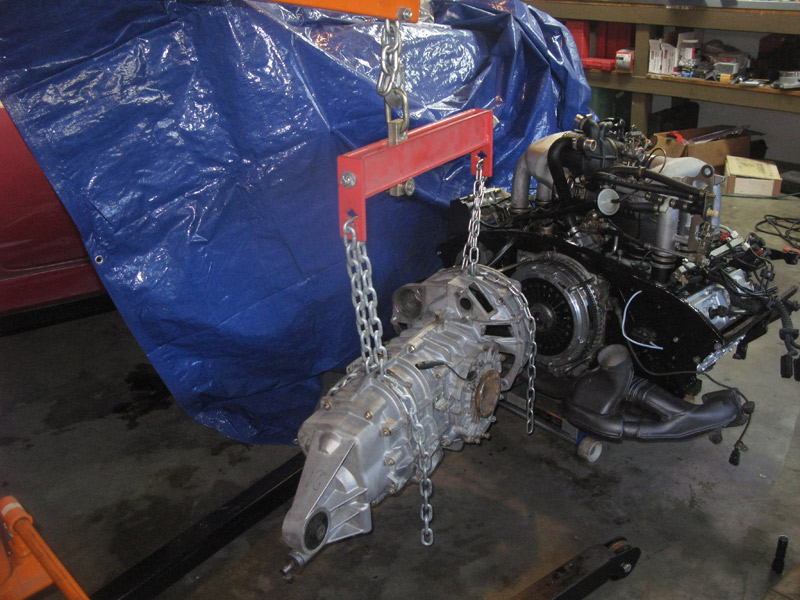 Hold fork by piece of tape, as manual says: 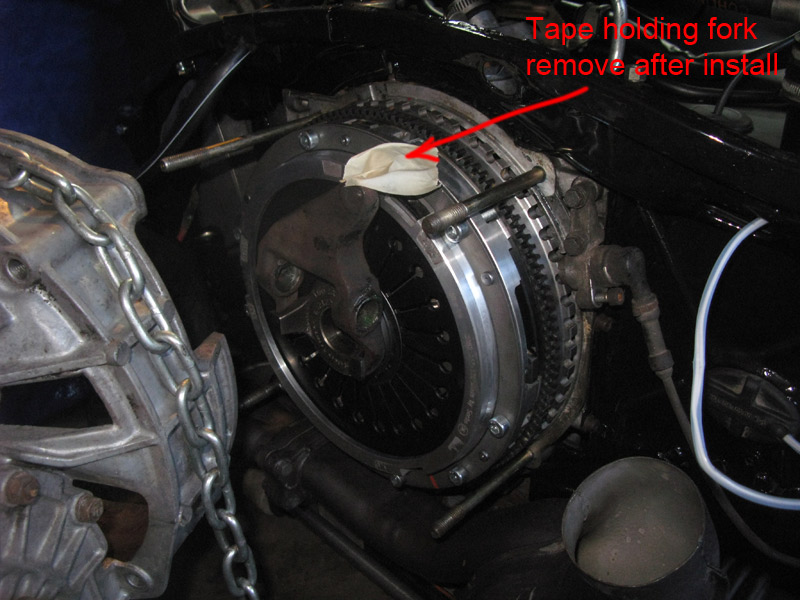 bolted together: 
|
|
06-08-2015, 09:29 PM
|
|
Oleg Perelet
Join Date: Jul 2010
Location: Escondido, CA
Posts: 173
|
Oil thermostat rebuild Clamp cover and remove clip: 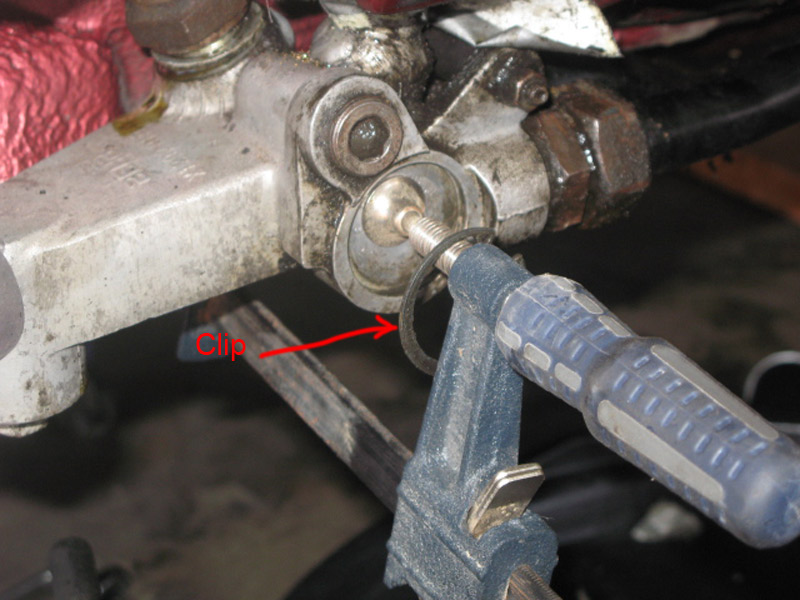 Slowly undo clamp - front cover should fall out: 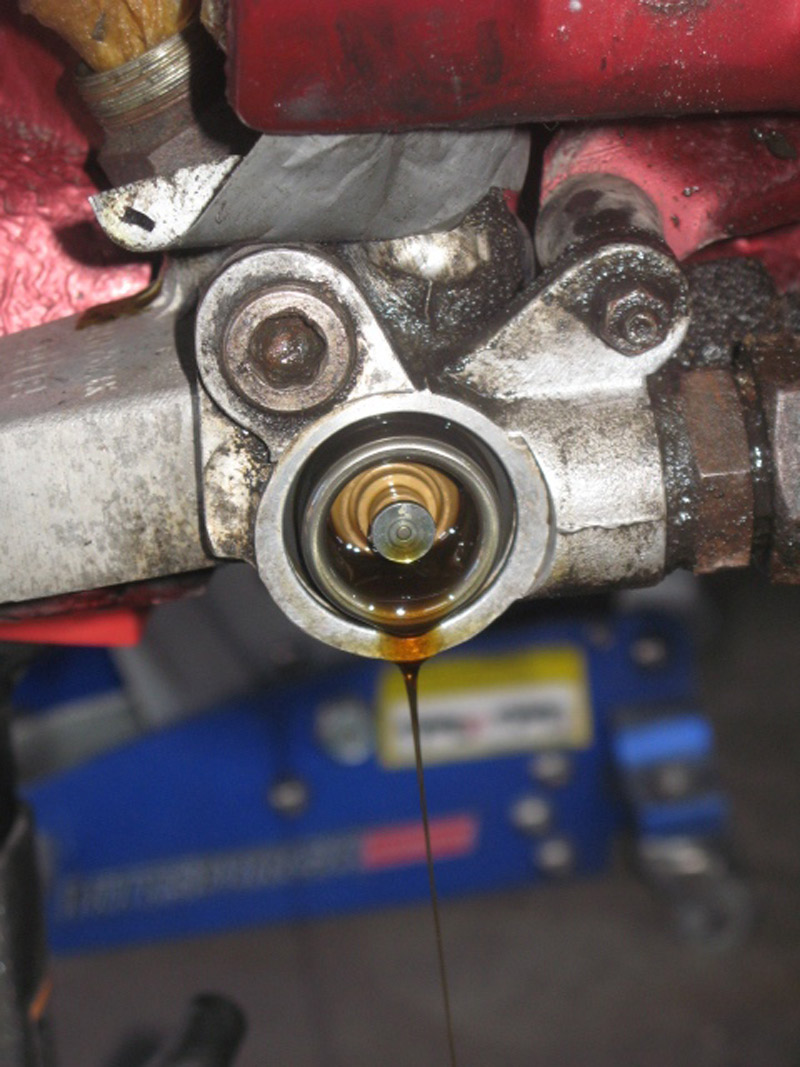 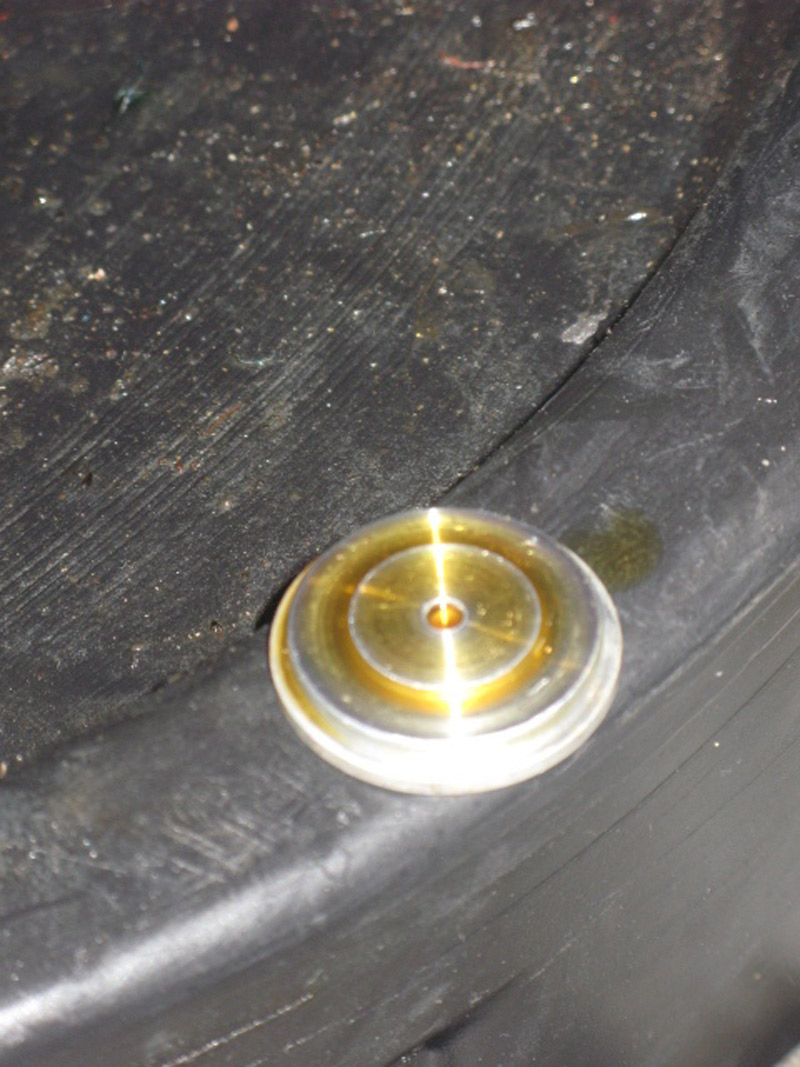 replace o-ring: 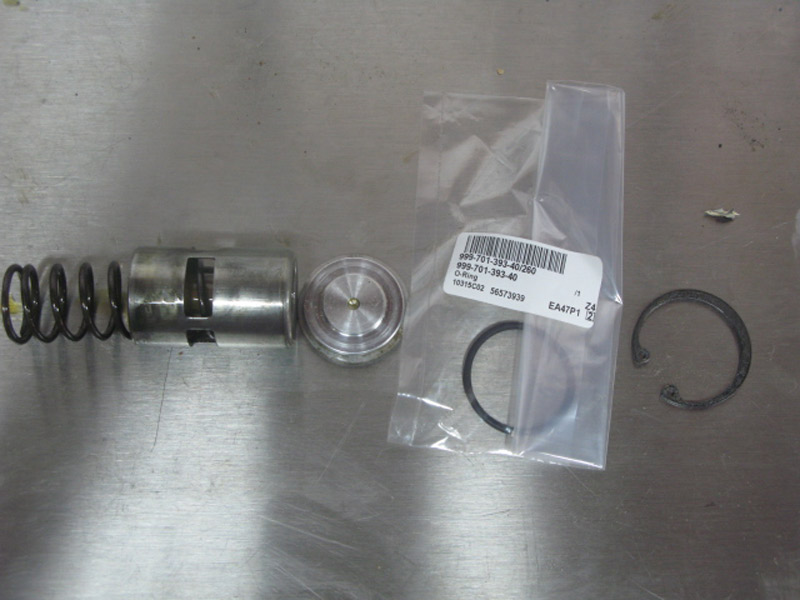 Put everything back: 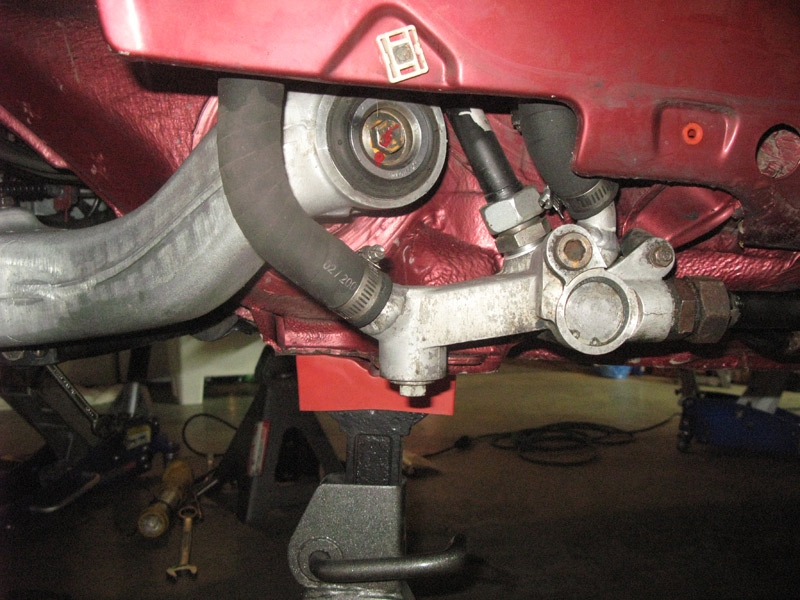
Last edited by perelet; 06-09-2015 at 07:19 PM.. |
|
06-09-2015, 07:07 PM
|

|
Oleg Perelet
Join Date: Jul 2010
Location: Escondido, CA
Posts: 173
|
Oil tank rebuild Oil tank & pipe paint stripped: 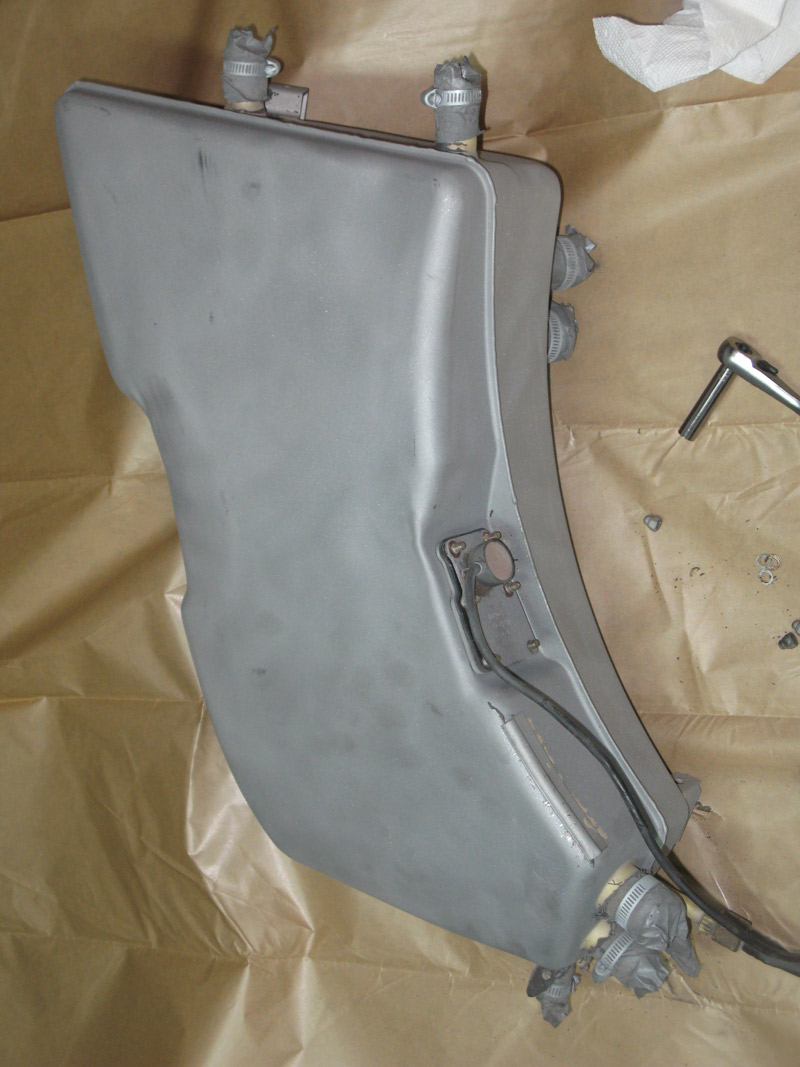 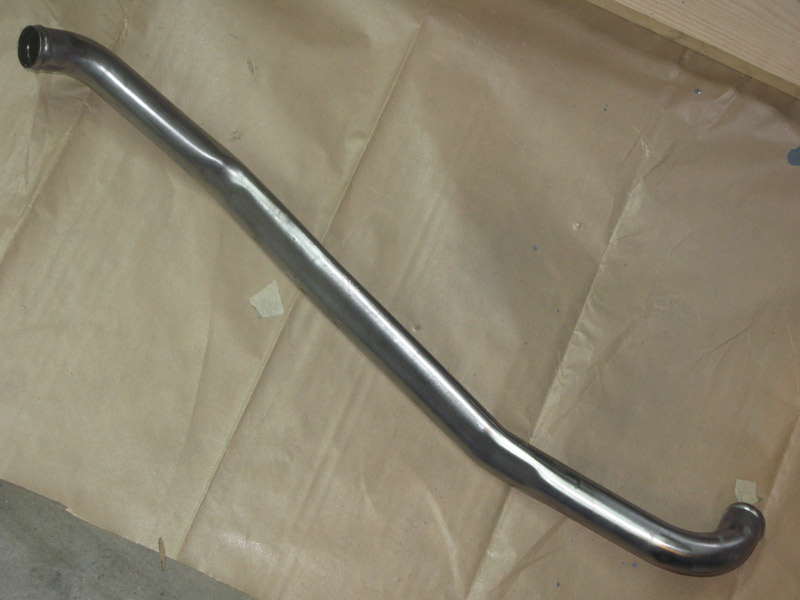 Epoxy painted: 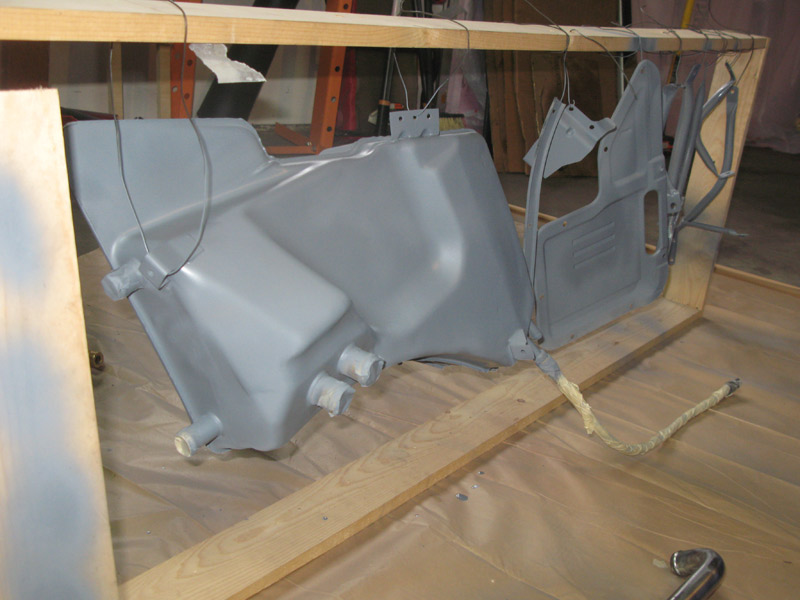 Painted: 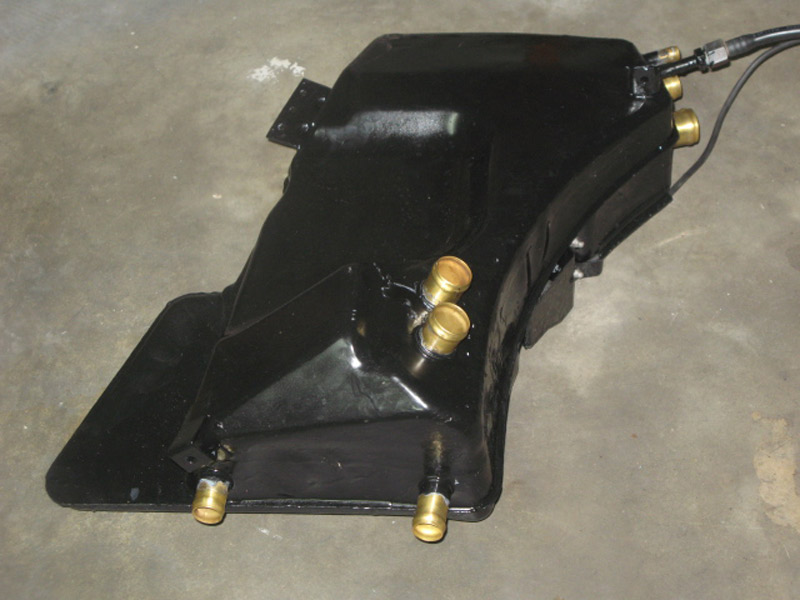 Oil filter housing coupler aluminum washers were pretty bad: 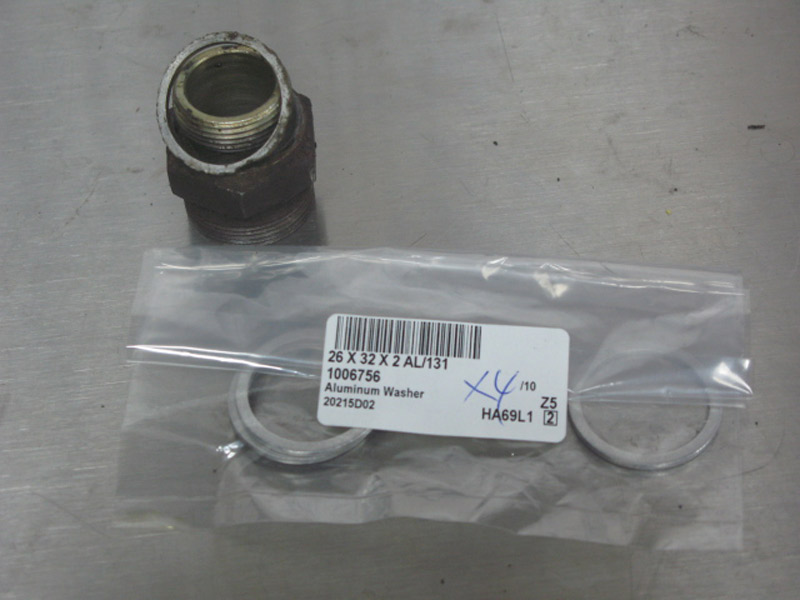 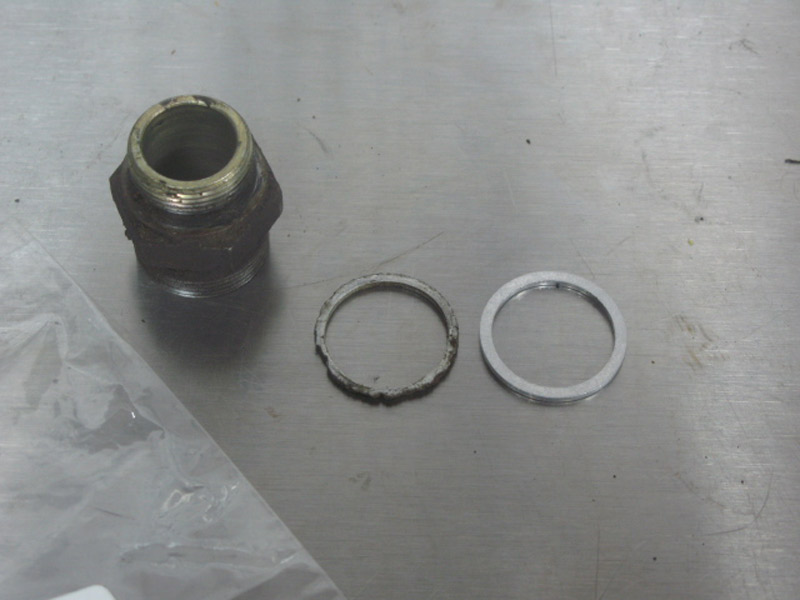 One expen$ive oil ho$se (also pain to fit!): 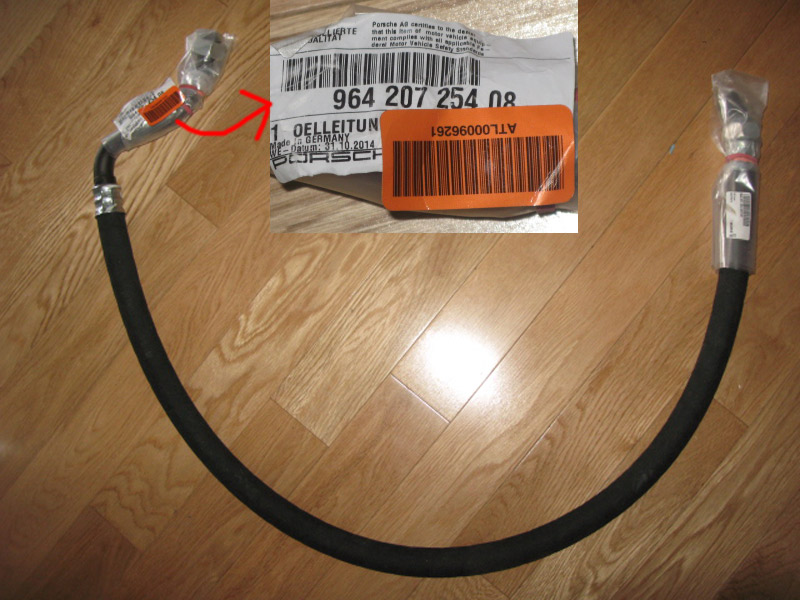 All fitted: 
|
|
06-09-2015, 07:30 PM
|
|
|

