| Author |
|
|
Oleg Perelet
Join Date: Jul 2010
Location: Escondido, CA
Posts: 173
|
964 Oil leaks & fixes thread.
Last edited by perelet; 12-11-2011 at 07:28 PM.. |
|
 12-11-2011, 12:06 PM
|
|
|
Oleg Perelet
Join Date: Jul 2010
Location: Escondido, CA
Posts: 173
|
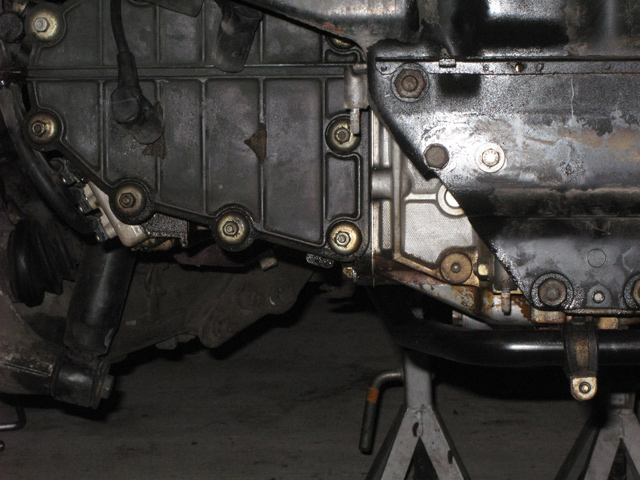
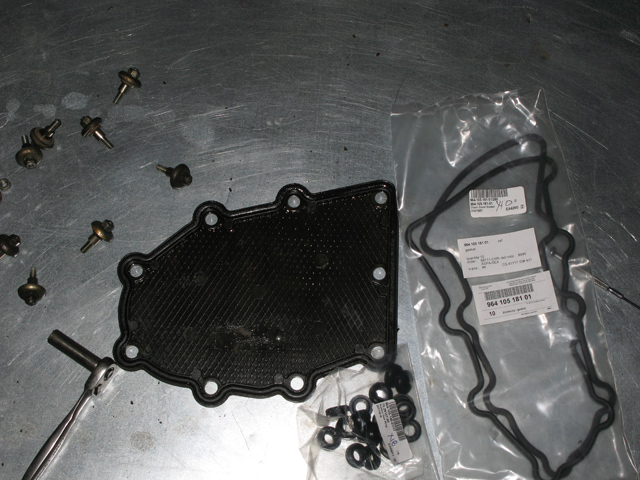
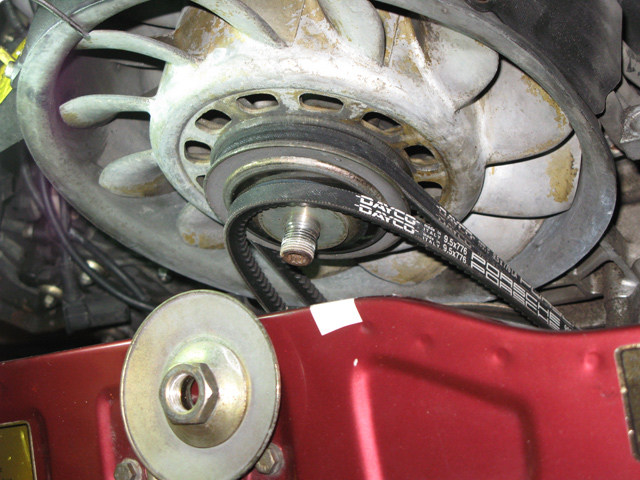
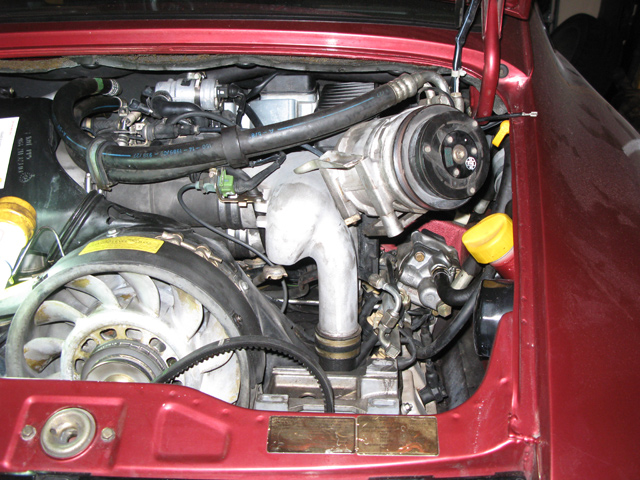
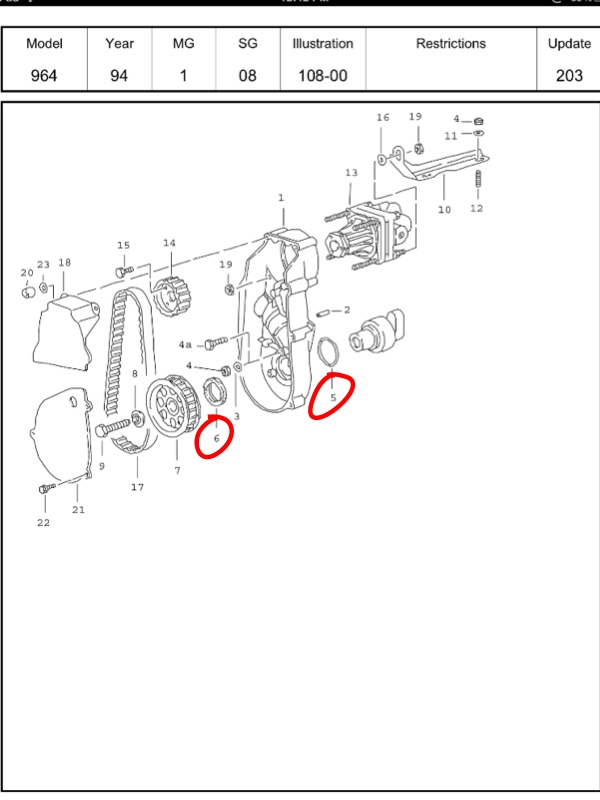
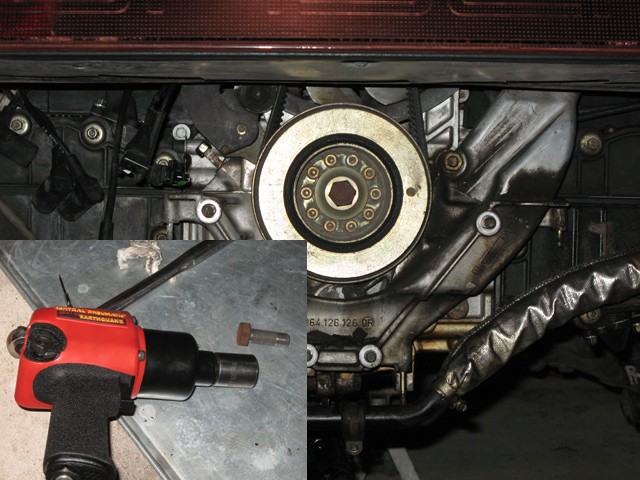 many methods exists - impact works fine for me. to remove pulley you'll need special tool: 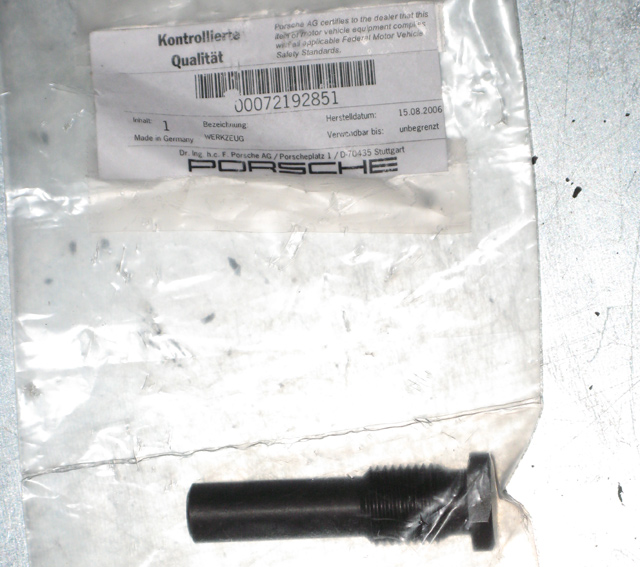 Now you'll see rather ugly AC bracket that blocks access to pass side cover: and also condition of your crank seal. 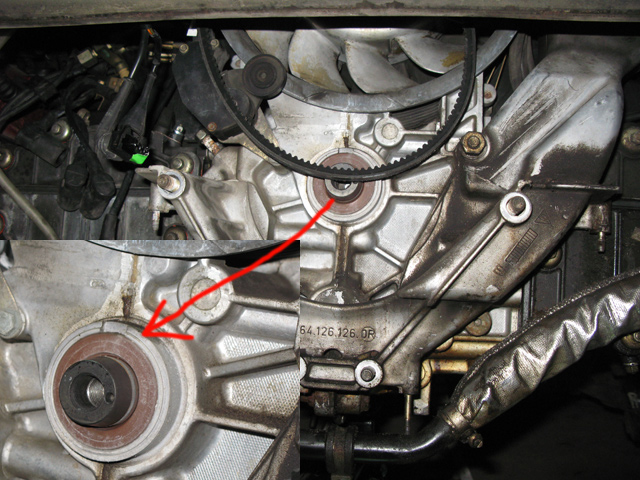 Unbolt bracket and you have access to another timing chain cover: 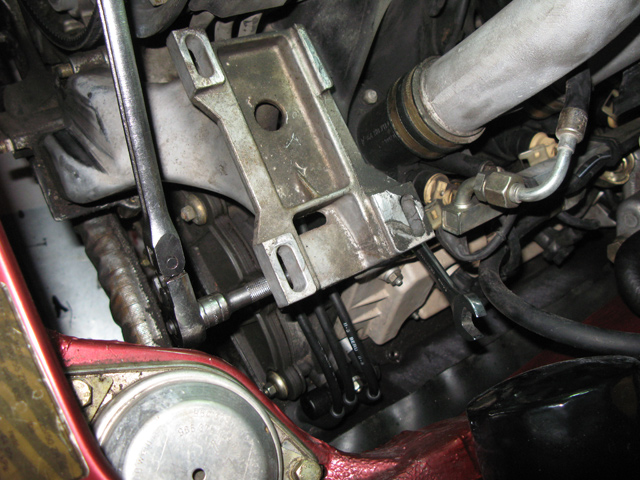 And chain tensioner gaskets (I used gasket sealant on those ones): 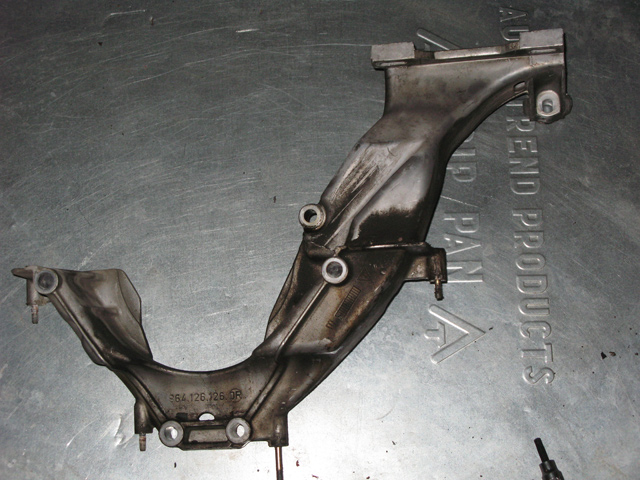 remove cover, clean it up, replace gasket and rubber rings. While there replace gaskets seals for oil bridge 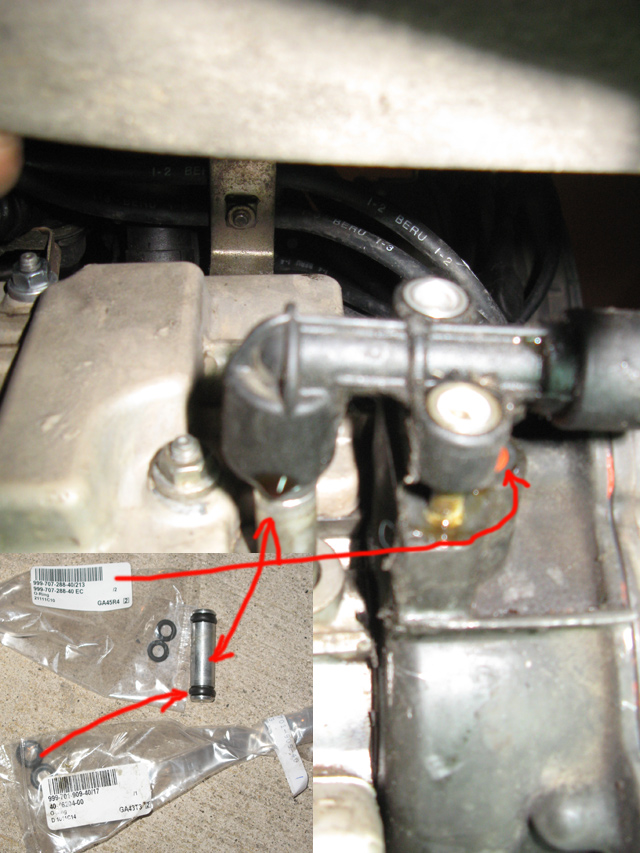 NOTE. There's typo in PET - you'll need 4 999-7-1-909-40/17 seals, not 2 as it says, also 999-707-288-40/213 is black and one that you most probably will see in the car is orange. Also, replace chain tensioner gaskets at same time. I used gasket sealant on those ones cause they tend to warp: 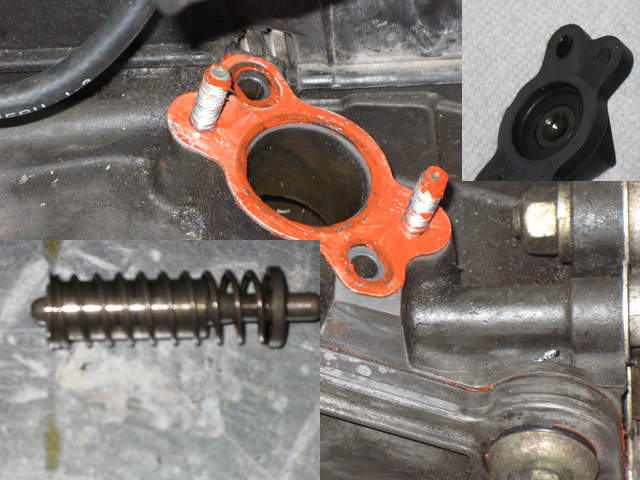
Last edited by perelet; 12-11-2011 at 07:30 PM.. |
|
12-11-2011, 12:27 PM
|
|
Oleg Perelet
Join Date: Jul 2010
Location: Escondido, CA
Posts: 173
|
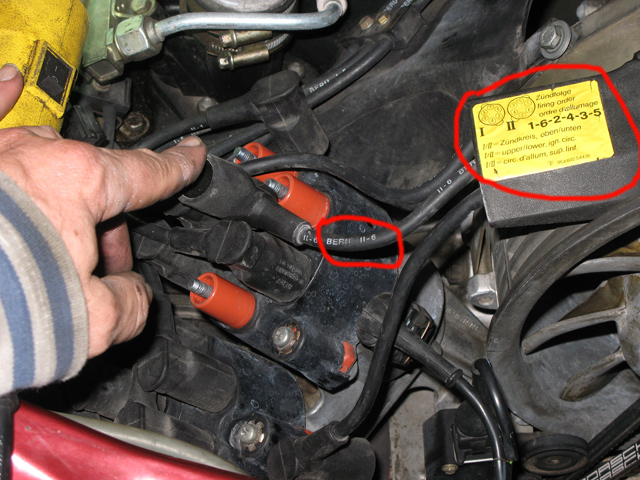
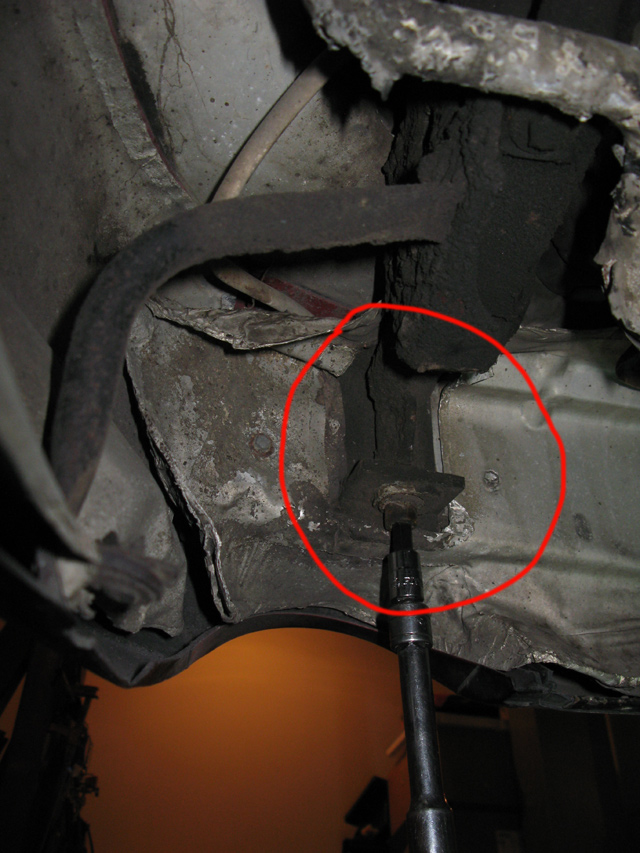
While there.
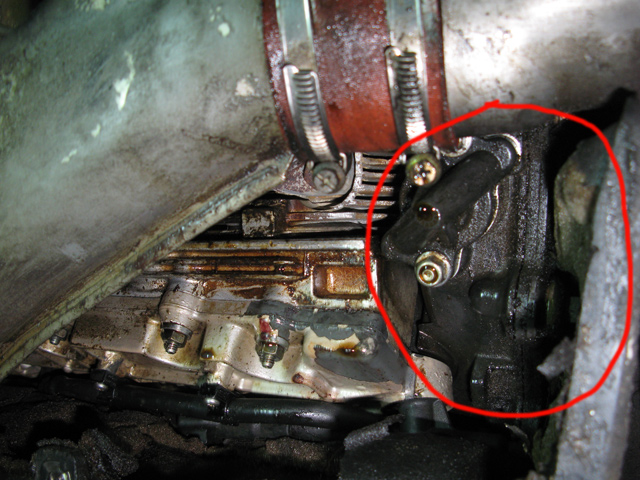
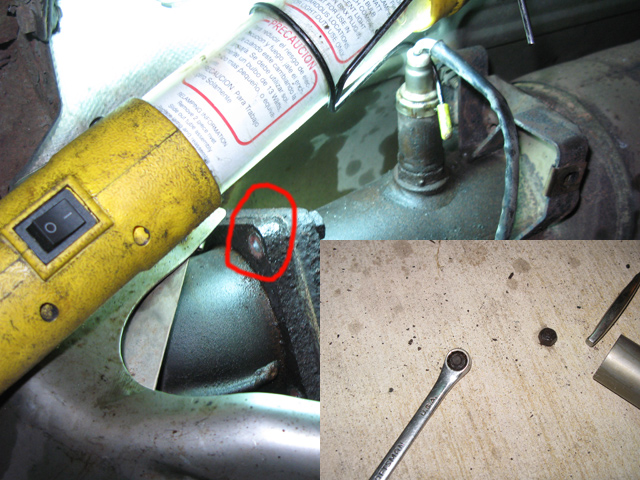
Oil return pipe bolt tends to get loose and leaks oil on heat exchanger producing that 964 specific smell that my wife hates: 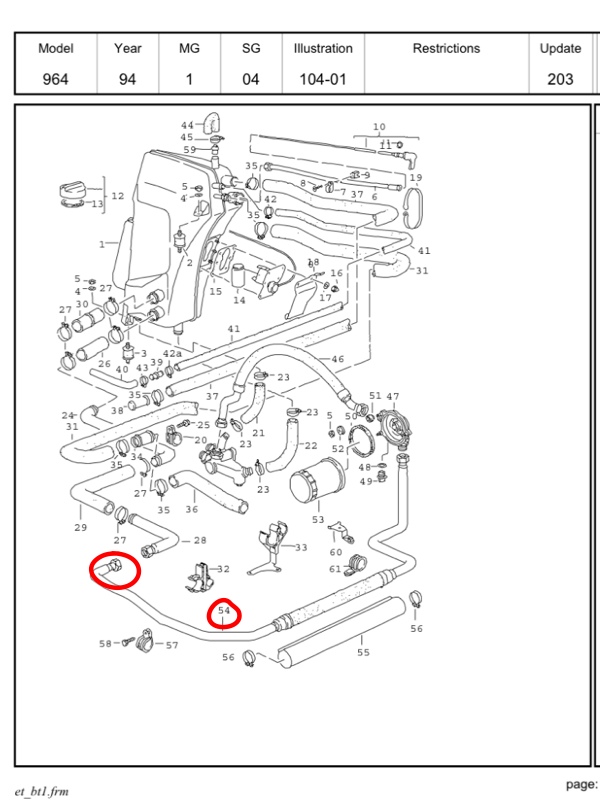 here's real life pic:  To get there you'll need to drop heat exchangers .... sooner you get to remove them, easier your future life will be. Nuts tend to rust & studs can break. Sooner you replace them - better. 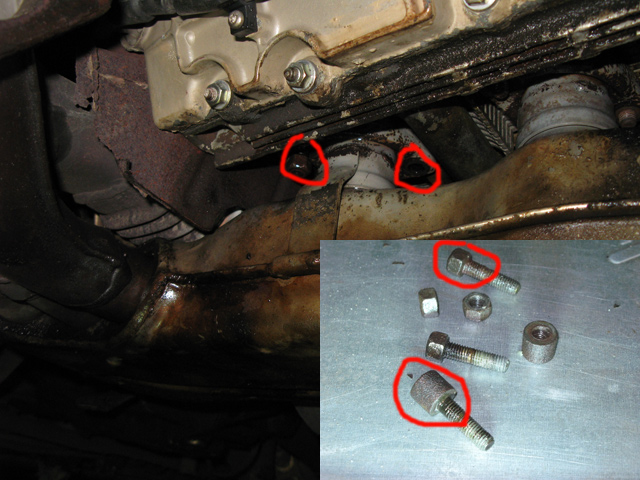 In my case some nuts get off, some nuts got stuck and I ended up with studs. Also I had to "fabricate" 13mm wrench to get exhaust nuts. I used HF 12/13mm combo offset wrench as source: 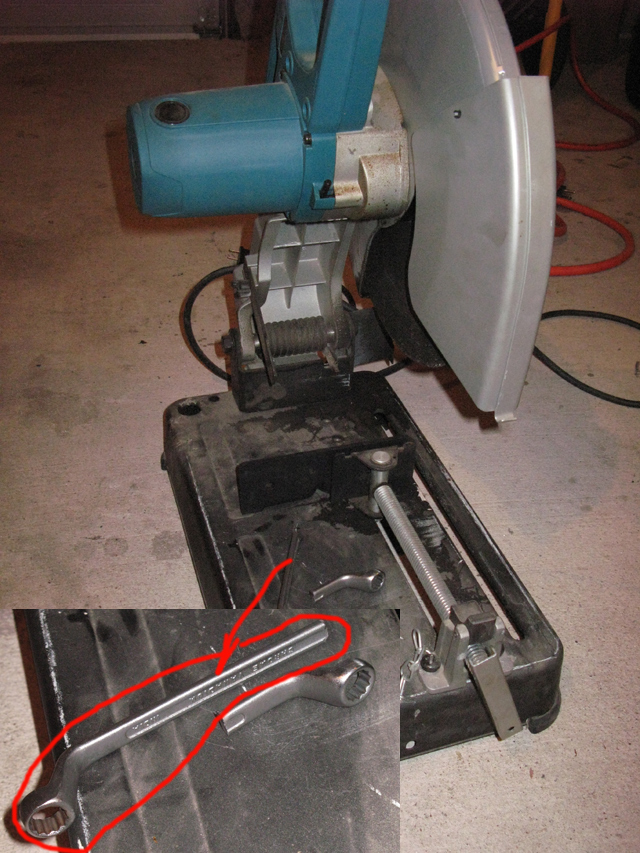 Exchangers out: 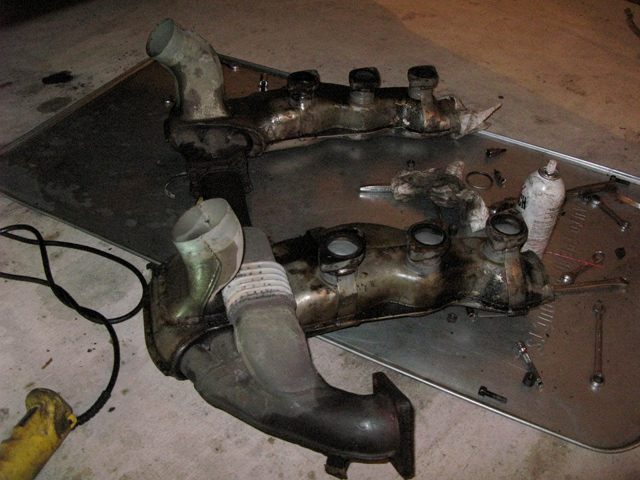 Now you have access to 36mm nut on return pipe. In most cases end nut on the pipe get's loose. But also, there coupling and crush washer. Also, in my case Oil relief bolt was loose also: 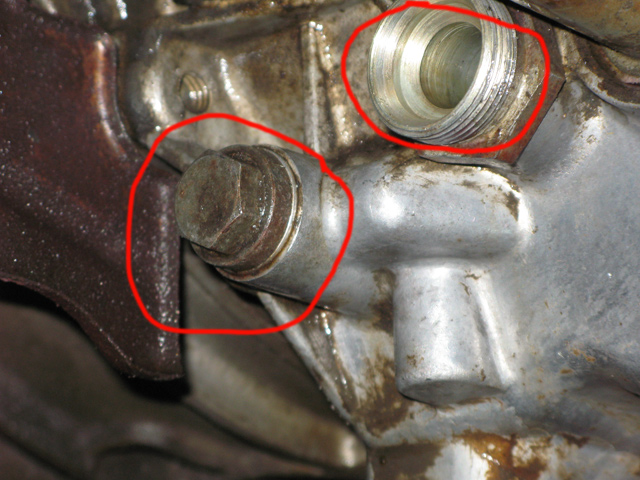 Here are parts for washer etc. I'll cover upper part later: 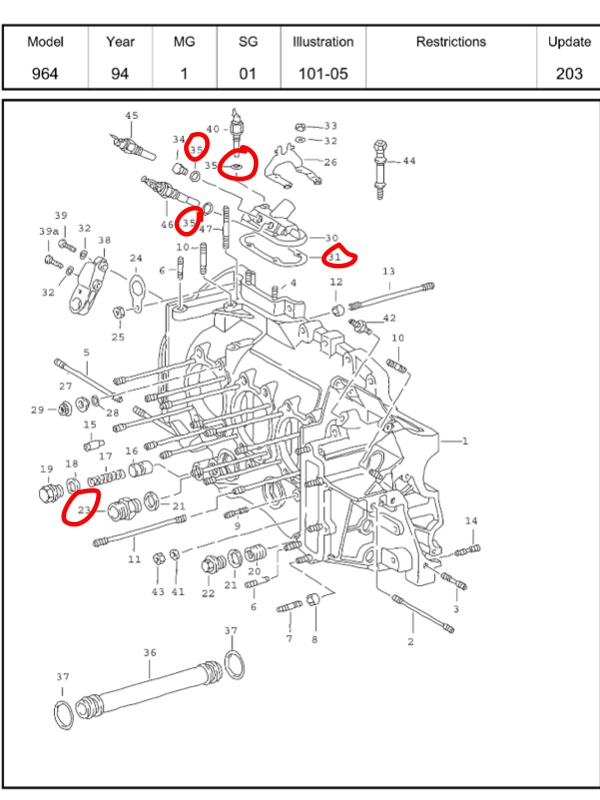
Last edited by perelet; 12-31-2011 at 06:01 PM.. |
|
|
12-11-2011, 12:42 PM
|
|
|
Oleg Perelet
Join Date: Jul 2010
Location: Escondido, CA
Posts: 173
|
2. Steering pump seals replacement.
 typically demonstrates itself as mess on pass side heat exchanger, cylinders: 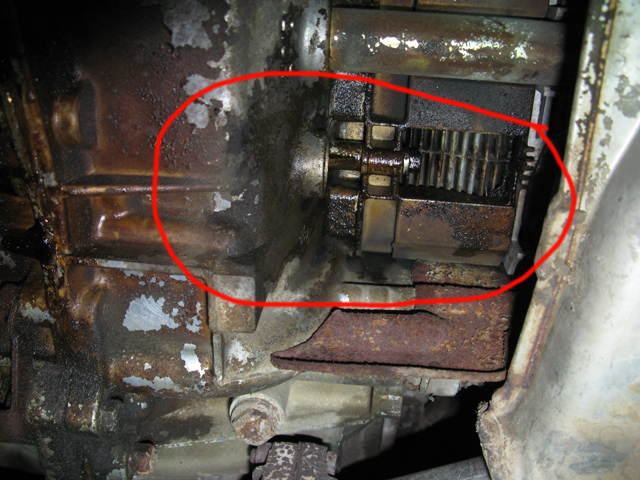 This procedure can be done with engine in the car also. ... to be continued .. |
|
12-11-2011, 12:50 PM
|
|
Oleg Perelet
Join Date: Jul 2010
Location: Escondido, CA
Posts: 173
|
At this moment I had heat exchangers off. To get more space I removed rear strut:
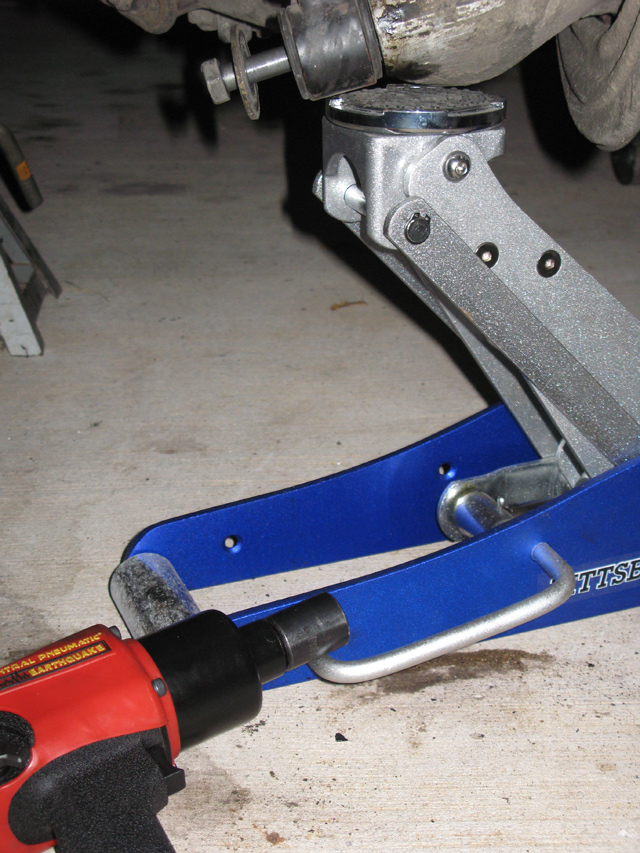 then I disconnected oil line and removed muffler bracket. 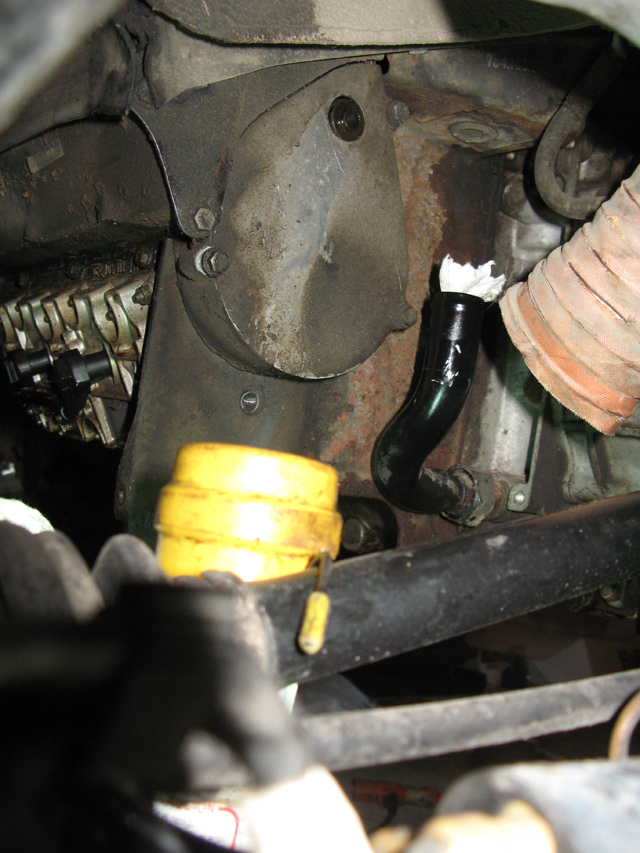 off goes lower belt gear: 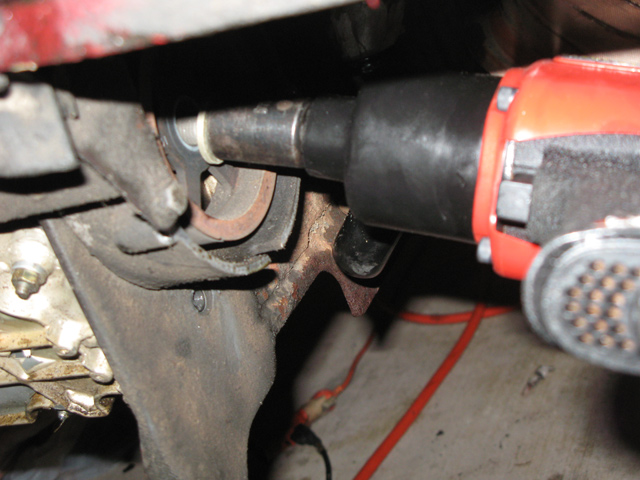 Here's view: 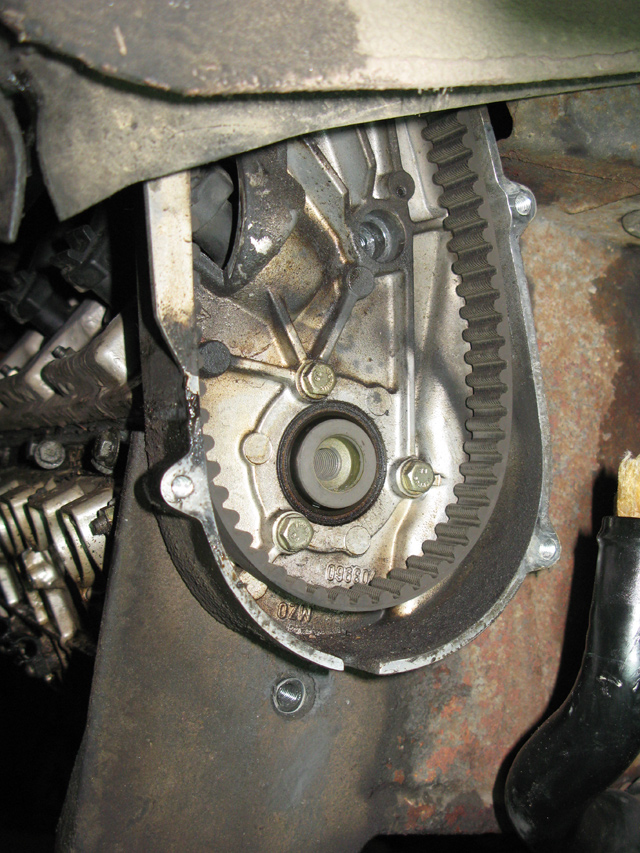 Now few more bolts here and there and steering pump can be removed from housing: 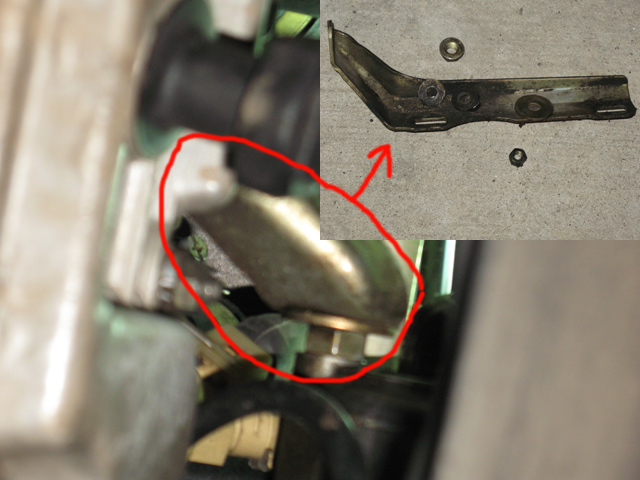 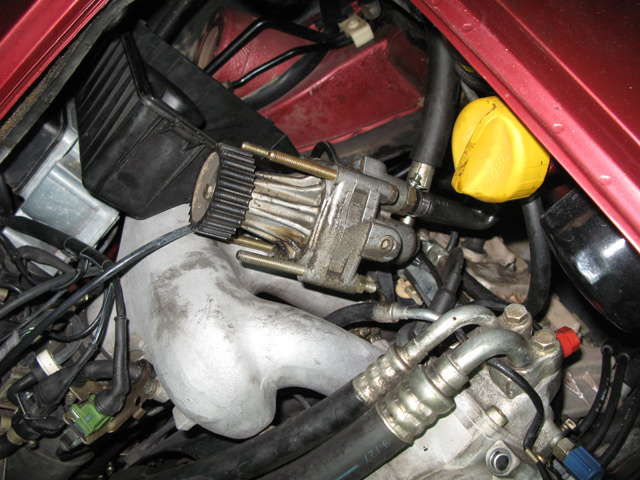 Bad parts: 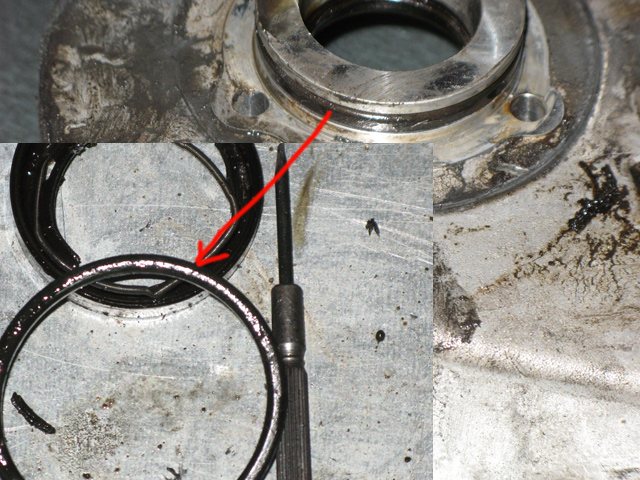 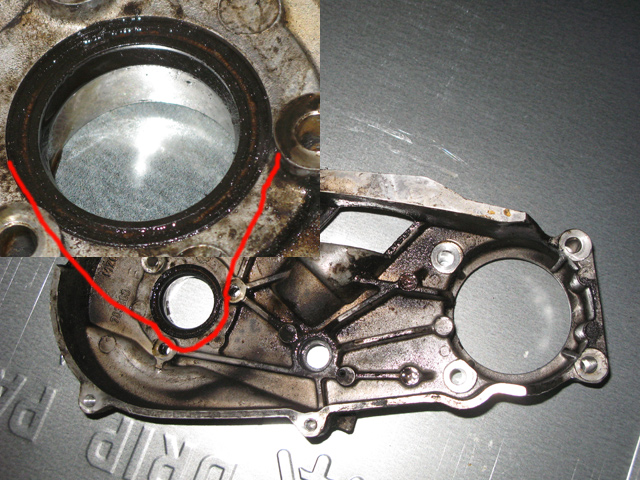 New seals: 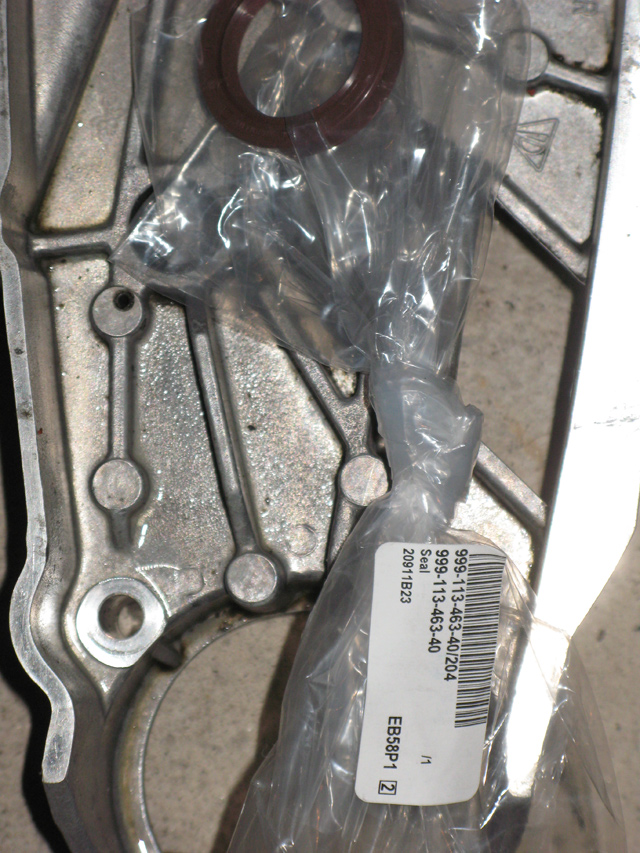 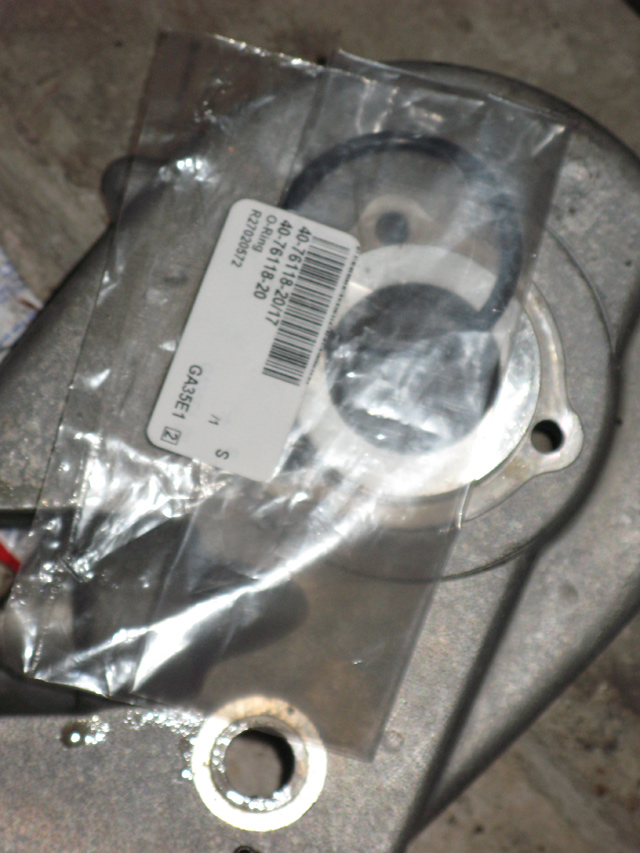 oops run out of single post limits again - see next Oleg. |
|
|
12-11-2011, 04:18 PM
|
|
|
Oleg Perelet
Join Date: Jul 2010
Location: Escondido, CA
Posts: 173
|
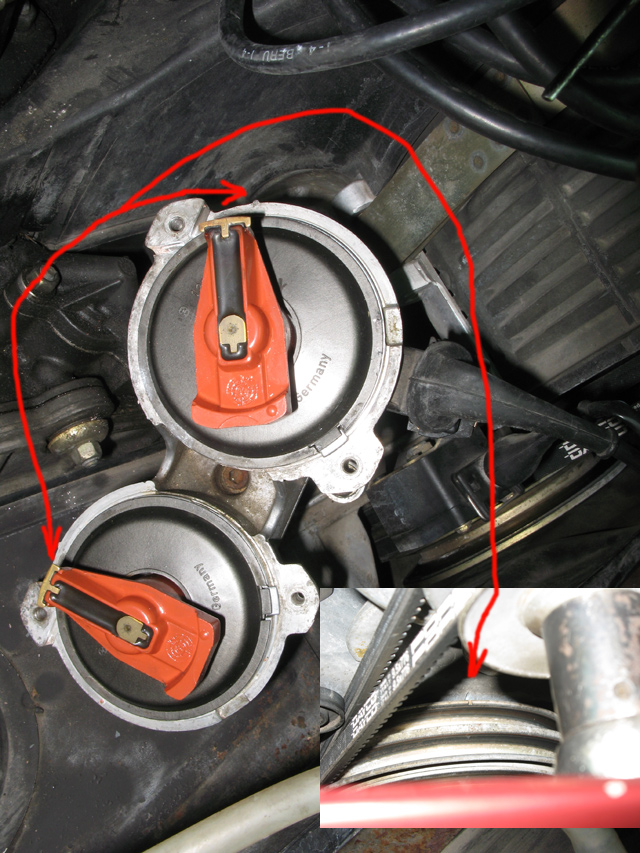
and installed cover:
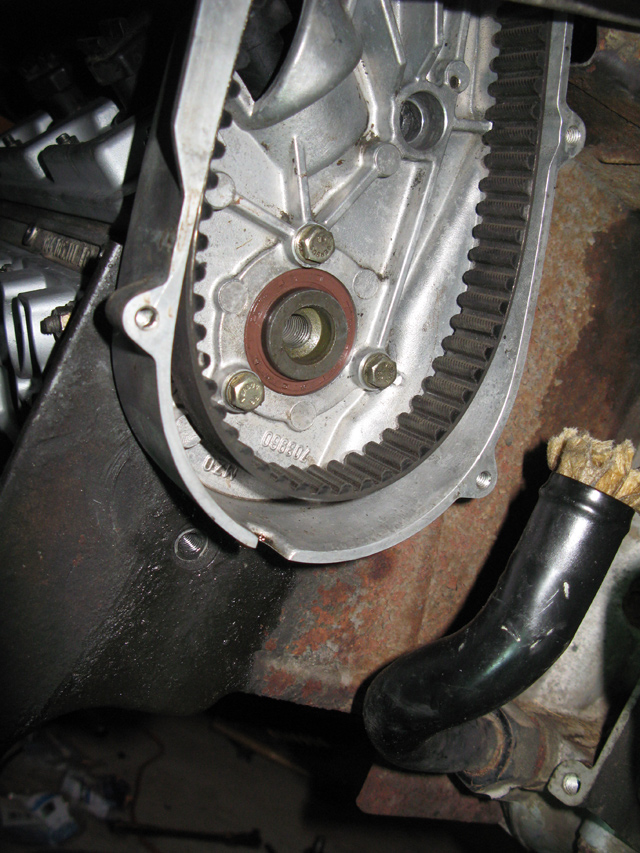 To torque bold apply parking brake - it's enough to get required 88lb/ft 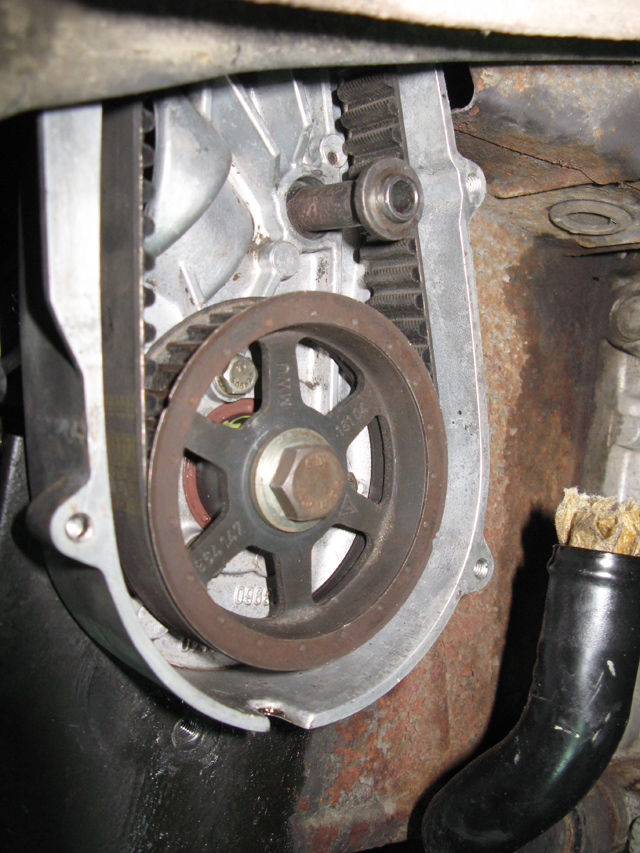 Belt just fits the gear there's no tensioning mechanism. |
|
12-11-2011, 04:20 PM
|
|
Oleg Perelet
Join Date: Jul 2010
Location: Escondido, CA
Posts: 173
|
3. Valve covers.
 With things apart to that level addressing valve covers, doing valve adjustment and changing spark plugs is pure pleasure. 964 105 902 00 is part number for valve cover kit that has everything needed, but I also suggest ordering few extra studs - one above cat get cooked. Valve adjustment is pretty much like on every other single cam car (I used to own BMW 2002's and older 5 series with big sixes) Take tool: 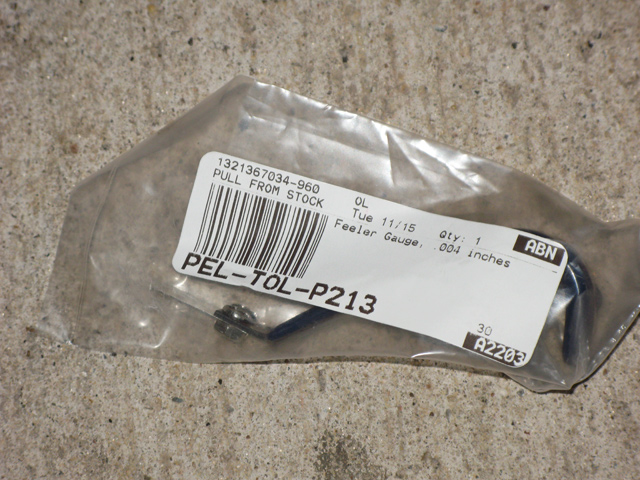 put engine in right position (addressed all over books and web), check the gap: 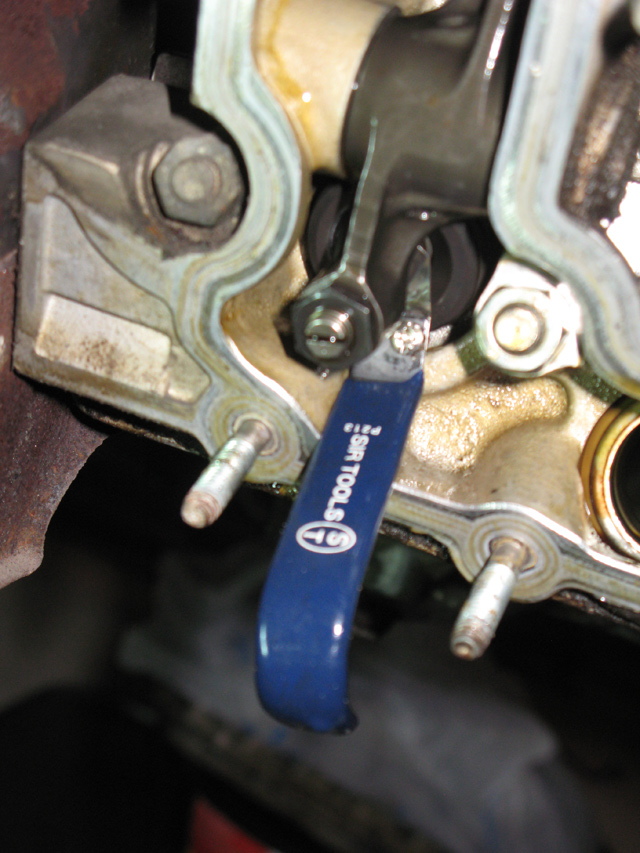 adjust if needed. Somehow people make big buzz out of valve adjustment - it's not. Nastiest thing about this part is to deal factory paint bubbling on magnesium valve covers - yuck: 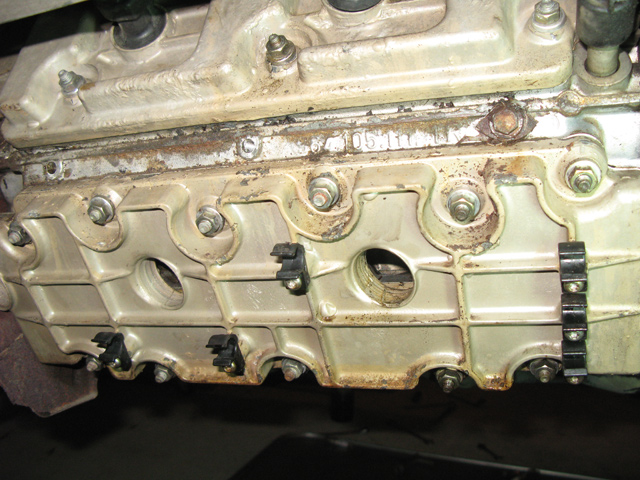 Using spray paint stripper on valve covers is NFG: 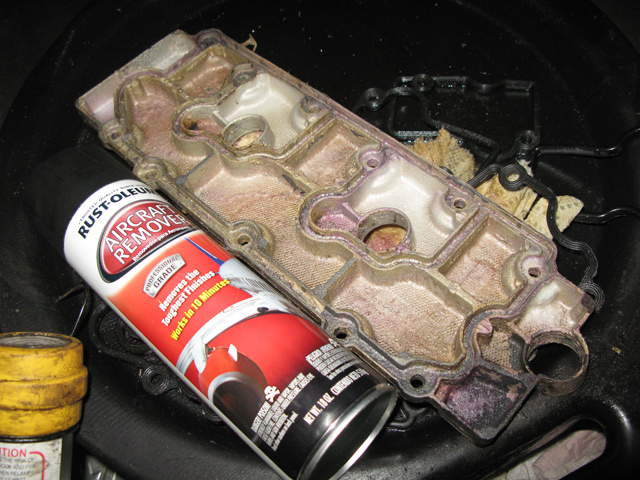 Gel pain stripper is one of nastiest chemicals you can buy. 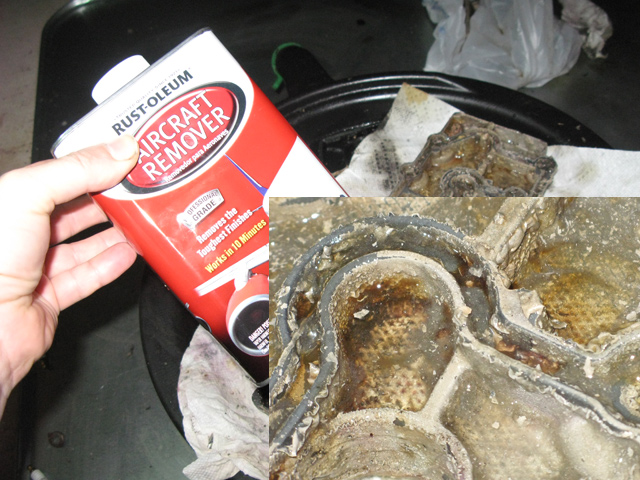 but be warned this stuff is nasty, here's enlargement from previous pic: 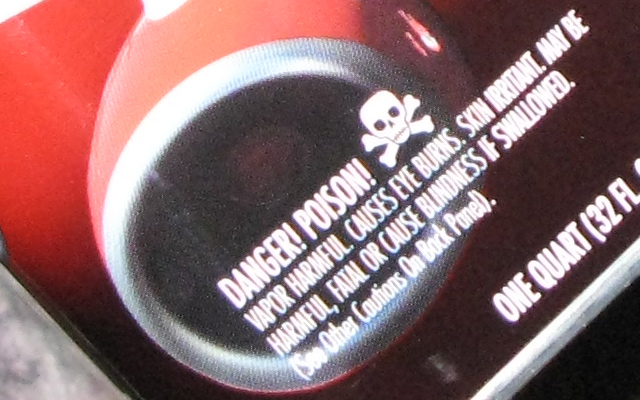 Even after letting it soak in deadly gel, some paint still was left inside. Well, glass blast it: 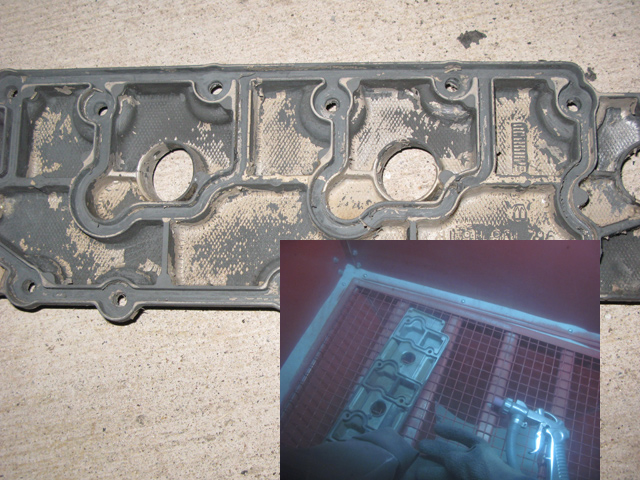 I'd rather hang them on the wall: 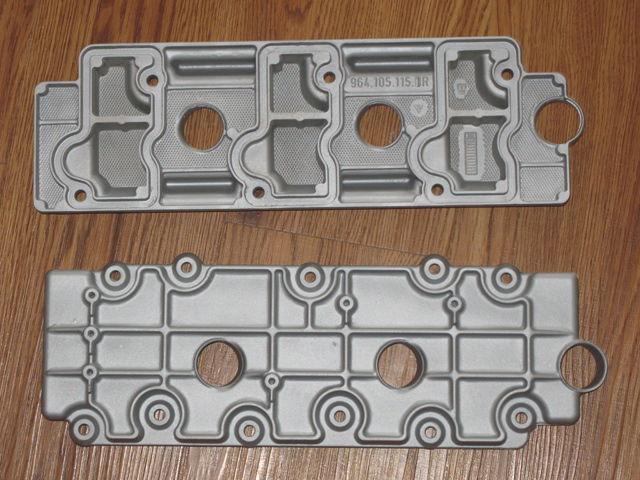 You will need to prime and paint exposed to open air surfaces - magnesium rusts (get's darker) very fast. Misc notes: NOTE 1: With all that nastiness outside spark plugs after 70K miles look absolutely clean. Old vs brand new: 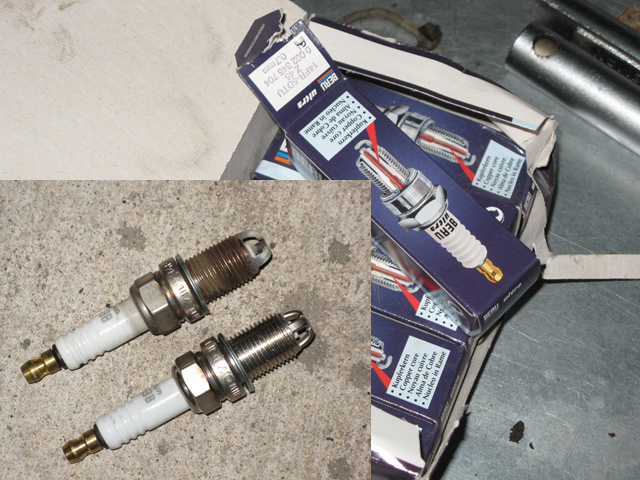 NOTE 2: Rear pieces weighted: Bumper with insides 40lb Cat 16lb Premuffler 24lb Muffler 23lb Manifold1 18 Manifold2 13 exhaust alone is almost 100lb. No surprise C4 Lightweight was so light and quick - it had headers only, but slso it was loud.... Oleg Perelet Last edited by perelet; 12-11-2011 at 08:19 PM.. |
|
|
12-11-2011, 04:57 PM
|
|
|
Oleg Perelet
Join Date: Jul 2010
Location: Escondido, CA
Posts: 173
|
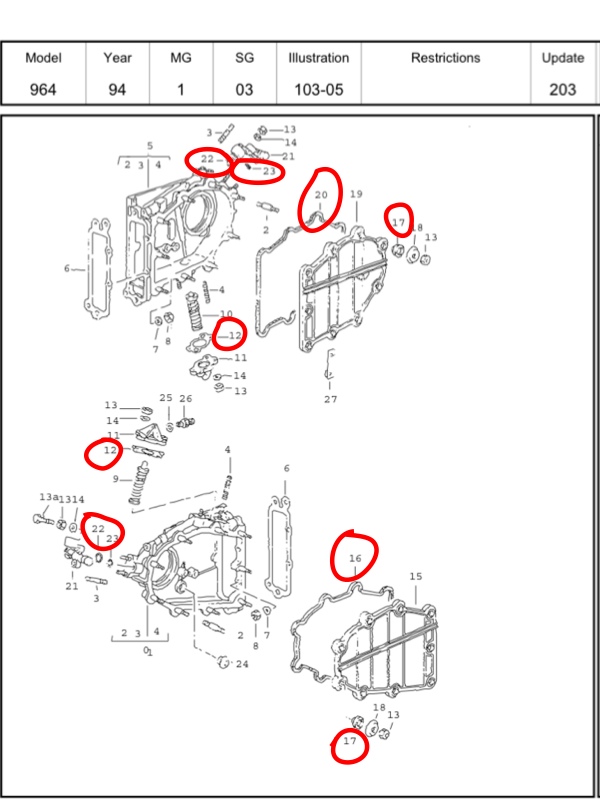
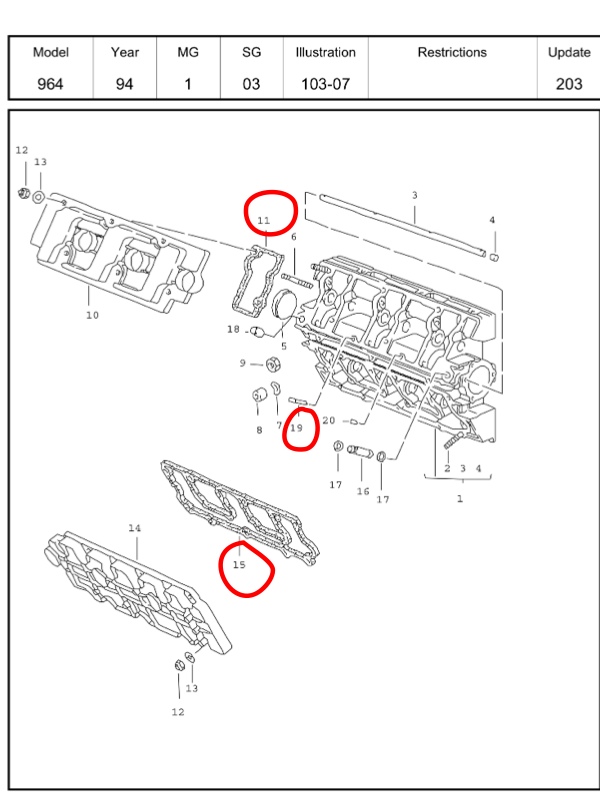
4. Upper seals. I did them few years ago, can't find pics. If I find I'll post. Or somebody else who did it please add pics. Mainly - remove intake manifolds and you'll get access to top part of engine. I marked ones that I had to replace.
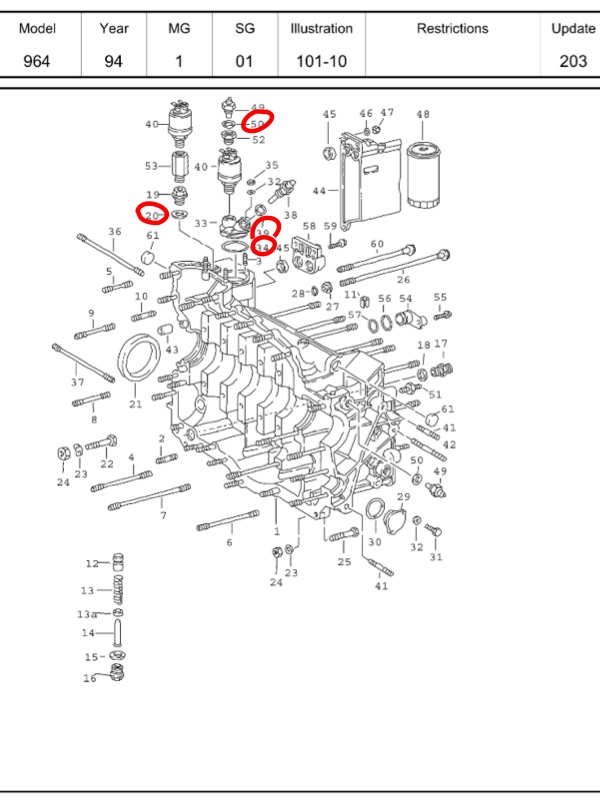 Disregard #23 on pic below - it was addressed before in oil return pipe post. EDIT. Found some older pics. Remove pass side part of intake out from car - it is matter of loosening clamps. You can keep driver side intake manifold in car, but disconnect it from engine. Same about mid section. 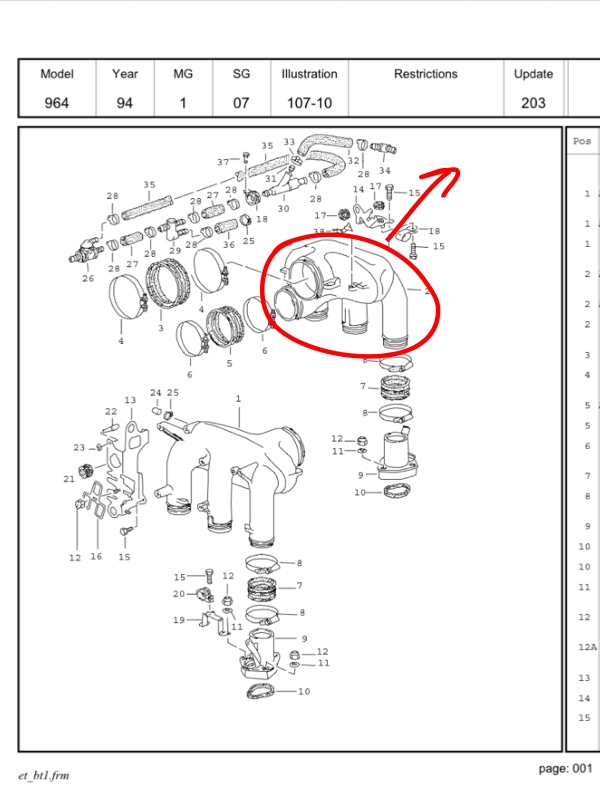 Now you have some lose parts that will let you to reach back of the engine. Looks much busier on the pic than it is in real life: 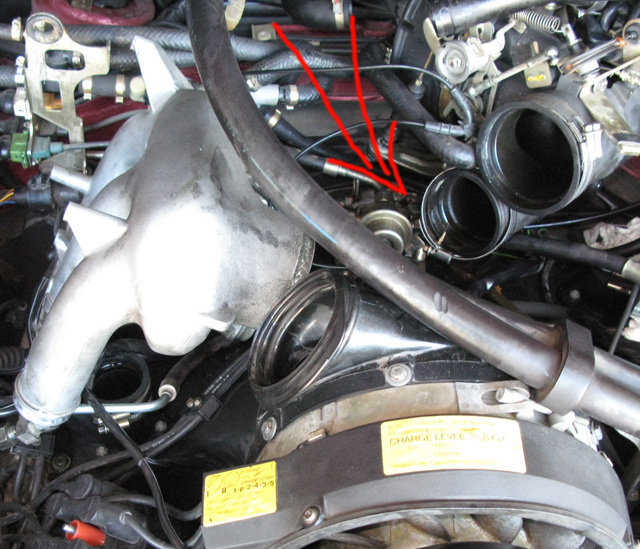 One can take time to disconnect all hoses hoses and electrical connectors and take both manifolds out, I do not see any reason for it, except for better photo opportunity I did not took too many pics at that time. Here closeup of area where arrow points on previous photo - is view with breather casting (part #30 in 2nd drawing) removed: 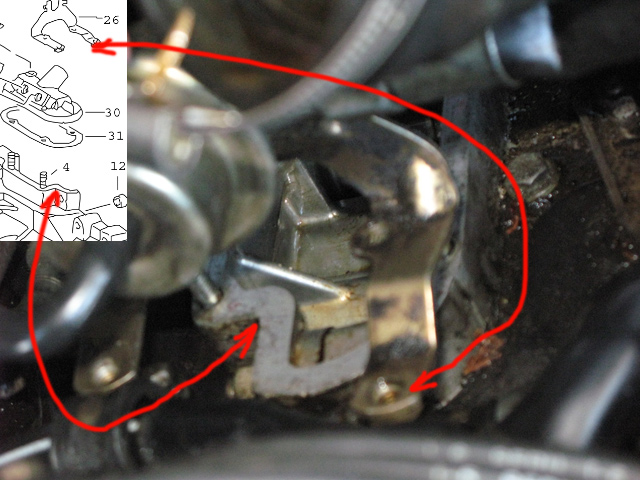 All other components aka oil pressure sender etc are in same area. Oleg Perelet. Last edited by perelet; 12-12-2011 at 05:41 PM.. |
|
|
12-11-2011, 05:10 PM
|
|
|
Oleg Perelet
Join Date: Jul 2010
Location: Escondido, CA
Posts: 173
|
For DIY enthusiasts I suggest doing what I described before going in to "cracked case" or other nightmare scenarios. You'll learn your car, won't break bank - whole thing is at most $500 for seals, bolts, gaskets. And you'll have fun.
Please feel free to add other leaks that I missed + DIY that you did your own  Oleg Perelet. |
|
|
12-11-2011, 05:12 PM
|
|
|
Registered User
Join Date: May 2003
Location: Detroit (Rock City!)
Posts: 768
|
Wow, nice job. Thanks for including the part prints.
|
|
|
12-11-2011, 08:17 PM
|
|
|
Registered User
Join Date: Aug 2008
Posts: 87
|
Dear Oleg
Can you explain the repair on the pass side heat exchanger, cylinders? Pictures please Andrew |
|
|
12-12-2011, 06:02 AM
|
|
|
Open to suggestions
Join Date: Aug 2008
Location: slc, utah
Posts: 1,296
|
Oleg, well done. This is a keeper.
__________________
PCA member since 1993 1972 911 1991 964 C2 1977 s |
|
|
12-12-2011, 11:35 AM
|
|
|
Oleg Perelet
Join Date: Jul 2010
Location: Escondido, CA
Posts: 173
|
Quote:
1. Top leaks dripping down, oil breather tube is routed to the pass side and and most of leaky sensor seals/washers - see "4. Upper seals." post above, I edited it and added few pics to it. I did it awhile ago and did not took many pics. 2. Steering pump and/or steering gear seal and o-ring. Maybe just leaky hose from reservoir to pump , but you must be lucky to have that. See "2. Steering pump seals replacement." post above. There maybe other reasons. If yours is wet you may start with top part - it can take 1-2 weekends, risk of breaking things/messing up is relatively low. Note if it makes it better, if not do lower part  - that may take 2-3 weekends - that may take 2-3 weekendsOleg. Last edited by perelet; 12-12-2011 at 05:42 PM.. |
|
|
12-12-2011, 05:34 PM
|
|
|
Registered User
Join Date: Mar 2009
Location: New Windsor NY
Posts: 297
|
Messed up thing is that I just paid over $2000 to do all the leaks you just spoke of. I wish I would have seen this thread first.
Robert
__________________
1985 Euro Red Carrera Coupe."SOLD",1985 White Targa Carrera. "SOLD",1977 Yellow 930. "SOLD",1991 Black 964 C4. "SOLD",2002 Silver 996 C4 Cab "SOLD", 2001 Polar Silver 996 twin Turbo |
|
|
12-12-2011, 07:09 PM
|
|
|
Registered User
Join Date: Nov 2010
Location: Dallas, TX
Posts: 163
|
Great write-up. I think I caught all these and more on my oil seal refresh. I am also adding in camshaft seals (which means re-timing the cam), the rear main seal and the front main seal (which are fairly easy after you figure out how to go about it).
|
|
|
12-12-2011, 07:41 PM
|
|
|
Registered User
Join Date: Oct 2010
Location: BRONX NY
Posts: 1,506
|
Pretty good info and the picture to guide us are great to actually see it as its talked about. Thanks.
__________________
Tony 91 964 c2 black/ Work in progress/Finally back on the road 85 EURO 930 Black slightly moded slowly reviving her 77 911tt EFI wide body red/ Slightly modified  SOLD SOLD
|
|
|
12-29-2011, 05:26 AM
|
|
|
Registered User
Join Date: Jul 2010
Posts: 321
|
This is great! I'm going to be in there soon removing the engine carrier to reinforce and replacing the engine cooling fan, so I might tag on these tasks too.
What primer/paint do you use on the valve covers? Also, I'm assuming the car should be drained of motor oil prior to starting? |
|
|
12-29-2011, 07:03 AM
|
|
|
Registered User
Join Date: Oct 2008
Location: Nash County, NC
Posts: 5,961
|
I think the biggest problem is the warpages of the chain boxes and valve covers..and they went back to magnesium as though they didnt learn anything in the 70s.
Bruce |
|
|
12-29-2011, 02:26 PM
|
|
|
Registered User
Join Date: Jul 2010
Posts: 321
|
Is there a remedy for warped pieces aside from updating to the CNC aluminum pieces available through the aftermarket (for valve covers at least)?
I've read people mention using a flat piece of glass and emory cloth to alleviate some warpage, but is this method advisable and/or effective? |
|
|
12-29-2011, 02:32 PM
|
|
|
Oleg Perelet
Join Date: Jul 2010
Location: Escondido, CA
Posts: 173
|
I used ppg epoxy primer and generic high temp engine paint. Goal is to protect magnesium from weathering.
Quote:
Oleg. Last edited by perelet; 12-29-2011 at 06:01 PM.. |
|
|
12-29-2011, 05:57 PM
|
|
|
|

